No cooking this week, as I'm off to London for various meetings and conferences today. However, I will share with you couple of pictures of some simple meals I've had lately.
Fish at its simplest
(Purustatud ürdikartulid)
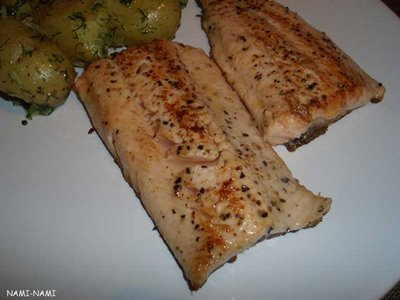
I had bought some nice trout fillets from Edinburgh's Farmers' Market. Usually I would simply season the fish with salt, pepper, dill and lemon juice before grilling it, and serve with boiled new potatoes. Here's a slightly different take on it: pan-fried trout fillets (seasoned with salt, pepper and lemon juice), served with crushed potatoes with dill, garlic and melted butter. Crushed potatoes in its various forms seem to appear in every single cookery magazine and programme these days and it was indeed quite a nice way of serving spuds.
A quick tomato soup
(Lihtne tomatisupp)
This is simply passata diluted with Marigold vegetable stock, reduced a little, enriched with cream, and seasoned with salt, black pepper and some basil. Served with a dollop of cottage cheese.
I quite like the picture, even if it is slightly out of focus..
Drunken potatoes
(Veini-kartulivorm)
A recipe from Jill Dupleix via Valentina over at Trembom in English for another great way to serve potatoes. Sliced potatoes, seasoned with salt, pepper and thyme, drowned in dry white wine and baked in the oven until soft and crisp at the same time.
Valentina's blog is definitely worth a visit, so if you haven't been there yet, please check it out.
Banana creme bruleé
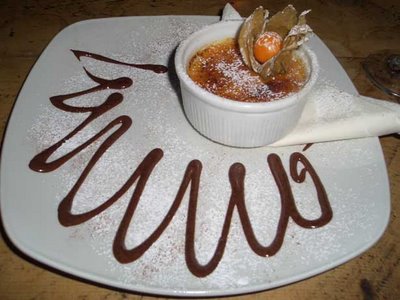
And finally - here's a picture of a banana bruleé I had at Maison Bleue in the company of a very charming Scottish politician a fortnight ago. Lovely place, and the bruleé was absolutely delicious, with a delicate yet crisp bruleé topping, a very subtle hint of banana and a cute cape gooseberry decoration.
I'm looking forward to trying to recreate this pudding, so if anyone out there has a good recipe for a banana bruleé, please let me know.
Monday, March 27, 2006
Friday, March 24, 2006
Stuff the onion: baked red onions with feta cheese & wild mushrooms
Encouraged by my delicious upside down red onion pie, seriously inspired by Nicky&Oliver's delectable braised red baby onions, loosely based on Paul Gayler's recipe for Greek stuffed onions in a feta cheese custard - here is a dish I came up with earlier this week, and will surely keep making in the future.
Paul Gayler is a chef known for his inspiring vegetarian dishes over at the Lanesborough Hotel in London. He has just published his third book on vegetarian food, Pure Vegetarian and some sample recipes were reprinted in Scotsman on Sunday in early March. I simplified the recipe considerably, skipping the feta cheese custard, using tomato puré instead of sunblush tomatoes, replacing dried porcini with some leftover black trumpet chantarelles and omitting the egg and cinnamon from the filling. Gayler introduces his recipe as 'a type of modern-day vegetarian moussaka', but due to the lack of custard my baked onions wouldn't fit this description. However, the result was delicious, savoury and strong-flavoured - lovely on its own with a slice of crusty bread. I can also imagine serving this as part of a buffet or as a side dish to some grilled or braised meat.
Baked red onions stuffed with feta cheese & wild mushrooms
(Fetajuustu ja metsaseentega täidetud punased sibulad)
Serves 4
500 grams red onions (about 9-10)
1-2 Tbsp olive oil
2-3 Tbsp water
Stuffing:
1-2 Tbsp olive oil
onion cuttings
1 fat garlic clove
150 grams wild mushrooms, chopped
2 Tbsp concentrated tomato puré
100 grams feta cheese
2 Tbsp pine nuts
1 Tbsp fresh parsley, chopped
salt
freshly ground black pepper
Remove the stringy outer layers of the onions, then cut off a very thin slice from the root end - just enough to enable onions to 'stand' upright. Cut a generous slice off the top of each onion, then place them in a baking tin. Drizzle with some water and olive oil, cover with foil and bake in a preheated 200˚C oven for about an hour, until onions are tender.
For the stuffing, heat the oil, add the chopped onion tops and fry for 5 minutes.
Add the garlic and fry gently for another 5 minutes.
Add the chopped wild mushrooms, fry for a couple of minutes.
Add the tomato puré, stir to combine.
Add the crumbled feta cheese and pinenuts, stir until combined, then season with parsley, salt and pepper.
Very carefully remove the centres of baked onions (I used the tiniest teaspoon for that). Make sure to keep the onion bases intact, but there is no need to despair if you fail - just use removed onion layers to cover the hole.
(If you wish, you can chop up the removed layers and add to the stuffing. If you manage to remove some nice intact layers, you can use these for stuffing as well. I started with 9 onions, but ended up with 13 stuffed ones:)
Fill onions with the stuffing, put into a baking dish, cover with foil and bake at 200˚C for about 30 minutes, removing the foil for the last 10 minutes or so to brown the onions nicely.
Allow to cool slighly and serve.
UPDATE: T. Carter @ Lifechanges ... Delayed tried this recipe as well.
Tuesday, March 21, 2006
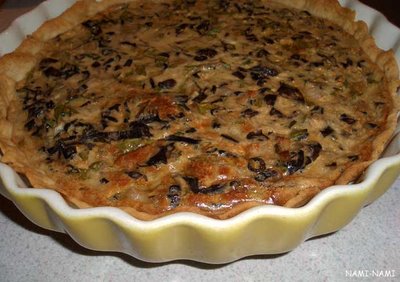
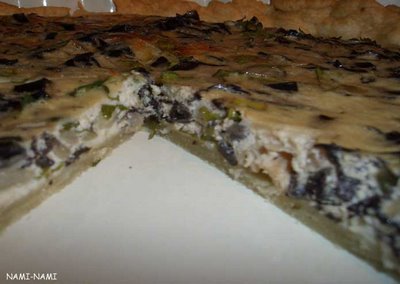
A magic mushroom quiche
Let me make something clear. I've never smoked a cigarette in my life, nor tried any other substances that might be considered illegal in some countries (moderate consumption of alcohol is luckily legal in my part of the world). So obviously this is not a quiche of magic mushrooms. But last week one of my regular readers emailed me and said that s/he is feeling a bit low and a magic mushroom quiche might cheer him/her up. And a very dear friend of mine, T. refuses to eat mushrooms, unless they are of the abovementioned kind. So I thought that by calling my mushroom quiche a magic one might just cheer A. up and might have tricked T. to eat the quiche had he been around.
And, to be fair, I thought there was something harrypotteresque about those black trumpet chantarelle mushrooms I used anyway. Don't you think so? (Click on the photo to enlarge).
The recipe is loosely based on a mushroom and blue cheese quiche recipe from Valio that I've tried many times successfully. As I had some nice mushrooms* on hand this time, I didn't want to overshadow their earthy-musky flavour, so I omitted the blue cheese. I also incorporated the tarragon (usually in the filling) into the pie crust this time. Just like with pizza doughs, I find that seasoning the pie crust gives a small, but necessary lift to the whole dish.
A magic mushroom quiche
Serves 6-8
Pie crust:
100 grams butter
200 ml plain flour
1 tsp dried tarragon
0.25 tsp salt
2-3 Tbsp cold water
Filling:
200 grams fresh black trumpet chantarelles
1 medium onion (I used a large banana shallot)
2 Tbsp butter
a generous handful of fresh parsley
3 eggs, whisked
150 ml sour cream
salt
crushed black pepper
Mix the butter, tarragon, salt and flour with a knife until you get coarse crumbs, then add the cold water and mix the dough together. Let it cool in a fridge for about 20 minutes, then roll out and line a 22 cm pie dish with the pastry. Prick with a fork, then put into the freezer for 20 minutes (this reduces the need for blind baking, as the pastry will shrink only very little).
Pre-bake at 200°C for 15-20 minutes, until the pastry is light golden brown.
Meanwhile, make the filling. Clean the mushrooms thoroughly (if possible at all, avoid rinsing them and use a damp kitchen roll or brush), chop into smaller pieces.
Mince the onion. Heat the butter in a saucepan, add the onion and fry gently for about 10 minutes, until onion starts to soften.
Add the mushrooms and sauté until some of the liquid evaporates (trumpet chantarelles are very dry anyway, but this may be necessary for button mushrooms).
Cool the mushroom and onion mixture.
Add the eggs, sour cream, finely chopped parsley. Season with salt and pepper.
Pour the filling into the pre-baked pastry crust and bake for another 20-30 minutes, until the filling has set.
Cut into slices and serve with a salad.
* After complaining about the non-availability of wild mushrooms in Edinburgh, I've now discovered a small shop, Clarks Speciality Foods, in Bruntsfield, that sells various wild mushrooms at reasonable price. A new mushroom stock is brought in every Friday - straight from Paris markets apparently - and they try to vary the choice of mushrooms. So far I've bought pied bleu mushrooms and these black trumpet chantarelles. I'll be back for more soon.
Clarks Speciality Foods
202 Bruntsfield Place
Edinburgh EH10 4DF
Telephone: 0131 656 0500
Monday, March 20, 2006
Cooking Estonian: barley mousse
Need an unusual dessert for a weekday night? Have no money and need something cheap to satisfy your hungry sweet tooth? This dessert should do the trick then. All you need is some barley flour and sugar in your cupboard, fresh milk in your fridge and some of that redcurrant juice you made from last summer's berries in your chiller cabinet. Failing that, a shop-bought cranberry juice will do.
A similar pudding made with manna/semolina - mannavaht - is very common in Estonia, and much loved by children. Another version - rukkijahuvaht - uses rye flour. Whereas semolina version yields the fluffiest mousse, this is lovely as well. A proper nursery food.
Estonian barley mousse
(Odrajahuvaht)
Serves 4
500 ml water
100-150 ml sugar
200 ml plain cranberry or redcurrant juice
200 ml barley flour
Bring water and sugar to boil and stir, until sugar dissolves. Add the juice.
Stir in barley flour, whisking very vigorously to avoid any lumps.
Simmer for a few minutes, until the 'porridge' thickens.
Take off the heat and let cool slightly.
Whisk with an electric mixer until light and foamy (you're dealing with barley flour here, so the mousse will inevitably be a bit heavy).
Divide into dessert bowls and serve with cold milk.
Saturday, March 18, 2006
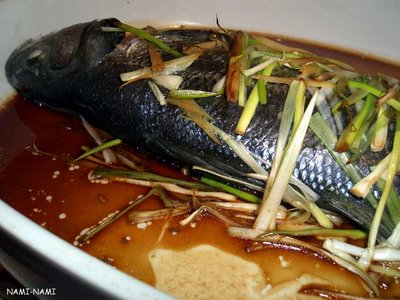
Being adventurous with sea bass
I get most of my fish from Eddie's Seafood Market in Marchmont, Edinburgh - a delightful little place with amazing choice of fish - filleted, whole, even still swimming in a tank. A true heaven for fish-lover. However, being a relatively recent convert to the joys and benefits of fish, I usually end up buying salmon. Tasty - but a bit boring. Sometimes I get haddock instead. Always filleted. The woman (fishmongress?) that serves me pretty much offers me salmon fillets before I even ask for it. I keep jokingly promising her that I'll try something new next time.
Today I was brave and asked for a whole sea bass - cleaned and gutted, that is. This was quite a big step - I bought a fish I hadn't bought before, and I bought the whole fish as opposed to plain fillets. A quick web-search yielded this lovely recipe for lightly flavoured oven-steamed seabass. A very nice and subtle ginger and soy flavour, the almost creamy texture of the fish (and very few annoying bones to my utmost delight), this was a simple but festive dish to serve. Another definite keeper. Sometimes it just pays to be a bit more adventurous after all..
Oven-steamed sea bass with ginger and spring onions
(Idamaine meriahven ingveri ja talisibulaga)
Adapted from Epicurious, Menus, February 2006
Serves 2
800 gram whole sea bass, cleaned
0.5 tsp salt
1 bunch spring onions
2-3 cm piece fresh ginger, peeled and julienned
3 Tbsp Kikkoman soy sauce
0.25 tsp sugar
Prepare the spring onions. Cut the white and pale green parts into very thin 5 cm strips. Put the green parts aside (you need them later).
Rub the cleaned and gutted fish with salt inside and out. Put into a large baking dish, and the dish in a large roasting pan.
Cover the fish with julienned spring onion and ginger. Mix the sugar and soy sauce and pour over the fish as well.
Fill the roasting pan with boiling water, so it reaches half-ways up side of baking dish.
Cover the whole lot (both the baking dish with the fish and the roasting tin with the baking dish) with foil, sealing the edges tightly, so no steam can escape.
Put onto the middle position in a preheated 200°C oven and oven-steam for 30-35 minutes, until the fish is cooked through.
To serve, remove the foil and sprinkle with sliced spring onions (the green bit).
Serve with boiled rice.
Oh - and the dessert was whipped cream, strongly flavoured with lemon juice and zest (2 Nice lemons per 284 ml double cream), sweetened with icing sugar. So simple, and yet so lovely.
Friday, March 17, 2006
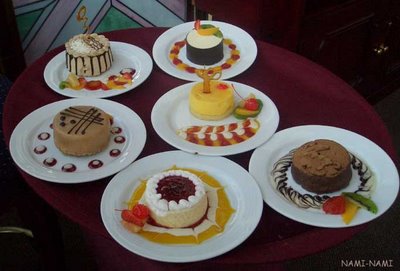
Dessert temptations, Mexican style
This post is loooooong overdue. I said I would write about Mexican marketing tricks after returning from my wonderful - if somewhat telenovela style - trip to Mexico last Autumn, but somehow it's March and I still haven't done it...
I'm a real pudding girl. If I have a choice between a starter and a dessert (or pudding, as they're called here in the UK), I almost always go for the latter. I have a very sweet tooth, which explains the prevalence of cakes over savoury dishes on this little blog of mine. However, I am very much aware that all those sugar and butter ladden cakes cannot be good for my waist-hip ratio. So I try to avoid them.
Not too difficult here in Scotland or back home in Estonia or anywhere else in Europe I've travelled. After finishing the main course, the waiter usually comes and quietly asks if I'm interested in the dessert menu at all. Here's the chance for me to exercise my often dwindling self-control and say "No, thank you". Sometimes I forget that I'm not really so hungry and/or not supposed to have a dessert, and let the waiter bring the menu. However, it is still relatively easy even at this point to look at the menu only fleetingly, convince myself that I'm not actually so hungry after all and opt for a coffee or tea instead.
But no, not in Mexico.
You see, in Mexico, they don't do the old-fashioned printed menus for desserts. In Mexico, they do these dangerously tempting and irresistible in-your-face dessert menus. When you're happily chatting away with your friends after yet another delicious meal, a smiling waiter appears with a huge tray of oh-so-delicious-looking desserts - real ones, not photographs or some artificial replicas, a true feast to all your senses. In Mexico the smart marketing people have long known that we eat with our eyes. However much you'd like to say that "No gracias, señor", suggesting that you're more than full already, you're doomed, you're bound to fail. Once you eye and smell those luscious creations right in front of you, you inevitably end up asking for one. At least that's what happened to me each and every time I ate out during my trip. After just one glance at the dessert offerings, my finger pointed at one of them, and the joyous waiter took my order to the pastry chef in the kitchen.
I know I'm not very good in resisting good food anyway, but I was always taken by surprise how easy it was to give in. How could I possibly fit in that chocolate and raspberry cake at Bistrot Mosaico in Condesa after a very generous slice of huitlacoche quiche, terrine de berengenas and other delicious Franco-Mexican concoctions? Or how did a simple cocktail with a friend at the slowly revolving 45th floor restaurant of the World Trade Centre, Ciudad de México on my last day in town ended with the planned cocktail and a delectable mocca mousse (that's the one in the middle on the left side above, next to the mango cheesecake)? You get my point..
Oh well. At least no-one in Europe seems to know this particular dessert marketing trick. Yet..
Wednesday, March 15, 2006
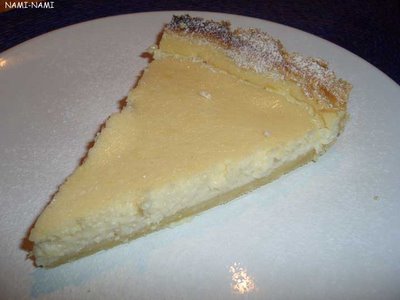
Lemony curd cake
Here is another faithful cake recipe of mine. It's a baked lemon cheesecake, but using the slightly crumbly milk curd as opposed to the much more commonly used cream cheese. As a result, it's a lot lighter in terms of calories, and has a nice creamy-grainy texture (yep, both at once:)
It's best made day before serving. And please feel free to increase the amount of lemons if you prefer. This version is definitely, though still subtly, lemony.
Lemony curd cake
(Sidruni-kohupiimakook)
Serves 6-8
The pastry case:
100 grams cold butter
2 Tbsp sugar
250 ml plain flour, sifted
2 Tbsp cold water
Milk curd filling:
3 eggs
150 ml sugar
250 grams plain curd cheese (or ricotta)
150 ml soured cream (or creme fraiche)
2 Tbsp plain flour
2 lemons - finely grated zest (only the yellow part!) and pressed juice
Make the pastry:
Mix the flour, sugar and butter in a bowl with a knife until crumbly. Add the cold water, and using your hands, bring the pastry quickly together. Put into the fridge for 10 minutes.
Dust the working surface slightly with flour, and roll the pastry into a circle to fit a 22 cm pie dish. Pierce the base with a fork couple of times and put into the freezer for 20 minutes.*
Bake in a pre-heated 200˚C for 15-20 minutes, until lightly golden brown.
Prepare the filling:
Whisk the eggs with sugar until pale and frothy, then fold in other ingredients.
Pour the filling into the pre-baked pastry case.
Bake at 200˚C for about 30 minutes, until the cake is golden brown at the edges and the filling is set. Make sure not to overbake, as the cake will become dry instead of creamy then.
Let it cool properly. Dust with icing sugar and/or cinnamon before serving, if you wish.
* If you prefer, you can simply bake the pastry crust 'blind'. I find this a bit of an hassle, and by putting the pastry-lined pie dish into the freezer for a while you eliminate the need for this step. I just pre-bake the pastry for 15-20 minutes straight from the freezer, and it hardly ever shrinks.
Tuesday, March 14, 2006
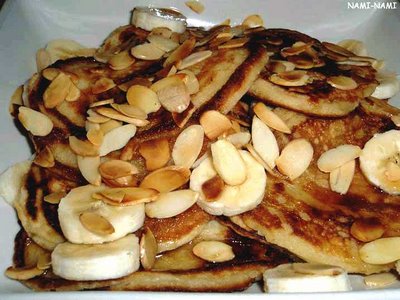
Sunday breakfast: buttermilk pancakes with bananas, nuts & maple syrup
A simple recipe for deliciously rich and fluffy pancakes that are perfect for a lazy Sunday breakfast at home. Drizzled with warm maple syrup and layered with sliced bananas and nuts of your choice, these are positively decadent.
Buttermilk pancakes with sliced bananas, toasted nuts and warm maple syrup
(Petipannkookid vahtrasiirupi, pähklite ja banaanidega)
The quantities below will feed two, but can be easily multiplied by 2 or 3 to feed a crowd.
100 grams plain flour
1 tsp baking powder
1-2 Tbsp sugar
150 ml buttermilk or kefir
1 large egg
25 grams butter, melted
sunflower oil or butter for frying
To serve:
1 banana, sliced
25 grams of nuts (pecans, sliced almond, walnuts are all good), toasted until aromatic and golden
maple syrup, heated
Mix the flour, baking powder and sugar in a bowl.
Whisk the buttermilk, egg and melted butter in another bowl, then mix into the dry ingredients. Heat a non-stick frying pan on a medium, add a bit of oil or butter.
Take about 2 Tbsp of pancake batter for each pancake and fry in small batches on both sides until golden brown (about 2 minutes per side).
Keep pancakes warm in a cool oven or under a piece of foil (or do what my Mum does - she always makes one large pancake at the end and puts on top of the small ones to keep them warm).
To serve the pancakes, layer them with sliced bananas and toasted nuts, and pour over the maple syrup.
Forks and knives are optional:)
Sunday, March 12, 2006
New ways with brassica: roasted cauliflower
Photo updated in June 2008
Here is a lovely side dish that I served alongside the delicious Dutch draadjesvlees or slowly braised beef a fortnight ago. I came across the recipe at RecipeGullet, where it got rave reviews, so I was tempted to try. According to some comments, it tastes like oven chips. I don't know about that, but it was definitely delicious. Seems like Orangette's Molly, the best overall foodblogger of 2005, agrees, as does Antti over at the very nice Doughboy blog*. So do give it a go!
Roasted cauliflower
(Röstitud lillkapsas)
cauliflower
olive oil
Maldon sea salt flakes
crushed black pepper
Cut the cauliflower into 1 cm thick slices - due to the shape of the veg, you'll inevitably end up with some neat slices and some broken smaller florets. That's fine.
Take a large baking sheet, where you can spread the cauliflower in one layer. Drizzle with olive oil, season with salt and pepper. Toss slightly to coat evenly.
Roast in the middle of 200˚C oven for about 30-40 minutes, turning the slices around every now and then, until the cauliflower is cooked and lovely light to medium golden brown.
Serve hot or cold, on its own or with a garlicky sour cream dip.
A lovely addition to my cauliflower recipes - like the spicy cauliflower with tomatoes and cauliflower with sage butter and eggs that I wrote about here.
* Although this particular post is in Finnish, all the newer entries are in English and worth reading. Click on the banner to get to the recent posts.
Friday, March 10, 2006
Chewy Walnut Squares
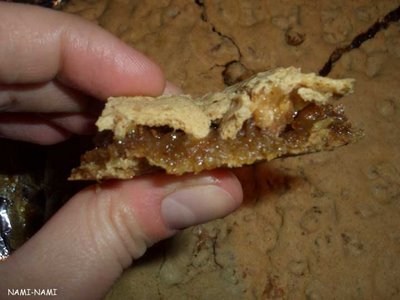
Lisa over at In a Nutshell claims to be "Nuts About Nuts - Almonds, Cashews, Hazelnuts, Macadamias, Pecans, Pistachios, Walnuts And More". True to her blog name, she recently shared a a recipe for fabulous chewy walnut squares. I made these last weekend, and really loved their - well, wonderful chewy texture and strong nut flavour - and can heartily recommend these.
Chewy walnut squares
(Mõnusad pähkliruudud)
Source: Tina Salter Nuts: Sweet and Savory Recipes from Diamond of California
250 ml coarsely chopped walnuts
125 ml plain flour
1/4 tsp baking soda
1/4 tsp salt
250 ml brown sugar
1 tsp vanilla extract
1 egg
Spread the walnuts on a baking sheet and toast at 180˚C oven for 8-10 minutes, shaking the pan every now and then, until the nuts are nicely aromatic.
Line a 20x20 cm cake tin with a foil, so the foil is hanging over the edges. Brush generously with a vegetable oil.
Mix the flour, salt and baking soda in a small bowl.
Mix the sugar, vanilla extract and the egg in another bowl until combined. Fold in the dry mixture, followed by toasted nuts. The batter is rather thick, but persevere and it comes all together.
Spoon the batter into the lined cake tin.
Bake at 180˚C for 20-25 minutes, until the cake is slightly browned at the edges, but still softish in the middle.
Take out of the oven, lift carefully onto a metal rack to cool.
Cut into 5 cm squares with a sharp knife. Remove the foil.
Will keep in an airtight box for up to 5 days.
Wednesday, March 08, 2006
A heartwarming sauerkraut soup
It was snowing in Edinburgh last Friday, probably taking by surprise the crocus flowers that had been out for a few weeks already. Snowing as such is not unusual in Edinburgh, but this time was different as patches of snow remained at least in my part of town for a couple of days. As the weather was chillier than usual, a heartwarming soup was in order for dinner. I was cooking for two Estonian girls again (three, including me), and made a wintry classic from home - a sauerkraut soup, no meat. Soups like this are very filling, and would be served as a main course back home. I followed it with the milk curd cream pots with blueberries.
The recipe is from a very old Estonian cookbook classic, Valik toiduretsepte, probably lurking on a shelf somewhere in pretty much every household. No pictures, just lots of recipes. The first edition of the book is from 1965, and the last one probably around 1990. My edition is exactly as young as I am - issued in 1974:)
I've changed the recipe a little. I used potato as a thickener instead of flour, and rinsed the sauerkraut in water to make it less sour. These two ideas were suggested by Katia and Szofi after I made Hungarian sauerkraut and smoked sausage soup Kolbászleves back in November. I think the soup was much better for that, and this shows again that foodblogging can immensely improve your cooking..
One more thing - do not attempt to cook this if you don't have a very good extractor fan above your oven. It smells strongly of sauerkraut, which is an acquired taste/smell. But the resulting soup is worth it:)
Meatless sauerkraut soup
(Lihata hapukapsasupp)
Serves 4-6 as a main course
3 litres of water
1 kg fresh sauerkraut*
100-200 grams vegetable oil, lard or butter
1-2 large onions
3-4 carrots
1 Tbsp concentrated tomato paste
1-2 chopped floury potatoes
2-3 bay leaves
salt
black pepper
sugar
sour cream to serve
Drain the extra liquid from the sauerkraut, put aside (you may need this to make the soup more sour later on). Rinse lightly under cold water.
Heat the oil in a large saucepan. Add the cabbage and pour over enough boiling water to cover by a few centimetres.
Bring to the boil, add 2 chopped carrots, diced onion, tomato paste, chopped potatoes and bay leaves. Simmer for 1-1.5 ours, until the cabbage is tender. Add the rest of the boiling water in batches during simmering.
Season with salt. Taste the soup - if it is too sharp and sour, add some sugar. If you think it's not sour enough, add some of the preserved draining liquid. Being a sauerkraut soup, it's supposed to be sour, of course. But you're not aiming for gut-scratching sharp and sour that gives you tummy troubles later.
Add 1-2 finely grated carrots for some crunch and colour, and garnish with a dollop of sour cream.
Serve with rye bread.
* Sauerkraut is available either "fresh" or canned. The latter has been partially cooked already, so needs less simmering time. It also tends to be less sour. I got my fresh sauerkraut from the Polish deli**, where it was sold vacuum-packed.
**Bona Deli, 86 South Clerk Street, Edinburgh
Monday, March 06, 2006
Crumbly pistachio cookies
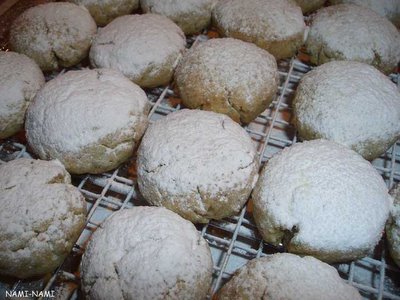
This is my third nutty cookie post on this blog. On the previous occasions I've used ready-made nut butter as a shortcut (remember the Peanut Butter Cookies and the Hazelnut Butter Cookies, both delicious and oh-so-easy?). This time, however, I decided to be a proper domestic goddess and make the cookies from scratch. The recipe is very slightly adapted from donna hay magazine. I've added lemon juice to the batter and reduced the amount of butter by 1/3rd and flour by 1/5th - to result in a more lemony and more nutty flavour, respectively. Also, using just one, and not one-and-a-half packet of butter sounded more, well, reasonable*.
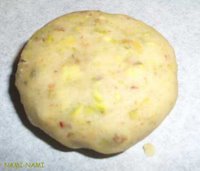
The recipe yields 24 delicious, elegant, nutty, crumbly, lemon-scented cookies that are gorgeously jade green in colour and are lovely with a good cup of coffee or tea.
Just try not to choke on the icing sugar:)
Very crumbly lemon and pistachio cookies
(Sidruni-pistaatsiaküpsised)
Adapted from donna hay magazine, Issue 22
250 grams butter (at room temperature)
3 Tbsp caster sugar
150 grams unsalted/green pistachio nuts, finely chopped
500 ml plain flour, sifted (I used type '00')
a small lemon (both grated zest and juice)
icing/confectioner's sugar for dusting
Using a wooden spoon, cream the butter with sugar in a bowl.
Add the pistachio nuts and lemon zest, mix thoroughly.
Sift in the flour and mix until you have moist crumbly mixture. Add the lemon juice in the middle of mixing.
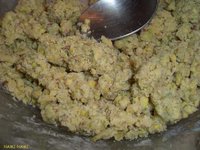
Take tablespoonfuls of the crumbly mixture and press into a ball between your hands. Flatten the balls slightly and put onto a baking tray. (The cookies do not spread much at all, so no need to leave too much space between them.)
Bake at 180˚C/360˚F for 15-20 minutes, until the cookies are dry and slightly golden.
Do not brown!
Take out of the oven and transfer to a wire rack to cool.
Dust generously with icing sugar.
* In the UK, a packet of butter tends to be 250 grams, back home 200 grams, and in the US a stick of butter is 113 grams.
Estonian milk curd dessert with berries (kohupiimakreem)
I'm still all excited like a kid about discovering a Polish shop* nearby here in Edinburgh. Amongst other things that leave me cold (dried packet soups and ubiquous biscuits with a best before date in January 2048), they stock rather decent rye bread, vacuum-packed sauerkraut and salted cucumbers, plain and flavoured kefir, stuffed dumplings of various types, and the best sour cream in town. Though I have a nagging feeling that I'm one of the very few foodbloggers who gets all excited about a place that sells fermented milk, fermented shredded cabbage and fermented salty cucumbers:)
It also sells proper milk curd, so I can make typical Estonian desserts without having to recreate the creamy yet grainy texture with a mixture of quark and ricotta instead. Not that it'd be difficult of course, and during my seven or so years in Edinburgh I've successfully settled for the 'fake milk curd' instead. But there is something more satisfying about using the real thing, and I've already tried some familiar dishes using milk curd.
Milk curd on its own can be topped or mixed with jam and eaten as a humble weekday dessert, but when mixed with whipped cream it becomes a much more luscious pudding. Here it is served simply with berries, but it would also be a delicious filling for a simple sponge cake. One of my favourite 5-minute party cakes is a sponge layered and topped with coffee-flavoured milk curd cream, and topped with toasted flaked almonds.
Estonian farmer's cheese cream with berries
(Lihtne kohupiimakreem)
250 grams (low-fat) milk curd
250 ml whipping cream
1 tsp vanilla extract
3-5 tsp sugar
Press the milk curd through a sieve, if it's too coarse and grainy.
Add the sugar to the cream and whip until soft peaks form.
Add the vanilla extract and curd cheese. Mix gently until combined.
Spoon into glasses (tap on the work surface couple of times to smooth the top).
Top with berries of your choice and put into the fridge until serving.
Can be made up to a day in advance.
* Bona Deli, 86 South Clerk Street, Edinburgh
Friday, March 03, 2006
A jolly good salad
Here is a recipe for a salad that I served as a starter before the super-delicious slowly braised beef last weekend. It started as a simple salad thrown together from the ingredients I happened to have, but as the end result was very delicious, I've adopted it as my current party starter salad:)
Amongst the diners last Saturday were two Estonian guys. One of them made it clear that he doesn't like 'grass' (i.e. anything green and salad-like). The other one remembered after the second helpings that he really-really doesn't like goat's cheese. Funny how one forgot his aversion to salad leaves and the other happily munched away on goat's cheese while they were eating:)
A tasty salad with rocket, goat's cheese and bacon
(Pille pidulik salat põld-võõrkapsa, peekoni ja kitsejuustuga)
For the salad:
a bag of rocket salad, washed and drained
a couple of chopped spring onions
a generous handful of toasted pinenuts
a log of soft goat cheese
couple of rashers good quality lean smoked bacon
For the dressing:
extra virgin olive oil
half a squeezed lemon
crushed black pepper
Maldon sea salt
Not much to say about the preparation. Toast the pinenuts on a non-stick pan, fry chopped bacon until just crisp. Mix all ingredients in a bowl, drizzle over the dressing and serve.
Just a jolly good combination of the mustardy sharp rocket, salty-chewy bacon, nutty-crispy pinenuts and creamy-tart Welsh goat's cheese. Will make an appearance on my table again in no time.