Thursday, March 28, 2013
Beet deviled eggs aka Beetroot devilled eggs for Easter brunch
Beet-pickled eggs have made quite a few appearances here on Nami-Nami. First in April 2007, then again in March 2008, but in a marbled form. The ruby eggs were present on our Easter brunch in 2009, and ruby-red quail eggs were present on our Easter brunch in 2012. Probably in 2010 and 2011 as well, I just forgot to take a photo of them. If you read Estonian, then you saw them in my recipe column in the March 2013 issue of Kodu ja Aed ("Home and Garden") magazine as well:
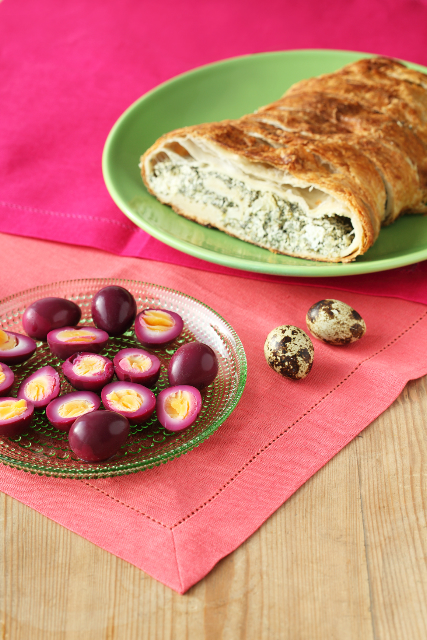
Photo by Juta Kübarsepp for the March 2013 issue of Kodu ja Aed
Yet it had never occurred to me to make deviled beet eggs until I came across this post on The Kitchn (well, I actually first spotted the recipe on Pinterest, where I promptly pinned this to my Beautiful Beet Recipes board). I had to make them.
Deviled beet eggs/Beet deviled eggs/Ruby eggs/Beetroot devilled eggs
Step 1: Simple beetroot eggs:
free range and/or organic eggs
beetroot juice/beet juice
salt
First you need to hard-boil some eggs. There are several "schools" of boiling eggs, but here's what I do. Place the required number of eggs in a single layer in your saucepan. Pour over boiling water to cover. Set the timer at 8 minutes (I use large eggs, 7 is enough for smaller eggs) and simmer over moderate heat. Once the timer goes off, rinse the eggs under a cold running water for a few minutes to cool them down.
Note that you don't want to overcook your eggs, as this results in those unsightly green-blue rings around the egg yolk, caused by sulphur compounds. You can avoid those by not overcooking your eggs in the first place and quickly cooling them down in cold water after cooking.
When cool enough to handle, peel the eggs carefully. Place in a single layer in a bowl, pour over the beetroot juice, season with a bit of salt. Cover, place into the fridge and leave to marinate for about 3 hours. (Longer, if you want, but I wanted just a thin ruby-red beetroot effect this time).
If you wish, you can serve the eggs just like this, halved - look at that gorgeous yellow yolk! I cut off a thin slice from the base of each egg half - this way they sit neatly on the plate and don't slide all over the place or fall over.
Hey, I still have that chicken!
Step 2: Stuffed beetroot eggs/Deviled beet eggs:
If you want to make devilled beetroot eggs, then halve the eggs and gently scoop out the egg yolks. Make your favourite devilled egg mixture. My regular "Estonian deviled eggs" include some mustard, butter and mayonnaise. However, knowing the affinity of beets and horseradish, I used egg yolks, butter, mayonnaise, some strong horseradish and finely chopped dill for the filling. Worked like a treat!
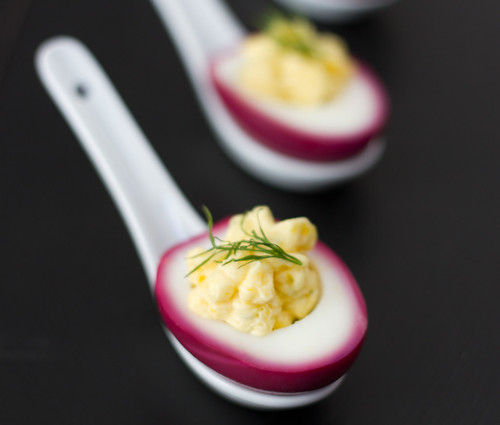
To be more precise, then that's what I did. Mash the egg yolks and butter (I grate the butter and egg yolks finely, but you can also press them both through a sieve). Stir in the mayonnaise and season with salt and horseradish. Mix in the dill.
Spoon onto the egg halves or use an icing bag with a serrated tip and fill the eggs.
Enjoy! You can make these a few hours in advance, but keep them in the fridge until serving then.
More ruby egg/beetroot egg/beet egg recipes:
Perfect hard-boiled ruby eggs by Alanna @ A Veggie Venture
Beet-pickled deviled eggs by Leela @ The Kitchn
Beetroot-pickled eggs by Allegra McEvedy @ The Guardian
Beet pickled eggs with fennel @ Not Without Salt
Beet pickled deviled eggs by Paula @ Bell'Alimento
Pink deviled eggs by Denise @ Chez Us
Beet deviled eggs by Angie @ Eclectic Recipes
Pickled deviled eggs by Kelly @ Just A Taste
Beet-pickled eggs @ Cookistry
Tuesday, March 26, 2013
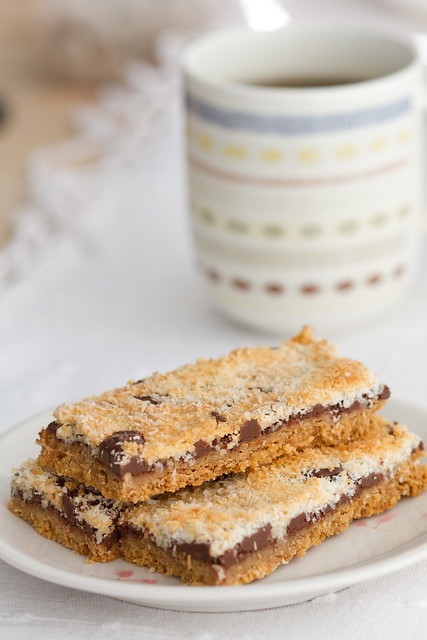
Simple Magic bars recipe
I was due to give a Scottish cookery class last Sunday in Aegviidu - a small town about an hour from Tallinn. While finalising the menu for the cookery class (skirlie and clapshot and cranachan and such like), I flipped again through the pages of Scottish author's Sue Lawrence's excellent "A Cook's Tour of Scotland: from Barra to Brora in 120 recipes". One of the last recipes in the book was for Anta Bars - a tray cake that Sue Lawrence was served at the Anta Pottery's tearoom in Fearn, Tain, near Ross-shire in the Scottish Highlands (see here for the exact address). Ingredients? Digestive biscuits, butter, sweet condensed milk, milk chocolate and desiccated coconut. Very similar to Magic bars, though these tend to have a layer of nuts included as well, and are layered somewhat differently (I rely on the Joy of Baking blog for this information).
I had a whole packet of sweet condensed milk I wanted to use, and while I really wanted to make the Millionaire's Shortbread, I decided to give these Anta Bars a go instead. Why? Well, for the Millionaire's Shortbread (also known as caramel shortbread) you need to boil the condensed milk first, whereas the Anta Bars have a layer of regular sweet condensed milk drizzled over the cookie crumb base. So much simpler and quicker.
A word of warning, however. While Scotland can be really proud about the great quality of their produce and ingredients (venison, lamb, beef, salmon, raspberries, shortcakes, haggis etc etc), then this cake is not the healthy option, for the fainthearted or for those counting their calories. It's extremely sweet. You know, tooth-achingly sweet. Definitely an occasional treat rather than your regular afternoon tea or coffee cake :)
Sue Lawrence's recipe was excellent - no surprise, as she is considered one of the best Scottish food writers of our times. However, I did reduce the amount of coconut flakes after the initial attempt, as I had hard time getting the original amount (170 g of desiccated coconut) to stick to the cake and not fall off. Also - even if you might be tempted to use dark chocolate instead of milk chocolate, perhaps to counteract the sweetness, then don't - this cake needs the much sweeter milk chocolate. Trust me, I tried both versions..
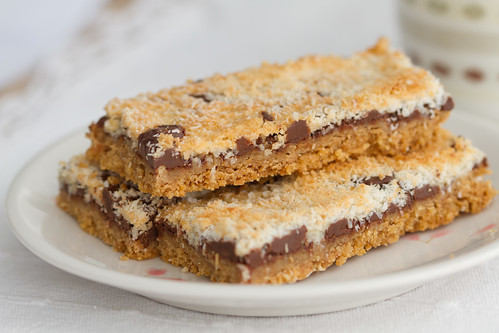
Anta Magic Bars or a recipe for caramel, milk chocolate and coconut slices
(Anta koogiruudud)
Source: Sue Lawrence's "A Cook's Tour of Scotland", sligthly adapted
Serves about 24
140 g butter, melted and cooled
350 g Digestive biscuits or graham crackers
300 g sweetened condensed milk
200 g good-quality milk chocolate, chopped (or use chips)
100 g desiccated coconut
Line a baking sheet/Swiss roll tin (about 25x35 cm) with a parchment paper. Preheat the oven to 180 C/350 F.
Finely crush the Digestive biscuits (I used my food processor), then mix thoroughly with melted butter. Spoon the biscuit mixture into the cake tin, pressing down. Drizzle the sweetened condensed milk evenly over crumb mixture.
Now scatter the chopped chocolate evenly on top, finally sprinkle with coconut flakes, patting down lightly.
Bake in the middle of the preheated oven for about 20 minutes, until the coconut is golden brown.
Remove from the oven and leave to cool completely before cutting into small squares or bars.
Other foodbloggers have been testing Sue Lawrence's recipes:
Cock-a-leekie soup by Pille @ Nami-Nami
Mince and tatties by Pille @ Nami-Nami
Chocolate brownie with raspberries by Pille @ Nami-Nami
Smoked salmon frittata by Pille @ Nami-Nami
Haggis and winter tzatziki wraps by Sophie @ Mostly Eating (intrigued!!!)
Passion cake by Maggie @ Kitchen Delights
German apple cake by Celia @ English patis
Tuesday, March 19, 2013
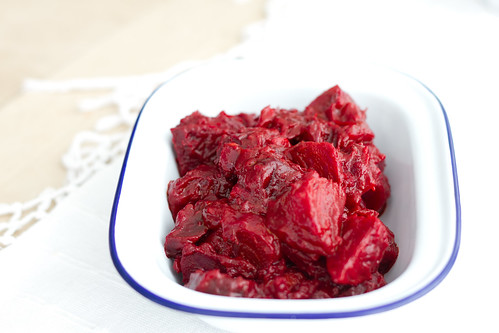
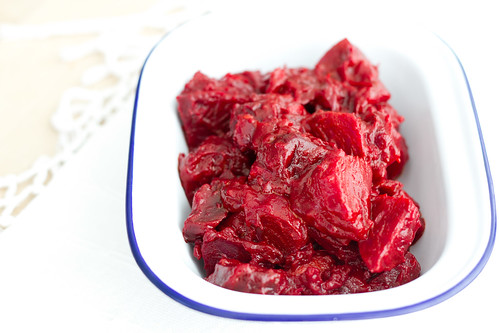
Beets with cumin seeds and tomatoes
Regular readers of this blog know about my fondness of beetroot. I'd like to think that I have a pretty good selection and variety of beet recipes here on Nami-Nami. You'll find recipes for beetroot cream cheese spread with horseradish, beetroot and blue cheese risotto, Georgian beetroot and walnut salad, Persian beet borani, beet and feta quiche, a wonderful vegan beetroot borscht, beetroot pesto, beet and blue cheese muffins, beetroot pickled eggs, beetroot and goat cheese soup, beet and ginger cake, beet bruschetta, raw beetroot salad, beet and potato pie, a layered beet and smoked salmon salad, dashing coconut and beet soup here on Nami-Nami - and this is just the tip of the iceberg!
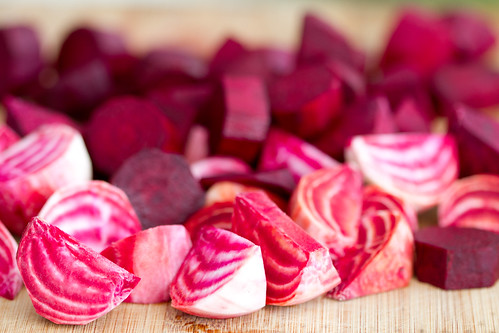
Yet I discovered something totally new - and exciting - last weekend. It all began when my dear hubby told me that he had discovered a long-forgotten pile of beets in our garage that also doubles as a very cold larder. And these were not just beets that he unearthed, but some lovely Chioggia, Golden Burpee and small long beets grown by yours truly last summer. They were perfectly crisp and happy, as they had been hiding themselves in a box of sand destined to entertain our five chicken :)
They needed a great recipe. I made actually two great dishes - a beetroot and chocolate cake (using raw, not cooked beets), and then this recipe for an Indian-style beetroot dish that I came across on Delicious Magazine (UK) website. The recipe was by Tom Norrington-Davies, who credits the Indian food guru Madhur Jaffrey for the original recipe. Tom Norrington-Davies writes that he loves making it "for barbecues and serve it with lamb chops or sausages. It is good hot or cold".
A very novel way of using beets, I thought, and made this dish for our leisurely and long afternoon meal on Sunday. I tweaked the recipe - I couldn't see the point of squeezing the hell, sorry, liquid, out of the canned tomatoes, only to replace it with water later, but otherwise I followed Tom's recipe.
Our test group of the day - four adults and three kids - were all happy with the result, and if you're into sweet-and-sour flavour combinations, you'll love it. Just like Tom, I can see serving this with grilled meats during the summer, or as a vegetable side dish during the winter.
If you're a fellow beet lover, you may want to check out the Beautiful Beet Recipes Pinterest board, where you'll find 100+ great pins leading you to some wonderful foodbloggers' recipes. If you'd love to contribute to that board, then just leave your Pinterest handle in the comments and I'll send you an invite!
(India peedihautis vürtsköömnete ja tomatitega)
Serves 6
400 g canned crushed tomatoes
about 500 g small beets
3 Tbsp vegetable oil
1 heaped tsp of cumin seeds
1 garlic clove, chopped
2 medium onions, chopped
0.5 tsp dried chilli flakes
1 tsp salt
1 Tbsp red wine vinegar or juice of 1 small lemon
a generous pinch of sugar
Peel the beets, cut into smaller chunks or wedges, depending on the shape of your beets.
Heat the oil in a medium saucepan, add the cumin seeds, onion and chilli flakes and sauté gently for about 5 minutes. Add the garlic and fry for another few minutes, until the onions are starting to brown a little.
Add the beets, canned tomatoes, vinegar/lemon juice and salt and sugar. Bring the ingredients to a simmer, then cover and cook for 40-60 minutes, until the beets are tender.
Uncover, season to taste. Turn up the heat to thicken the sauce a little, if that seems necessary.
Monday, March 18, 2013
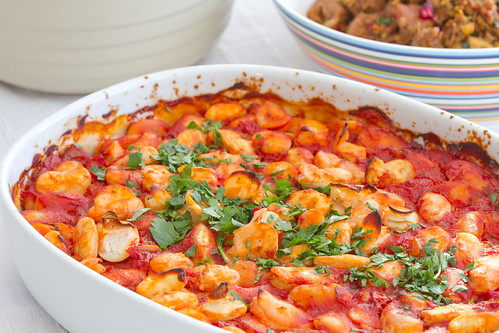
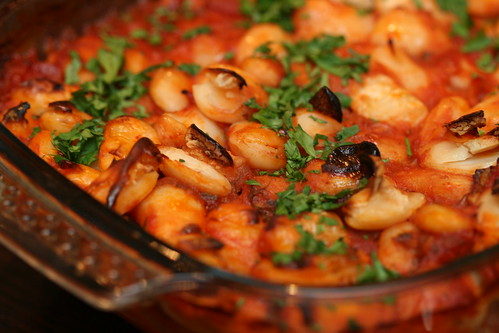
Gigantes plaki aka Greek giant baked beans
Gigantes plaki (yigandes plaki, γίγαντες πλακί) is a popular Greek taverna dish, consisting of oven-baked fasolia gigante ("giant") beans with tomato sauce. Gigantes are occasionally also called elephant beans (elephantes) - which is the name reserved for extra large giant beans :) The gigantes are native to Greece, and the ones from Kastoria are especially prized, as well as the ones from Florina and Drama regions - all three have the PGI-designation or are recognised by the EU as products of Protected Geographical Indication.
If you're in Estonia, look out for Garrido gigantes (either canned or dried, offered by Kaupmees) or Palirria (large cans, offered by HellenicTrade - these are the ones I've been using). Elsewhere, look for the jumbo beans/elephant beans/gigantes at Greek and Middle Eastern markets. Amazon.com sells Kastoria giant beans online, and there's also a canned variety available. You can use dried or canned cannellini or lima beans instead, but you'll need to adjust cooking times accordingly.
Serve as part of a mezedes spread, or spoon onto a slice of leavened white bread. I sometimes crumble some decent feta cheese on top at the end of the baking time :P
Giant baked beans, Greek style
A recipe from BBC Good Food (September 2009), slightly modified
Serves 8
400 g dried giant or butter beans or 3x400 g canned beans
3 Tbsp extra virgin olive oil (Greek, of course)
1 large onion, finely chopped
2 garlic cloves, minced
2 Tbsp concentrated tomato paste/pureé
2x400 g cans crushed tomatoes
1 Tbsp honey
1 Tbsp dried oregano
couple of pinches of ground cinnamon
sea salt and freshly ground black pepper
To garnish:
2 Tbsp finely chopped flat-leaf/Italian parsley
If using dried beans: soak the beans overnight in plenty of water. Drain, rinse, drain again. Place in a large pan covered with fresh water. Bring to the boil, reduce the heat, then simmer gently for 50-60 minutes, until the beans are tender but not too soft. Drain.
If using canned beans: tip the beans onto a large colander, rinse with cold water. Drain and put aside.
Heat the oven to 180C/350F.
Make the sauce: heat the olive oil in a large frying pan over moderately low heat. Add the onion and fry for about 7-8 minutes. Add the garlic and fry for another 2-3 minutes, until the onion is translucent.
Add the tomato puree, sauté for a minute. Add the rest of the ingredients (except the beans) and cook for 2-3 minutes. Season generously with honey, oregano, salt and pepper, then tip in the drained cooked beans.
Transfer the mixture into a large ovenproof dish - I love using my lasagne pan - and bake for approximately one hour. Don't cover and don't stir! The dish is ready when the tomato sauce has thickened and the beans are soft and flavoursome.
Remove from the oven, cool a little. Scatter the parsley on top and drizzle with some extra olive oil.
Similar recipes:
Gigantes sto Fourno @ Kalofagas
Greek style baked beans @ Souvlaki for the Soul
Gigantes in savory tomato sauce @ Mediterranean Cooking in Alaska
Twice-cooked gigante beans with garlic and feta @ Kalyn's Kitchen
Gigantes plaki (Greek baked beans) @ Closet Cooking
Gigantes plaki: Greek baked beans @ Choosy Beggars
Gigandes plaki by Simon Rimmer
Fasolia Gigantes Plaki: Big Greek Beans baked in a Bodacious Red Sauce @ Sortachef: One Hot Cat in a Woodfired Kitchen
Gigantes plaki @ Jono & Jules do Food & Wine
Gigantes plaki @ Life is Like a Dumpling
Greek baked beans (Gigantes plaki) @ the taste space – steam, bake, boil, shake!
Greek baked beans @ Eats Well with Others
Tuesday, March 12, 2013
It's Pasta Time: Tagliatelle with creamy spinach and pan-fried salmon
One of my favourite pasta dishes recently is this clean-looking pasta (usually tagliatelle, but I've also used linguine) with seared salmon, fresh spinach and cream, with a light lemon kick. For an extra quick version I've used smoked salmon, but using fresh salmon is much wallet-friendlier and has more kid-appeal as well. Also, it's a great way to use that thinner tail-end of the fish that I usually put aside when baking salmon in the oven.
Note that there's no Parmesan cheese in the dish!!!
Tagliatelle with creamy spinach and pan-fried salmon
(Makaronid praetud lõhe ja spinatiga)
Serves 4
400 g tagliatelle pasta (linguine or spaghetti would work as well)
water and salt, for cooking pasta
400 g salmon or trout fillet
butter, for frying
100 g fresh baby spinach leaves, rinsed
about a cup of double cream
a handful of fresh parsley
1 lemon, zested
sea salt and freshly ground black pepper
Bring a large pot of water into a rolling boil, season with salt and cook the pasta al dente according to the packet instructions.
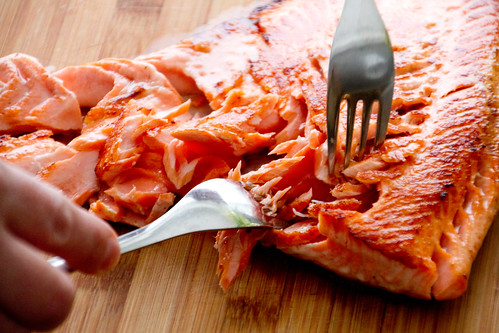
Meanwhile heat the butter on a large frying pan over moderate heat. Place the fish onto the pan, skin-side up, and fry for 3-4 minutes. Flip over and cook for another 2-3 minutes. (The fish will be still undercooked, but you'll cook it further in a minute).
Remove the fish fillet from the frying pan:
Using two forks, break the fish into bite-size chunks:
Heat some more butter on the frying pan, add the rinsed spinach leaves and cook till wilted.
Add the cream, season with black pepper, parsley and lemon zest. Return the fish to the pan and simmer for a minute or two.
Drain the pasta, toss with the sauce and serve immediately.
Pan-seared salmon with pasta and spinach cream sauce @ The Paupered Chef
Creamy spinach and salmon sauce @ Know Thy Food
Monday, March 11, 2013
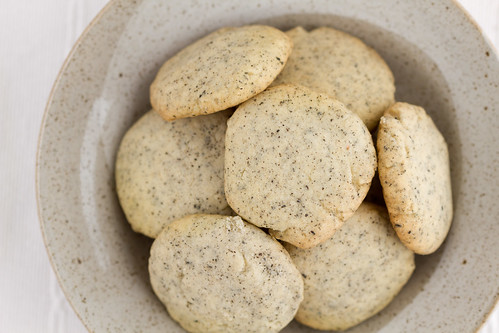
Earl Grey tea cookies
Imagine a kitchen - well, actually a whole house - where the wonderful aroma of Bergamot orange is floating in the air. (If you're unfamiliar with bergamot, then my blog friend David Lebovitz comes to the rescue). Does that smell sound appealing? If yes, then read on :)
A friend of mine who works at KAFO (the Estonian distributor of Lavazza coffee, Just t teas, Jura coffee machines, Monbana Trésor chocolates, David Rio chais and such like) gave me a selection of Just t Black Label No X teas for degustation recently. All nine of them:
I had fun brewing and sipping them. Personal favourites - No 1 (Lemon balm herbal infusion), No 5 (Black tea Earl Grey Luxury), No 7 (Green tea jasmine blossom) and No 9 (Black tea Bombay Chai, with ginger, cloves, black pepper, cinnamon).
However, Nami-Nami is a food blog, not a drink blog, so I should provide you with a recipe instead of going on about my favourite teas, right? Coincidentally, my Uppsala-based friend Annika gave me two Swedish food magazines last Friday, and there was a recipe for Earl Grey-drömmar in one of them. These were egg-free cookies where one had to make an Earl Grey infused sugar to start with. Unfortunately, the cookies were a huge disappointment - they were too sweet and way too crumbly, so we sent the big box of cookies to someone we know appreciates soft and sugary cookies :)
Yet the smell of Bergamot in the air was so amazing that I had to give those cookies another try. This time I simply took my regular thumbprint cookie recipe and incorporated the lovely Earl Grey infused sugar into this recipe.
Much, much, much better. I ate them plain, well, with a large cup of freshly brewed Earl Grey tea, but a tiny schmear of lemon curd will make them even more enjoyable.
Earl Grey tea cookies
(Teeküpsised)
Makes about 30
60 g (about 100 ml) icing sugar/confectioner's sugar
2 Tbsp finest Earl Grey tea leaves
200 g unsalted butter, softened
240 g all-purpose/plain flour (400 ml)
55 g potato starch/potato flour
a pinch of salt
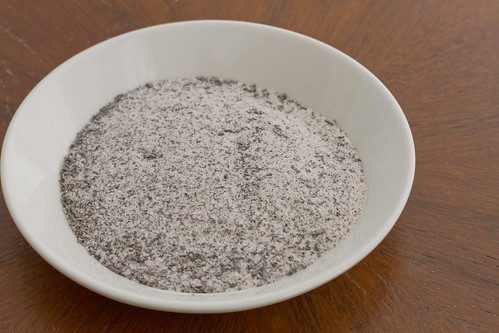
To start with, make the aromatic Earl Grey sugar. Blitz the caster sugar and tea leaves until you've got a fine powder:
Cream the butter with the Earl Grey sugar. Mix flour, salt and potato starch, sift into the butter mixture. Combine with a wooden spoon.
Using your hands, take small chunks of cookie dough and roll into small balls.
Place on a cookie sheet and flatten slightly. (If you prefer making thumbprint cookies, then press a thumb print onto each cookie and fill with a small dollop of lemon curd).
Bake in a preheated 180 C oven for about 15 minutes, until the cookies are light golden.
Cool for a few minutes, then transfer onto a metal rack to cool completely.
Enjoy.
More recipes using Earl Grey tea leaves:
Earl Grey cupcakes with lemon Earl Grey buttercream by Hannah @ Honey & Jam
Earl Grey ice cream by Ali @ Gimme Some Oven
Earl Grey chocolate cake by Tracy @ Shutterbean
Earl Grey shortbread by Diana @ Appetite for China
Earl Grey banana bread by Lauren @ Healthy. Delicious.
Earl Grey poached pears by Karen @ Citrus & Candy
Earl Grey chiffon cake @ Happy Home Baking
NB! If you've got a favourite recipe using Earl Grey, feel free to leave the link to the comments!
Tuesday, March 05, 2013
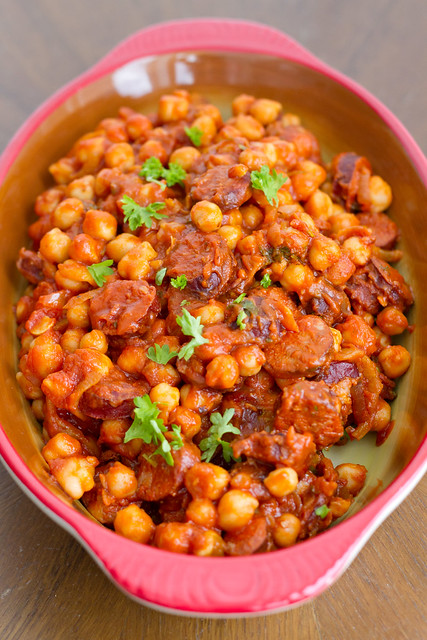
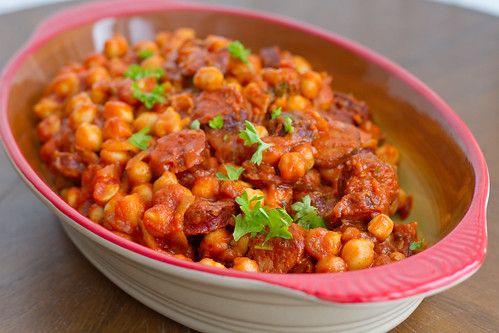
Chickpeas with chorizo (Garbanzos y chorizo)
Chickpeas (or garbanzo beans, as they're known in the US), that excellent store-cupboard ingredient that helps one to make many an excellent meal. A filling chickpea and tuna salad with smoked paprika powder. A healthy vegetarian side dish consisting of chickpeas and pomegranate molasses. A quick tortilla wrap with chickpeas and tuna. A chickpea and tomato soup with smoked paprika. A chickpea and tomato soup with Moroccan spices. A quick hummus with beets. Or a quick hummus with wild garlic, come ramp or ramson season. Or a quick hummus with harissa paste, if you want something a wee bit spicier.
I always keep some in the cupboard, as they are indeed an excellent stand-by.
Chickpeas and smoked paprika powder (pimentón) is a match made in heaven, and this is utilised in this wonderful Spanish creation, garbanzos y chorizo. No pimentón or smoked paprika powder - pimentón de la Vera is considered the best - is needed, but you need a good-quality Spanish cooking chorizo that is seasoned with pimentón to start with. I came across a locally-made chorizo sausage last weekend - produced by Liivimaa Lihaveis - and decided to try an old favourite chorizo-and-chickpea (or chorizo-and-garbanzo) dish of mine*, and see, if the locally produced chorizo stands up to the proper Spanish one.
It did, I'm happy to admit.
Chickpeas with chorizo
(Kikerherned chorizo-vorstiga)
Serves four to six
1 Tbsp olive oil
1 large onion
1 red or yellow bell pepper
300 g cooking chorizo
400 g canned chopped tomatoes
800 g canned chickpeas (that's 2 regular cans)
about a cup of water
salt and freshly ground black pepper
fresh parsley, finely chopped
Peel the onion, halve and cut into thin slices. Halve and deseed the pepper, then cut into thin strips. Rinse and drain the chickpeas. Cut the chorizo into thin slices.
Heat the oil in a heavy saucepan or a large sauté pan. Add the onion and pepper and a sprinkle of salt and sauté over moderate heat for about 5 minutes, stirring every now and then.
Increase the heat, add the chorizo and fry for another few minutes, until the chorizo is slightly browned.
Add the chopped tomatoes, then pour about a cup of water into the tomato can, give it a quick swirl and pour into the pan. Add the chickpeas. Bring into a simmer, reduce heat to medium, cover and simmer gently for about 20 minutes.
Season to taste with salt and pepper. Sprinkle some herbs on top and serve with some crusty bread and a fresh green salad.
NOTE: This reheats well (you can add some water, if too dry), and it also tastes great when cold.
* This dish is indeed a regular in our kitchen - I discovered this photo from August 2011 and this photo from April 2009 as well this one from April 2008 in Flickr :)
Similar recipes in other foodblogs:
In my Life (very similar to mine)
Morsels & Musings by Anna
Lindaraxa
Spanish Recipes pic by pic
Flanboyant Eats (much soupier version)
Friday, March 01, 2013
The 3-ingredient cookie
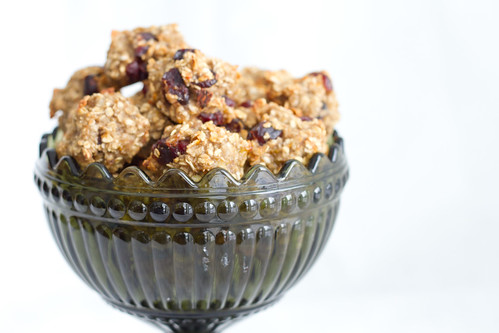
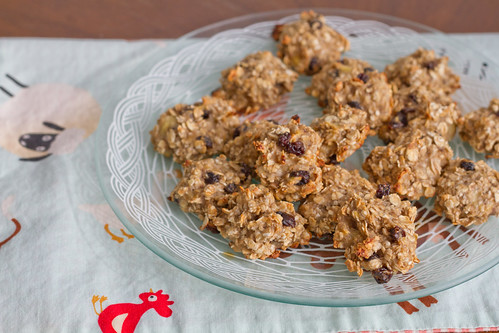
An excellent version with oats, bananas, dried cranberries and grated orange zest.
Have you heard about those three-ingredient cookies consisting of nothing but bananas, oats and an optional fill-in (chocolate, raisins or nuts, for instance)? No added sugar. No added fat. Suitable for vegans and all those on lactose-free, casein-free, gluten-free*, egg-free, dairy-free diets. Take 2 minutes of prep work and need about 15 minutes in the oven. That's less than it takes to unpack your regular grocery bags, so they're super-quick as well.
* You need to make sure you use certified gluten-free oats, also called 'pure oats'.
I came across the recipe in The Burlap Bag. As the author Lauren notes, even if you eat all of those, you've basically consumed 2 bananas and a cup of oats, so this qualifies as health food in my opinion. They are soft and slightly chewy. They're not the best-oat-cookies-in-the-world (these are!), but they're pretty moreish and satisfying. Flavour- and texture-wise, these remind me of those soft apple and oat drops I've been making, just much quicker and simpler.
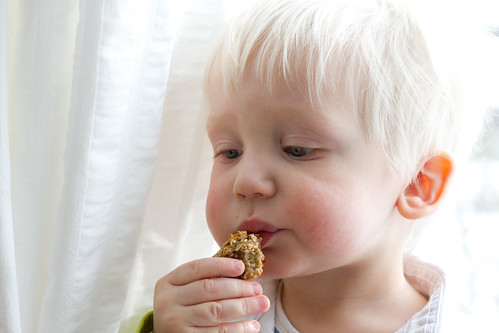
My two older kids love them (Karoliine, our youngest, is still to young to have any solids), and the grown-ups are pretty fond of them, too:
So here's the recipe. Again, a huge thank you goes out to The Burlap Bag for this great 'cookie' idea. Come autumn, I'll try their Autumn 2-ingredient Cookie, using pure pumpkin pureé.
Use really ripe bananas for making these - the riper your bananas, the sweeter the cookies.
3-ingredient oat cookies
(Kaerahelbeküpsised)
Makes about 16 bite-sized morsels
2 ripe medium-sized bananas
200 ml (4/5 of a cup) of quick-cooking oats
a handful of either raisins or dried cranberries (craisins) or chopped dark chocolate or chopped walnuts
Pre-heat the oven to 170 C/350 F. Line a cooking sheet with a parchment paper or simply grease your cookie sheet thoroughly.
Peel the bananas, place into a bowl and smash with a fork. Add the oats and the add-in (I love the tiny seedless currant raisins):
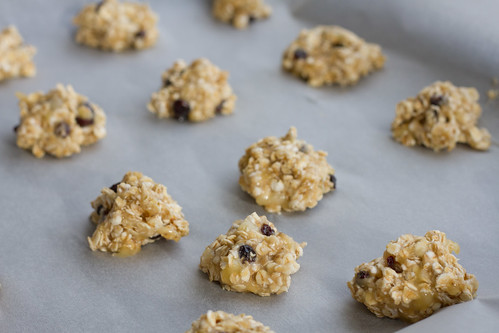
Mix till combined. Take about a teaspoonful of the mixture at the time, form into a ball and transfer onto your cookie sheet.
Bake for about 15-20 minutes, until golden brown. Cool slightly and enjoy!
Other foodbloggers making these:
Anne @ Anne's Food (9 March 2013, in English)
Martiina @ Tegemisi. Toimetusi (4 March 2013, in Estonian)
Gaili @ Tsheburashka (3 March 2013, in Estonian)
Kätrin @ Kätrin kokkab (13 March 2013, in Estonian)
Karen @ Kafka na praia (2 April 2013, in Brazilian Portuguese)
More moreish oatcake recipes:
My melt-in-your-mouth oat cookies
Cheesy oatcakes
Peppery oatcakes
Oatcakes with ginger
Apple and oat drops
Two years ago: Estonian Soda Bread Recipe
Four years ago: Raisin Fruit Soup Recipe (Kissel)
Subscribe to:
Posts (Atom)