Friday, December 28, 2007

Christmas Cookie Recipes: Cardamom Cookies aka White Gingerbread


K. playing around with gingerbread. See another example of his food styling here. The cookie cutter (do you recognise the Moomin character?) is a gift from Dagmar.

I baked a lot of cookies this Christmas - gingerbread cookies, matcha madeleines, sweet mayonnaise cookies, coconut macaroons, and these lovely pale cardamom cookies - to give away as gifts. The recipe is from a Finnish site, and they were called white gingebread cookies, if I remember correctly. The naughty bit is that they don't look like gingerbread cookies - which are supposed to be, of course, dark brown (see the colour contrast on the top photo?) - but they contain a generous doze of cardamom, which gives them a very Christmassy feel. Sneaky, eh?

Oh, if you don't have ground cardamom, then seeds from about 20 pods give you about 1 tsp of ground spice at the end. And be careful not to overbake them - you want white gingerbread after all!

White Gingerbread aka Cardamom Cookies
(Valged piparkoogid e. kardemoniküpsised)
Recipe from the Finnish Pirkka-site
Makes about 4 dozen


125 g butter, at room temperature
100 g sugar
1 egg
50 ml double cream
150 g plain flour
100 g potato starch/potato flour
2 tsp vanilla sugar
1 tsp ground cardamom
0.5 tsp baking powder

Cream butter and sugar until light, then whisk in the egg.
Mix the dry ingredients (flour, potato starch, vanilla sugar, cardamom and baking powder), add to the butter mixture together with the double cream. Press into a dough ball and place into the fridge for about 3 hours (I left it overnight).
Roll the dough out on a slightly floured surface into 3-5 mm thickness. Cut out cookies and place onto a cookie sheet covered with parchment paper.
Bake at 200 C for 6-8 minutes, until the cookies are very slightly golden.
Cool and decorate with sugar glazing (recipe here).

Wednesday, December 26, 2007

Christmas Recipes: Red Cabbage with Prunes (perfect with roasted goose)


We've just finished doing all the dishes after yet another Christmas party. For the second year already, K. and I have invited our respective families over for a festive Christmas meal. And instead of the traditional black pudding and sauerkraut (we've already had three traditional Christmas meals this week), we served something different this year: roast goose (sourcing and roasting courtesy of restaurant Stenhus, Tallinn*) and braised red cabbage, alongside with some lovely Estonian potatoes, creamy goose giblet gravy, and pickled pumpkin salad. (And

The recipe is from the Christmas 1998 issue of BBC Good Food magazine, but I've fiddled with it a little. You cannot really see the prunes on the photo below, but they were an excellent addition to the braised cabbage, adding a much-needed sweetness.

Hope you've all had a lovely holiday so far.

Braised Red Cabbage with Prunes
(Hautatud punane kapsas ploomidega)
Serves 10


2 Tbsp olive oil
2 red onions, halved and finely sliced
1 kg red cabbage, cut into fine shreds
250 g prunes, halved
a cup of orange juice
2 Tbsp balsamic or sherry vinegar
1-2 tsp salt
coarsely ground black pepper

Heat the oil on a large saucepan. Add onion and saute for about 5 minutes, until it starts to soften.
Add cabbage and saute, stirring every now and then, for 7 minutes.
Add the prunes, orange juice, balsamic vinegar, season with salt and pepper.
Cover the saucepan with a lid and simmer on a low heat for about 30-60 minutes, stirring every now and then, until the cabbage is cooked to your liking (I like it with a bit of bite, but it's also lovely when cooked until soft).
If the cabbage looks too dry at the end of the cooking process, add some more orange juice or water.

* One day I'll reveal why the executive chef of the best gourmet restaurant in Estonia was roasting my Christmas goose this year :)

Saturday, December 22, 2007

Estonian Christmas Recipes: piparkoogid aka Gingerbread Cookies


Häid jõule from me and K!!!

Piparkoogid actually translate as pepper cakes, but as spicy Christmas cookies tend to go under the name 'Gingerbread' across the world, I'm sticking to this English name instead. They're a must-have in Estonia. Various newspaper articles and TV programmes compile their "best gingerbread dough in 2007" lists. Mums and dads across the country are rolling and cutting and baking gingerbread cookies with their delighted offsprings. Coffee shops replace the traditional chocolate-with-your-cuppa with piparkook-with-your-cuppa. And those of us with extra time in our hands even make the gingerbread cookie dough.

Previously on Nami-nami, I've shown you pictures of stained-glass gingerbread and shared a recipe for gingerbread cookies with almonds. This year I used a different recipe, and liked the result a lot, so you'll get another gingebread recipe from me. Whereas the previous one used honey and almonds, this time I used Dansukker's light sugar syrup. You can either make your own syrup from scratch (don't burn it!), or use a light corn syrup, I guess. And if you don't have all the individual spices on hand, just use your pumpkin pie spice mixture (in the US) or mixed spice (in the UK) to get a rather similar result.

The gorgeous Moomin cookie cutters below are a gift from the very sweet Dagmar of A Cat in the Kitchen. Tack, Dagmar!!

Piparkoogid - Estonian Gingerbread Cookies
(Jõulupiparkoogid)
Yield: 1.3 kg of gingerbread dough


250 g light (corn) syrup
200 g sugar
2 tsp ground cinnamon
1 tsp ground cloves
1-2 tsp ground cardamom
1 tsp ground ginger
0.5 tsp ground allspice
0.5 tsp ground nutmeg
250 g butter
2 large eggs
600 g plain flour
2 tsp baking soda

Mix the syrup, sugar and ground spices in a saucepan and bring to the simmer.
Add the cubed butter and stir, until the butter melts. Remove the pan from the heatand cool.
Add eggs, one at a time, stirring vigorously with a wooden spoon (a simply use your KitchenAid mixer).
Mix flour and baking soda, then add gradually to the syrup and sugar mixture.
Knead until all ingredients are thoroughly combined. Wrap in a clingfilm and place into the fridge for at least overnight, preferably for a few days.

To make the cookies, divide the dough into manageable chunks and roll into 3 mm thickness on a slightly floured working board. Transfer to a cookie sheet.
Bake in the middle of 200 C oven for 6-9 minutes, until cooked through.


Cool, then decorate with a sugar glaze.

To make the sugar glaze:
Mix 1 egg white with enough icing sugar to get a thick and glossy glaze. Put into a piping bag with a very small hole, and decorate.

Friday, December 21, 2007

David Lebovitz's Chocolate Sauerkraut Cake with Chocolate Glaze


In every household there comes a time when one has 100 grams of finely shredded sauerkraut left (like after making some boozy sauerkraut) and needs to find a good home for that. Granted, one can just nibble the cabbage shreds (an excellent source of vitamin C). Or one can bake a chocolate cake.

Yes, you understood me correctly..

When I finally received David's book a few months ago, his version of Maida Heatter's chocolate sauerkraut cake immediately caught my eye. Sauerkraut, you see, is very common in Estonia - there are quite a few sauerkraut recipes on my blog to prove that. However, I had never encountered a cake recipe using sauerkraut before. So when I did end up with some extra sauerkraut and extra time earlier this week (K. had popped over to Finland for the night), I decided to give David's recipe a go. I finely chopped up the cabbage, creamed and mixed and poured the batter (which looks - as you can see on this photo - like your 'normal' chocolate cake batter), baked, waited, glazed, sliced and devoured. Mmmm... I must admit that I couldn't taste any sauerkraut in the cake - but it was incredibly moist, extremely light and very chocolatey.

NB! Note that the recipe is also the cover image of the US edition of the book. I think David is strongly suggesting you'll give this one a go :)

Chocolate Sauerkraut Cake with Chocolate Glaze
(Hapukapsa-šokolaadikook)
Source: The Great Book of Chocolate by David Lebovitz
Serves 12

There is no recipe for this cake on David's blog, so if you're after the US cup-and-buttersticks measurements, buy his book (US/UK), or check out the recipe on Leite's Culinaria. The measurements below are for the people cooking in metric Europe when butter tends to be sold in 50 gram increments and not in tablespoons or 113-gram sticks :)


For the bundt cake:
100 grams sauerkraut
50 grams unsweetened cocoa powder
280 grams plain/all-purpose flour
1 tsp baking powder
1 tsp baking soda
0.25 tsp salt
150 g unsalted butter, at room temperature
300 g caster sugar
3 large eggs, at room temperature
1 tsp vanilla extract
250 ml milk, cold

For the chocolate glaze:
100 grams dark chocolate (I used Fazer's 71% chocolate)
50 grams unsalted butter
1 tsp light syrup (Dansukker) or light corn syrup

Preheat the oven to 160°C. Butter a 3-litre Bundt or tube cake pan.

Rinse the sauerkraut in cold water, gently squeeze dry and chop finely.

Sift together the cocoa powder, flour, baking powder, baking soda, and salt.

Beat the butter and sugar until light and creamy. Add eggs, one by one, beating after each addition.

Stir in one-third of the dry ingredients, then half of the milk. Then stir in another third of the dry ingredients, then the remaining milk. Finally, mix in the remaining dry ingredients, vanilla extract and the chopped sauerkraut.

Pour the batter into the prepared pan and bake for 45 minutes, or until a toothpick inserted into the center comes out clean. Cool completely then invert onto a serving plate.

To make the chocolate glaze, heat the chocolate, butter, and syrup together until melted and smooth. Let stand until room temperature, then spoon the glaze over the cooled cake, allowing it to run down the sides.

This recipe was also included in my second cookbook, Jõulud kodus ("Christmas at Home"), published in Estonian in November 2011.

Wednesday, December 19, 2007

Estonian Christmas Recipes: Sauerkraut Braised in Beer

Õllekapsas ehk õlles hautatud hapukapsas. Sauerkraut braised in dark beer.

Sauerkraut is another must-have ingredient on our Christmas table - a lovely side-dish to all those fatty chunks of roast pork and crackling black sausages. Here's an adaptation of an earlier recipe of mine - more beer, fewer ingredients, less hassle. Still as wonderful, however, if not better - the porter beer (I use A Le Coq Christmas Porter) and brown sugar give such a lovely, slightly caramelised flavour to the cabbage.

Traditional wisdom says that you need something fatty and greasy to give a proper flavour to sauerkraut (and many of our traditional dishes indeed combine sauerkraut with fatty pork cuts). I constantly - and very successfully - ignore that wisdom. I often replace fresh cabbage with sauerkraut in my meatless and virtually fat-free borscht, to no loss of flavour. And although this beer-braised sauerkraut contains just a hint of butter, my lighter and more modern version has received praises on my Christmas table for the last few years. I doubt anyone has missed the traditional sauerkraut instead..

You'll find 'fresh' sauerkraut in Eastern European stores. Failing that, use sauerkraut in a jar (try to look for one with added salt only; rinse before using), and shorten the cooking time a little.

Beer-Braised Sauerkraut
(Õlles hautatud hapukapsas)
Serves 12 as a side dish


1 kg fresh sauerkraut
100 grams of soft brown sugar or honey
1-2 tsp salt
500 ml porter or other dark strong beer
a generous pinch of caraway seeds
50 grams butter

Put all ingredients in a large saucepan and put on a medium heat. Simmer, stirring every now and then, until the cabbage is golden and softened. This takes about an hour.

Keeps in a fridge for a week (just reheat before serving).

This recipe was also included in my second cookbook, Jõulud kodus ("Christmas at Home"), published in Estonian in November 2011.

Tuesday, December 18, 2007

Russian Vinaigrette Salad, and confusion with culinary terms

Vinaigrette is the oil-and-vinegar dressing so popular across the world for livening up salad leaves, right? Wrong, at least as far as the vast Russia is concerned. And Estonia, for that matter. Most deli counters in supermarkets here would sell something called 'vinegrett' (that's vinaigrette in the local lingua), and it's not the dressing they're selling, but this bright Russian vegetable salad. My version is possibly a bit beetier (khm? is that a word?) than others, but I simply couldn't resist the colour.

Note the Russian vinaigrette salad is lactose free/gluten free/vegetarian/vegan, so should suite a wide array of diets- in addition of being really bright and beautiful to look at. I served it on crisp dark rye bread triangles, but usually it is eaten just as a side salad.

Russian Vinaigrette Salad
(Köögiviljavinegrett)
Serves 10 as a side dish


300 g boiled potatoes
200 g boiled beets
100 g boiled carrots
300 g sauerkraut
200 g pickled or salted cucumbers
150 g red or yellow onions or spring onions

Dressing:
5 Tbsp vegetable oil
2 tsp strong mustard
a generous squeeze of lemon juice*
salt
sugar
coarsely ground black pepper

fresh herbs (e.g. dill, parsley, chives)

NB! All cooked/boiled vegetables must be cool before starting to prepare the salad.

Peel the potatoes, beets and carrots and cut into thin julienne sticks or grate coarsely. Cut the cucumbers into thin slices lengthwise, then cut into stick crosswise. Mince onion finely.
Mix gently all the vegetables (sauerkraut, beets, carrots, cucumbers, onions) in a large bowl, until well combined.
Season the vegetables with salt, then dress with oil, mustard and lemon juice. Check for seasoning - and add salt, sugar and/or pepper, if necessary. The vinaigrette salad should have a slightly sweet-and-sour flavour.
Put into the fridge for about an hour, so the flavours and colours could mingle.
Sprinkle generously with fresh herbs and serve.

* It is traditional to use vinegar, but we prefer the much milder lemon juice.

VARIATIONS TO THE THEME:
You may add any of the following ingredients:
* fresh or preserved green peas
* salted Baltic herring slices (place on top of the salad)
* chopped salted wild mushrooms (add about 25 g per person)
* chopped hot-smoked fish
* chopped fresh or pickled apples
* chopped bell peppers (add about 100 g to the above recipe)

Sunday, December 16, 2007

Christmas Cookie Recipes: Danish Coconut Macaroons (kokosmakroner)

I've been making lots of Christmas tiramisu recently (post coming soon), and therefore end up with lots of eggwhites. I've already made meringues, but one can only eat so many airy-crispy egg white cookies. Here's another way to use up those egg whites - Danish coconut macaroons. I must admit that I don't really know what makes these so Danish - it's just I learnt to like these while exchange student in Denmark back in 1992, they're very popular among the Danes (especially during the festive season), and this particular recipe I've been using for years is from the Danish Karolines Køkken site.

Note that the bases of these coconut cookies can be dipped into melted dark chocolate - I've never bothered, however. They're exquisite the way they are..

Kokosmakroner - Danish Coconut Macaroons(Kookosmakroonid)
Yields about 4 dozens


50 g butter, cubed
4 egg whites
250 g caster sugar
250 g unsweetened desiccated coconut
1 tsp vanilla extract or seeds from 1 vanilla bean

Mix all ingredients in a heavy saucepan. Heat on a low heat, stirring, until all ingredients are combined (about 5 minutes).
Remove from the heat. With the help of two teaspoons, take the coconut mixture and form into small round heaps. Place on a baking sheet covered with parchment paper. Leave about 1-2 cm between cookies (they do not spread much during baking).
Bake in the middle of a preheated 200 C oven for about 10-12 minutes, until the cookies are light golden.

More Coconut Macaroons:
Chocolate-Covered Coconut Macaroons (Orangette, January 2005)Coconut Macaroons à la Dahlia Bakery (Orangette @ Seattlest, December 2005)Rochers à la Noix de Coco (Chocolate & Zucchini, November 2003)Baking With Dorie: Coconut Domes (Dorie Greenspan, September 2007)Lemon Coconut Macaroons (Alpineberry, May 2007)Barefoot Contessa's Coconut Macaroons (Alpineberry, April 2006)Lampreia Coconut Cookies (Tastingmenu, April 2005)Coconut Macaroons with Lime and Orange (Anne's Food, January 2006)Very Coconutty Coconut Macaroons (Kitchen Chick, January 2007)Coconut Macaroons with Condensed Milk (Carrie's Cooking Adventures, December 2007)

Thursday, December 13, 2007

Estonian Christmas Recipes: Pickled Pumpkin

During Christmas all self-respecting Estonians feast on black pudding, roasted pork, sauerkraut and roasted potatoes. These are accompanied by lingonberry jam and pickled clove-scented pumpkin. At the end of the feast we nibble on piparkoogid (that's Estonian gingerbread cookies) and caramelised almonds and sip copious amounts of hõõgvein (mulled wine/glühwein/glögg). And then we're off to do some cross-country skiing in the midst of our beautiful pine forests to burn off all those calories. Well, some of us :)

I must admit this was the first time I pickled my own pumpkin - usually we have my mum's or grandmother's pumpkin on the Christmas table. I'm not even particularly keen on pickled pumpkin per se, but couple of yellow chunks alongside another portion of black pudding is kind of semi-required. My university friend Piret dropped by the other day and brought me a small pumpkin from her parents' country home. When trying to think what to do with this beauty of a pumpkin, somehow, this year, I really wanted to make my own pickled pumpkin. Here's the recipe I came up with. And it's not half as bad, believe me..

Pickled Yellow Pumpkin, Estonian Style
(Marineeritud kõrvitsasalat)
Makes 3 half-litre jars


1 kg prepared pumpkin/winter squash (see below)
1 L water
200 g sugar
1-2 cinnamon sticks
5 black peppercorns
1 whole cloves
5 allspice berries
fresh gingerroot, about 2-3 cm, peeled and sliced (optional)
2 Tbsp vinegar (30% strenght)

Cut the pumpkin into wedges, then peel, remove the soft bits and seeds. Cut the flesh into small chunks or sticks (even julienne, if you can be bothered). You need about 2 pounds or 1 kilogram of pumpkin chunks/sticks.
Mix water, sugar, cinnamon stick, gingerroot, black peppercorns, allspice and whole cloves in a large saucepan. (You may add a teaspoon of salt to the marinade, but it's not necessary). Bring to the boil, then add the vinegar and then your pumpkin.
Simmer on a moderate heat until pumpkin pieces have become translucent, but not too soft and mushy.
Transfer the pumpkin with a slotted spoon into sterilised jars, then pour the hot marinate over.
Close and keep in the fridge or very cold larder. Wait for about a week before eating, so the flavours could really mingle.

Wednesday, December 12, 2007

Sesame and Lemon Chicken Recipe

Somebody somewhere commented that my blog is very nice, but a bit baking-heavy. Well, I cannot help it. I consider myself to be a much better baker than a cook. And with Christmas around the corner, I'll be baking and baking and baking. According to the traditions, one must have seven different types of cakes and cookies on the Christmas table, so I must obey - and keep up a certain reputation I've acquired among my family and friends:)

But just to show I can cook as well, I'm going to post a non-baking recipe today and tomorrow. Tonight I start off with a very easy supper recipe for Sesame and Lemon Chicken. I discovered the recipe from a tiny cookbook by Tami Lehman-Wilzig & Miriam Blum, called "The Melting Pot: A Quick and Easy Blend of Israeli Cuisine" - a gift my friend Hille brought me back from her trip to Israel few years ago. I've made this dish couple of times, and can really recommend it. Again, I love the easiness of this dish, the subtle lemon flavour and the crunch of sesame seeds in my mouth. And I know that kids like this, too - I've checked!

Aitäh raamatu eest, Hille!

Sesame and Lemon Chicken
(Sidruni-seesamikana)
Serves 4


4 small to medium chicken fillets
half a lemon
0.5 tsp salt
0.25 tsp black pepper
1 egg
6 Tbsp plain flour
3 Tbsp sesame seeds
3 Tbsp breadcrumbs
vegetable oil for frying

Flatten the chicken fillets slightly by placing them between two sheets of clingfilm and gently beating them with a rolling pin. Place in a large shallow dish, season with salt, pepper and lemon juice on all sides. Cover and leave to marinate for half an hour in a fridge.
Break the egg into a soup plate, whisking it a little.
Place flour into another plate.
Mix sesame seeds and breadcrumbs on the third plate.
When ready to cook, toss the chicken fillets, one after another, in the flour, then quickly dip into the egg, and finally press into the sesame seed mixture, to ensure they're covered evenly.
Heat oil in a large skillet/frying pan over moderate heat, and cook the chicken fillets on both sides until golden brown and cooked through.
Serve with lemon slices, steamed rice and some steamed broccoli or other vegetables. Or simly with some dressed salad leaves.

Monday, December 10, 2007

Juhhei! I'm a 2007 Food Blog Awards finalist!


I've just read over at Wellfed Network that Nami-nami is one of the five finalists in the RURAL category of the 2007 Food Blog Awards. How exciting and what an honour!


I must admit that I was a wee bit baffled at first, as I consider myself a 100% city girl. But then I guess my frequent mushroom forageing trips (for saffron milkcaps, yellow morels and others), my proud and fruitful forest berry picking missions (lingonberries, bog bilberries, wild strawberries, cranberries, cloudberries - all regulars in our kitchen in one form or another) and general exploratory-culinary use of wild plants (making meadowsweet cordial, enjoying nettle soup, experimenting with ground elder pie, dressing up dandelion leaves and adding chopped wild garlic leaves to salads, drinking freshly collected maple sap and sweetening my tea with either dandelion 'honey' made of dandelion blossoms or flowering quince extract), not to forget my exciting encounter with these chicks (you can see more chicken photos here) - do give my blog and my cooking a slightly rural slant :)


It's a tough competition - I'm running against very strong (and rural:) Susan (Farmgirl Fare, who won the category last year) and Ilva (Lucullian Delights, also a finalist last year). In any case, I'm thrilled and pleased to have been nominated in the first place! I am very pleased to see many of my favourite foodbloggers as finalists in other categories - there's David Lebovitz running for Best Food Blog (Chef) category, Food Blogga's Susan for Best Food Blog (New) category, Bea, Matt and Meeta (how can one possibly choose between them???) for Best Food Blog (Photography), Susan (again!) and Molly for Best Food Blog (Post), Jeanne in Best Food Blog (Writing), and Heidi, Bea and Ilva in Food Blog of the Year category. I'm sad my blogging buddies Johanna, Melissa, Kalyn, Nicky and Alanna didn't end up in the finals, but then there's always next year :)


In any case, you can go and cast your vote until Friday, December 14th. For rural category, click here, for all other categories, see here.

Wednesday, December 05, 2007

Nigella Lawson's Rosemary Loaf Cake Recipe - rosmariinikeeks

Rosemary, you see, doesn't just complement hearty lamb dishes and fruity carrot and orange salads and tender potato focaccia. It's a versatile herb that can also be added to desserts, like this sweet rosemary loaf cake by the original domestic goddess. The recipe is from Nigella's book How to Be a Domestic Goddess: Baking and the Art of Comfort Cooking. I've played with the amount of flour - we do not use self-raising flour here in Estonia, so I've had to add baking powder to the recipe. We really enjoyed the cake, even if the idea of rosemary in sweet baking did sound curious in the beginning. But be not afraid - as Nigella herself says, 'there is something muskily aromatic about [rosemary] against the sweet vanilla egginess of the cake'. Exactly.

Nigella suggests you eat this with cold stewed apples. We spooned some softly whipped cream over sliced cake instead.

Nigella Lawson's Rosemary Loaf Cake
(Nigella Lawsoni rosmariinikeeks)
Serves 10


250 g soft butter
200 g caster sugar
3 large eggs
300 g plain/all-purpose flour
3 tsp baking powder
pinch of salt
1 tsp vanilla extract
2 tsp finely chopped fresh rosemary
4 Tbsp (1/4 cup) milk

Preheat the oven to 170 C (325-350 F).
Mix flour, salt and baking powder.
Cream the butter until softened, add sugar and cream them both together until pale and smooth and light. Beat in the eggs one at a time, folding in a spoonful of flour after each addition, then add the vanilla extract. Fold in the rest of the flour and finally add the rosemary.
Thin the batter with the milk - you're aiming for a soft, dropping consistency.
Pour the batter into a buttered (or lined with parchment paper) 450 g loaf tin.
Cook for 60 minutes or a bit longer, until a cake-tester comes out clean.
Leave to cool in its tin on a wire rack. When completely cold, unmould and wrap well in foil until you need to eat it.
Keeps well for a few days.

Sunday, December 02, 2007

Cottage Cheese Muffins

Great minds really think alike.

You see, four weeks ago I made these lovely cottage cheese muffins for breakfast. Ideally, of course, I would have wanted to blog about these muffins earlier, but then I was in Budapest, spent a day on the seaside, took part in the Daring Bakers and WTISIM blog events, plus I've been spending time trying to learn how to cook from the real masters. Somehow the whole of November came and passed without blogging about these muffins..

Although I do follow Heidi's blog, it was only after making my cottage cheese muffins that I came across the recipe for Sun-dried Tomato Cottage Cheese Muffins over at Heidi's blog. Last night I decided that today is the day for my cottage cheese muffin post. Imagine my delight then when I spotted Kalyn's version of Heidi's muffins first thing this morning: Cottage Cheese and Egg Breakfast Muffins with Ham and Cheddar. You see what I'm telling about great minds thinking alike??

My version is simpler - just cottage cheese and herbs. If you fancy a more substantial version with ham or sun-dried tomatoes, check out Kalyn's and Heidi's posts, respectively.

The recipe is adapted from "Kohupiima- ja kodujuusturaamat" (100 Rooga). I've added fresh herbs that make the muffins so much more interesting, and also adjusted the quantities to fit the size of most commonly available cottage cheese tubs.

Cottage Cheese Muffins
(Kodujuustumuffinid)
Makes 12 muffins


350 g cottage cheese
2 eggs, lightly whisked
125 g butter, melted
3 Tbsp sour cream
50 g cheese, grated
a handful of chopped fresh parsley
100 g plain/all-purpose flour
2 tsp baking powder
pinch of salt

Mix cottage cheese, grated cheese, eggs, melted butter, sour cream and chopped parsley.
Mix flour, baking powder and salt in a small bowl, stir into the cheese and egg mixture.
Spoon the mixture into prepared muffin tins* and bake in the middle of 200 C oven for about 25 minutres, until the muffins have puffed up and golden.
Cool a little and serve. The muffins are even better on the following day, so they'd make an ideal picnic item (or breakfast item, of course).

* I suggest using silicone muffin pan (12 hole capacity) to make these cottage cheese muffins (I've also began using silicone muffin pan for making Molly's beautiful Bouchons au Thon, as these slip out of a pan very easily). Alternatively, use paper muffin cups, or butter your regular metal muffin tin thoroughly.

Thursday, November 29, 2007

Sea-buckthorn and apple tart


Ooops. Not only was I late with this month's Daring Bakers submission, I am also late with my WTISIM entry. Jeanne has - naughtily - chosen Topless Tarts as the theme. I made something similar to my toffee apple tart with cranberries from January. Remember the sea-buckthorn sorbet and sea-buckthorn jelly? Well, we have got lots of frozen sea-buckthorn berries in the freezer (courtesy of my grandma), so I decided to try the same toffee apple tart recipe, but replacing cranberries with sea-buckthorn berries. Furthermore, I was keen to try out the dried sea-buckthorn powder* I bought recently..

The resulting tart was scrumptious - sweet toffee apples with tart sea-buckthorn berries nicely complementing each other, plus the berries giving some extra colour to the cake. Try it!

Sea-buckthorn and Apple Tart (topless, of course)
(Õunapirukas astelpajumarjade ja astelpajujahuga)
Serves 8


Crust:
100 g butter
150 g plain/all-purpose flour
1 Tbsp sugar
2 Tbsp cold water

Filling:
4-5 smaller apples, cored and sliced
a handful of sea-buckthorn berries
7 Tbsp soft brown sugar
1 Tbsp potato starch
1 Tbsp dried sea-buckthorn berry powder

extra butter, for topping

Start by making the crust. Mix flour and sugar in a bowl, add cold cubed butter and rub between your fingers until you've got fine crumbs. Add the water (start with 1 Tbsp, as that may just be enough) to bring the pastry together. Form into a flat disc and place into the fridge for 30 minutes to cool.
Roll out the pastry on a slightly floured surface (or between two sheets of clingfilm) until 3-4 mm thick. Press into a 24 cm pie dish. Blind bake for 10 minutes in a 200 C oven.
Remove the tart crust from the oven, cover with apples and sprinkle with sea-buckthorn berries (no need to defreeze them).
Mix sugar, potato starch and berry powder in a small bowl, then sprinkle over the apples. Dot with some butter.
Bake in a 200 C oven for another 15-20 minutes, until the apples are softened and the sugar mixture has melted into a delicious toffee.
Cool a little, then transfer to a cake stand.
Dust with icing sugar before serving.

* Dried sea-buckthorn powder is exactly what it says on the packet - dried berries (incl seeds and skins), ground into a fine powder. They're full of vitamins and minerals. You can sprinkle these into your breakfast yogurt, add into fruit and berry smoothies, stir into hot cereal etc.

Tuesday, November 27, 2007

I'm a Daring Baker: Tender Potato Bread


I am late with this month's Daring Baker project, but that's not because I haven't been daring. I've spent quite a lot of time being daring in a kitchen last weekend, which wasn't mine (I'll tell you more one day), and I simply couldn't muster up enough energy to bake tender potato bread before the deadline. Today I stayed home, relaxed, and finally completed the challenge.

This month, Tanna of the My Kitchen in Half Cups blog decided we should have something baked and savoury, for a change. Since joining the ranks of Daring Bakers earlier this year I've made Jewish Purist's Bagels, a fancy Strawberry Mirror Cake, a delicious Milk Chocolate & Caramel Tart a la Eric Kayser, very comforting Sticky Buns & Cinnamon Buns, and elegant Bostini Cream Pies. This month we baked bread. And not any bread, but tender potato bread. The recipe is from Home Baking: Sweet and Savory Traditions from Around the World, a book by Jeffrey Alford and Naomi Duguid, and can also be found here on Tanna's blog.

And so this afternoon I peeled some potatoes, boiled them until tender, drained and pressed through a fine sieve. Then mixed and stirred and kneaded and waited and folded and formed, and finally enjoyed some lovely moist potato bread with a beautifully chewy-soft texture:


I made a large focaccia and some small potato buns (sprinkled with caraway seeds). K. and I enjoyed the bread alongside a bowl of hot borscht (same recipe, just cabbage-less), and were feeling very happy indeed.

Thank you, Tanna, for a lovely challenge - and sorry for completing it a bit late..

Sunday, November 25, 2007

Lovescool's Lovely Matcha Cookies


This is a story of a price-winning and very popular recipe. Lovescool's Kelli came up with a recipe for Green Tea Shortcakes, which won a Golden Scoop Award earlier this year. Then Fanny made them in France. Edith in Singapore. And then Mae and Inne in England. And Maddy in the sunny Los Angeles, and Lisa in sunny Sydney. Valentina on far-away Mauritius enjoyed them. Veronica made them. Carlos in Spain made them. Maribel liked them, and Mandy liked them. And now they've been made in Estonia by yours truly. I changed the recipe ever so slightly, using fine caster sugar instead of confectioner's sugar (I simply didn't feel like powdering my own at the moment, especially as the sugar I had was very fine indeed). I also listened to Mae's advice and reduced the temperature a little to make sure my cookies wouldn't brown too quickly. Here's my version - check out Kelli's post for the beautiful original recipe.

These are really lovely with a cup of green tea - sweet, with a hint of bitterness from matcha. Crisp and delicate. Elegant and beautiful.

Matcha Cookies
(Matcha küpsised)
Makes about 4 dozens


150 g fine caster sugar
1 Tbsp matcha (Japanese green tea) powder
140 g butter
185 g all-purpose flour
3 large egg yolks

Mix caster sugar and matcha powder in a bowl.
Cut butter into cubes, place into the bowl of a Kitchen Aid mixer. Add sugar and matcha mixture. Using the paddle attachment, cream until the mixture is crumbly.
Add flour, mix quickly. Add eggs one by one, mixing briefly after each addition.
Press the moist crumbs into a ball, cover with a clingfilm and place into a fridge to cool for about 15 minutes.
On a slightly floured surface, roll the pastry into 5 mm thickness, using your rolling pin. Use a cookie cutter to cut out various shapes.
(It's easiest to work with a smaller piece of pastry at the time, keeping the rest in the fridge).
Place the cookies into a baking sheet covered with parchment paper. Bake at 165 C until the cookies are slightly golden around the edges. Take the cookies out, transfer with the parchment paper onto a metal rack to cool. The cookies will harden and crispen as they cool.

Other Matcha recipes on Nami-nami:
Matcha and Dark Chocolate Truffles (November 2006)
Green Matcha Loaf (February 2007)
And a photo of Mont Fuji cake in Mariage Frères in Paris.

NB! Matcha-pulbrit saab Tallinnas osta Piprapoest (Liivalaia 43), kus 30grammine pakk maksab 135 EEK.

Friday, November 23, 2007

Wednesday, November 21, 2007

Beef and Beer Oven Stew aka Finnish Merimiespata

Meremehehautis ehk veiselihahautis kartuli ja õllega. Sjömansbiff. Sailor's stew.
Photo by Juta Kübarsepp for the November 2013 issue of Kodu ja Aed magazine.

Last Sunday K. and I headed to a small village called Pedaspea in the beautiful nature reserve Lahemaa in Northern Estonia, to spend a day with his friends cooking, eating, walking, playing Scrabble and generally catching up. We were supposed to bring along the main course, and thus we spent hours last week trying to decide what to make. Eventually we packed along our trusty old 5-quart cast-iron cooking pot (Dutch oven?), my sharp cook's knife, and picked up some nice beef from our local butcher and some potatoes, a bottle of beer and a pot of thyme from the grocery store.

After an hour's drive we arrived in the beautiful location on the seaside, regretting that the weather wasn't good enough for a quick swim, as the house is about 20 metres from the sea:) We then unpacked our groceries, sliced and fried and layered and seasoned the meat and veg, carefully placed our cast iron pot into the oven full of hot coals, and ventured out for an hour to explore the surroundings.

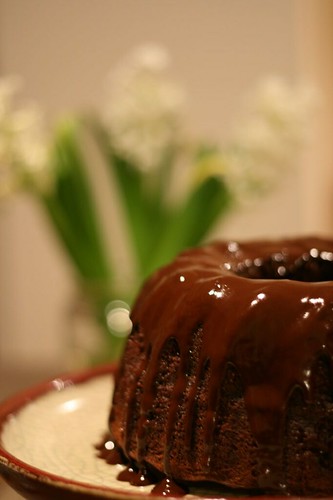
When back, the hosts Ellen and Jaan served us two dishes from Tessa Kiros' beautiful book on Italian food, Twelve: A Tuscan Cookbook. For starters, we had grilled bread with stewed Savoy cabbage (Crostone di Cavolo). And for dessert we enjoyed her Almond Cantucci together with Zabaglione that I had the pleasure of whipping up quickly. And in between those two beautiful dishes we savoured our main course, a Beef and Beer Oven Stew. The recipe I used (actually recipes, as I used three slightly different ones to come up with my own version) is Finnish, and the dish is called Merimiespata or Sailor's Stew. It was my first time to make it, but definitely not the last. There are very few ingredients - beef, potatoes, onions, beer. After initial preparation you can just leave it to slowly cook away in the oven for about 2 hours. And as it already contains both the meat and the potatoes, then it's a meal on its own - no need for a side salad or such like, although crusty bread wouldn't be out of place. And I liked the slightly sharp flavour of the dish given by beer. We used a light Estonian beer (A Le Coq premium, 4.7%), but I imagine many other types of beer would be good, too.

Merimiespata aka Finnish Beef and Beer Stew
(Meremehepraad)
Adapted from various sources
Serves 6


600 g lean beef (sirloin is good)
1 Tbsp oil
1 Tbsp butter
1.5 tsp salt
1 tsp freshly ground black pepper
2 large onions
1 tsp sugar
1 kg potatoes, peeled and sliced
a 0.5 litre bottle beer (I used A Le Coq)
300 ml beef stock
a bay leaf or two
fresh thyme, to garnish

Lay half of the potatoes into the iron-cast cooking pot, season lightly with salt.
Cut the beef cross-wise into 1.5 cm slices. Heat oil and butter on a heavy frying pan on a high heat, brown the meat slices on both sides (about 3-5 minutes). Season with salt and pepper and place on top of the potatoes.
Peel and halve the onions, slice thinly. Fry gently on the frying pan for about 5 minutes, then add sugar and fry for another 4-5 minutes, until onions are translucent and softened. Take care not to burn them! Scatter on top of the beef slices, together with any pan juices.
Cover with the rest of the potato slices.
Now pour over the beer, then add enough beef stock to just cover the potatoes.
Tuck a bay leaf into the pot, cover tightly and place either into a 175 C preheated oven for about 2 hours, or into a oven full of hot coals.
When finished, test for doneness with a sharp knife (like I'm doing on the photo here). Remove from the oven, garnish with some thyme and serve.
Can be re-heated on the next day or even on the following day.

Monday, November 19, 2007

Apple and Coconut Crisp

My mum sends us a basket full of delicious home-grown non-sprayed apples every week, and I'm therefore constantly looking for new and delicious apple cake, apple pie and apple dessert recipes. Over the years I've baked many, and hence I've got plenty of excellent apple cake and pie recipes in my 'regular' apple repertoir - Quark Cake with Grated Apples, Toffee Apple Cake with Cranberries, a simple Apple Tray Cake, not to mention my famous (Non-)Canadian Apple Cake that I've been baking for two decades. But recently another baked apple dessert found a way to this repertoire and we made it actually twice last week alone. I found the recipe from DanSukker (a Danish sugar producer) website, and only tweaked it a little. It takes almost no time whatsoever to put together, and the dessert needs just under half an hour in the oven, so it's a real quickie. And the fact that we made it twice in a row should indicate that it's also a delicious one :)

Maarja Sloveenias tegi ka seda õuna-kookosevormi juba ja kiitis heaks. Loe lähemalt siit.

Apple and Coconut Crisp
(Õuna-kookosevorm)
Adapted from DanSukker
Serves 6


500 g not-too-sweet apples, (peeled*), cored and quartered
3 eggs
200 ml sugar
100 ml plain/all-purpose flour
250 ml (1 cup) grated coconut (desiccated coconut)
100 g (just under 1 stick) butter, melted (plus extra for greasing)

Beat the eggs with sugar until foamy and pale, about 5 minutes with an electric mixer.
Mix flour, grated coconut and fold into the egg mixture.
Gently stir in the melted and cooled butter.
Layer the apples in a greased 25 cm oven dish, so the bottom would be covered.
Pour the batter over the apples and bake in a preheated 200 C oven for about 20-25 minutes, until golden brown.
Take out of the oven, and cool a little. Serve lukewarm with vanilla ice cream, crème anglaise or lightly whipped cream.

* Peeling is not necessary when using non-sprayed apples from your own orchard or organically grown apples from a reputable source. Simple rinsing will do in those cases.

Saturday, November 17, 2007

Nigella Lawson's Cheesy Feet

One of the first posts on Nami-nami back in July 2005 was about feet-shaped cheesy cookies, sprinkled with caraway, poppy or sesame seeds. The idea was derived from gorgeous Nigella's beautiful book Feast: Food That Celebrates Life. Back then I nicked Nigella's idea, traced down feet-shaped cookie cutters, but used one of my favourite cheese cookie recipes instead of Nigella's recipe. I thought it's time to use my feet-shaped cookie cutters again, and finally test Nigella's original cheesy feet, sorry, cheese cookie recipe.


I must admit I prefer my old and trusty cheese cookie recipe, especially the caraway-sprinkled version. But Nigella's recipe yields lovely, crumbly cheese cookies that would be a great nibble, whether feet-shaped or not.

Cheesy Feet
(Nigella Lawsoni juustuküpsised)
Yields: 20 cookies


100 g Cheddar cheese, grated
25 g soft butter (salted is fine)
50 g plain/all-purpose flour
0.25 tsp baking powder

Preheat the oven to gas mark 6/200C.
Place all ingredients into a food processor and blitz until comes together. (If you haven't got a food processor, then mix gtated cheese, soft butter chunks, flour and baking powder in a bowl and work between your fingers until combined). Form a flat disc, wrap in a clingfilm and let it rest in the fridge for 15 minutes.
Roll the rested dough on a floury surface to about 3 mm in thickness, and cut out your feet with feet-shaped cookie cutters (I used my 3 cm long cookie cutter). You can keep re-rolling this dough and cutting out feet until it is all used up.
Put them on a lined baking sheet and cook in the preheated oven for 10 minutes, until slightly golden on edges (NB! Overcooked cheese cookies taste nasty and bitter, so take them out of the oven when still light golden).
Transfer the cookies to a metal rack and allow to cool.

Friday, November 16, 2007

Old-fashioned Soups: Pumpkin Soup with Semolina

With Halloween just a fortnight behind us, there may still be an odd wedge of pumpkin in your fridge. I made a pumpkin risotto recently, and had had a lone half of a orange-fleshed pumpkin waiting in the fridge ever since then. I thought of re-making Johanna's roasted pumpkin and blue cheese quiche again. Or the simple pumpkin soup with vegetable stock. But eventually I decided to make something very unusual (to my international readers), yet typically Estonian. Milk soups - either with various grains (rice, semolina, pearl barley), pasta (macaroni or vermichelli noodles), or even vegetables (just like this beautiful summer soup by Deinin) are all common in Estonia. Granted, with the general increase of living standards and international influences, these humble soups do not enjoy the popularity they once did, but they're still very much part of the culinary heritage.

This milk soup with pumpkin and semolina can be eaten for breakfast, as a dessert or just as a light meal. It's best served warm, with a spoonful of jam, a dollop of butter or a drizzle of pumpkin seed oil (like I did), or even maple syrup (like K. did).

Ka Thredahlia tegi hiljuti kõrvitsa-mannasuppi - retsepti leiate siit. Ja ka Nami-nami blogisse võib kommentaare jätta eesti keeles:)

Milky Pumpkin Soup with Semolina
(Kõrvitsa-piimasupp mannaga)
Serves 4


500 ml milk (~ 2.5%)
300 ml water
350 g pumpkin flesh, coarsely grated
20 g or about 1.5 Tbsp wheat semolina (Cream of Wheat)
0.5 tsp salt
2 Tbsp demerara sugar

Bring milk and water to the boil in a heavy saucepan. Add pumpkin, reduce heat a little and simmer, stirring regularly, for about 15-20 minutes until pumpkin is softened.
Sprinkle in semolina, stirring to avoid lumps. Season with salt and sugar, reduce the heat further and cook for another 5 minutes, until semolina has expanded and softened.
Serve in small bowls.

Thursday, November 15, 2007

Budapest: Café Gerbeaud and Dobos Cake

I needed to attend a meeting last Friday in Budapest, so I flew over on Thursday morning to do some sightseeing. I stayed in a very conveniently located Starlight Suiten Hotel on Merleq utca, unpacked and headed to town. I had been to Budapest before, but that was dozen years earlier, so it was nice to wander the streets again - it's a rather grand city. And just like Vienna, Budapest is famed for its cafe culture, so I headed to one of the heavy-weights, Café Gerbeaud in Inner Pest.


The place is indeed opulent, as Rick Rogers states in his Kaffeehaus - all golden wall decorations, heavy curtains and fancy chandeliers. There were four large salons, some smoking, some non-smoking, each packed with locals and tourists alike (Gerbeaud can sit up to 330 guests in its salons, and another 300 on its open-air terraces, so we're talking about a huge café here!). As it was 4pm by that time, I decided to have both coffee and my dinner, so I ordered a home-made goose liver terrine with Tokaj wine, roasted endives and walnut dressing (above) to start with, and the famous Hungarian cake, Dobos Torte (below), to finish. The goose liver terrine was very nice - I liked the sweet Tokaj dressing that it came with, as well as the light-textured small brioches. The portion was too large to my liking, however - goose liver is quite a mouthful to eat, so I could only finish two slices (and I was hungry, believe me!).


But the cake? Well, I was expecting something much more impressive. The cake sure looks grand - it consists of five thin discs of vanilla sponge cake, layered with chocolate buttercream icing. The cake is then covered with wedges of caramel-glazed cake. Beautiful! My favourite bit was the caramel-coated top layer. Other than that I thought the cake was too sweet, too rich and utterly non-interesting. I'll choose a slice of moist Estonian layered honey cake any time :)

But seriously, now. Was I disappointed because the Dobos Cake as such isn't to my liking? Or was the chief konditormeister at Café Gerbeaud not doing the job properly that day? Unlikely, considering that their website mentions Dobos Cake as one of their specialties, and Rick Rogers claims that "In Hungary, the name Gerbeaud is so famous as a sign of quality in baking that it is worth millions". I will still pop by in Café Gerbeaud next time I'm in town - the atmosphere was very much to my liking, their boozy María Teresa coffee excellent, and I didn't even get to sample their pretty handmade bonbons - but I'll opt for Esterházy Slice or Gerbeaud Slice instead.

However, if somebody could tell me where to get the best Dobos Cake in Budapest, I'd appreciate that. I may be back soon.

Gerbeaud House
Vörösmarty tér 7.
1051 Budapest

Wednesday, November 14, 2007

Beetroot Soup with Goat's Cheese

Last night we celebrated K's birthday by inviting my parents and his mum and auntie over for a dinner. We started with this bright and nourishing beetroot soup, followed with a filling boeuf bourgoignon to please my dad (he did enjoy the beetroot & ginger cake he was served last time he visited, but he was still disappointed that there was no 'proper food' last time). We then entertained our dear guests with Piña Colada Espuma (second helpings for all the ladies, and if my dad hadn't been the designated driver, he would have probably helped himself to the seconds, too), and finished with a cup of coffee and a fancy peach souffle made by the birthday boy himself. A very enjoyable evening indeed..

I wrote about a beetroot soup only recently (Vegetarian Borscht, September 2007), but this is totally different, and just as nice. The recipe is straight off the Finnish Ruokala.tv site - Punajuuri-vuohenjuustokeitto* - the only difference is that I weighed the parsnip and celeriac to make the recipe more 'exact'. Not that it's necessary here, so if you wish, just play around with the amounts of various root vegetables in the soup. Also, the original recipe suggests you crumble the goat's cheese into the soup to make it more creamy, but I had bought a wrong goat's cheese for that purpose, so I just sliced the cheese and placed on top of the soup.

Maarja Sloveenias tegi ka seda peedisuppi ja kiitis heaks. Loe lähemalt siit.

Beetroot Soup with Goat's Cheese
(Peedi-kitsejuustusupp)
Serves 4-6


1 onion, finely chopped
olive oil
300 grams raw beetroot
50 grams raw parsnip
50 grams raw celeriac/root celery
1 Litre vegetable stock (I used 4 tsp Marigold vegetable bouillon and hot water)
100 grams soft goat's cheese, crumbled (or goat's cheese with rind, sliced)
salt
coarsely ground black pepper
fresh parsley, chopped

Peel the onion and chop finely.
Peel the beets, celeriac and parsley, and chop finely or grate coarsely.
Heat the oil in a heavy saucepan, add the onion and saute for about 7-8 minutes, until it starts to soften. Add the beets, celeriac and parsnip and heat for a few minutes, stirring every now and then.
Add the hot bouillon, reduce heat and cover. Simmer for 20-25 minutes, until vegetables are softened.
Cool a little, then process with immersion blender until smooth. Add the crumbled goat's cheese (reserve some for garnishing), season with salt and pepper.
Divide into small soup bowls, garnish with extra cheese and some herbs.

* Kui see retsept Eesti lugejatele tuttav tundub, siis tõesti on tegemist sama supiga, mida Angeelika Kang tegi esmaspäevases Terevisioonis ja mille retsept ilmus viimases Oma Maitse numbris. Aga meil oli menüü juba eelmisel nädalal paigas, nii et jäin oma esialgsele supivalikule kindlaks :)

Tuesday, November 13, 2007

Espresso Caramels, sweetened with honey


Heidi started it all in September. I made a mental note of the recipe. Then Joe praised them in early November. I printed out the recipe. And when Anne made them last week, I finally took out that glass of honey from the cupboard.

Excellent chewy-soft-coffee-honey-caramels. I sprinkled some extra Maldon sea salt flakes on top, but otherwise it's Heidi's recipe. Thank you, Heidi (and Joe and Anne!)

Honey-Espresso Caramels
(Pehmed mee-kohvi karamellid)


250 ml (1 cup) heavy cream (35-40% fat)
250 ml (1 cup) honey
1 Tbsp ground espresso coffee (I used Lavazza)
1 tsp Maldon sea salt, plus extra to sprinkle

Mix cream, coffee and salt in a small heavy-bottomed saucepan. Warm until almost boiling, then add the honey, and bring to a boil.
Lower the heat a little, and boil until you can do a firm ball test (a drop of the caramel in cold water should be a fairly firm ball). Keep an eye on the mixture, as you may need to stir occasionally to 'calm it'.
Use a candy thermometer - it should reach the hard-ball stage*, or 126ºC (260ºF). Be patient - it may take up to an hour!
Remove from the heat and let it cool a little, then pour onto a slightly greased parchment paper. When hardened to required consistency (it's a hard ball mixture, so it'll be hard, yet chewy), cut into small candies and wrap them in parchment paper or special candy wrappers.

* To test for the hard-ball stage, drop a small amount of mixture into very cold water. It should form a hard ball that is hard enough to hold its shape yet is pliable.

Sunday, November 11, 2007

Fennel Seed Bread Recipe


In one of my regular lunch joints, Bestseller Cafe in Viru Keskus (Tallinn), they sometimes serve soup with large chunks of fennel seed bread. Although I'm in somewhat uneasy terms with things aniseedy and liquoricey, I do like that spicy bread a lot. And therefore I couldn't help but try the fennel seed bread recipe that Clivia posted last month. Granted, I changed the recipe - originally from a Swedish baking guru Anna Bergenström - a little (omitting sunflower seeds, making two loaves instead of one, adding salt later in the process, etc), but it's still thanks to Clivia that I've discovered another keeper-recipe. Tack, Kristina!!!

Fennel Seeds (Foeniculum vulgare Mill., apteegitilliseemned ehk ristköömned) are a great spice to use in baking, bread, compotes, pickles and liqueurs, but can also be used to season fish dishes, salads and sauces. If you're interested in fennel seeds' medicinal properties, then you should remember that the seeds are also good for your digestive system and can ease the symptoms of a bad cough.

Fennel Seed Bread
(Apteegitilliseemnesai)
Makes 2 loaves


25 grams fresh yeast
1 Tbsp honey
400 ml tepid water
600 g plain flour (1 litre/about 4 cups)
1 tsp salt
2 tsp fennel seeds, slightly crushed

Crumble the yeast into a large bowl, add honey and stir, until yeast and honey melt into one. Add the tepid water, stir again.
Now add most of the flour, as well as salt and crushed fennel seeds. Stir with a wooden spoon until combined, adding more flour, if the dough is too wet. (I kneaded the dough for 5 minutes in my KitchenAid, then another 2 minutes by hand).
Cover the bowl with a clean towel or clingfilm and let dough rise in a warm, draft-free place about one to two hours, until double in bulk.
Punch down dough. Divide it into two equally sized pieces. Form each dough piece into an oblong loaf on slightly floured surface.
Line a baking sheet with a parchment paper, and lift the dough pieces onto the baking sheet.
Heat the oven to 250 C, and let the dough rise for another 15-20 minutes.
Bake the loaves in the middle of the 250 C oven for 15 minutes, then lower the heat to 150 C and continue baking for about 20 minutes longer, until the bread is light golden brown, and the bread sounds 'hollow' when you tap onto the bottom.
Let cool on a metal rack, loosely covered with a towel.

Thursday, November 08, 2007

K is guest-blogging about Cannelés, those little caramelised, irresistible buns from Bordeaux

[Pille is off to Budapest for a few days, so K. is using the opportunity to guest-blog again..]

Few years ago I took some French language courses in the city of Bordeaux, and opted for accommodation with a local family. I ended up staying with an excellent old-school French hosts: a retired couple Marie-Lucie and her husband Jean-Pierre, who had accommodated over hundred language students over the years.

Just before my arrival, the family had accommodated a student from Saudi Arabia, for whom it was the first trip outside his home country. Coming from deeply religious surroundings he couldn’t eat pork or drink wine. Seeing students from all over the world, always joyful Marie-Lucie was used to different cultures. But she also adored cooking and eating traditional and delicious French food, including some Clairet wine and hearty pork dishes... Sitting together at a dinner table was a sacred tradition for Marie-Lucie and Jean-Pierre. You can imagine how relieved they were to welcome a hungry Estonian guy appreciating everything her kitchen had to offer. In turn, I was ready to learn and be seduced by the Bordeaux cuisine.

During my two-week stay we savoured four-course dinners at home almost on a daily basis. The entire house was open for guests, except the kitchen in the mornings. It was behind these closed kitchen doors that Marie-Lucie and Jean-Pierre decided on the evening's menu. Most of the recipes were kept as small handwritten notes in huge plastic boxes labelled “poissons/crustaces”, “viande”, “entrées/legumes” etc (see photo on the right).

As expected, I could not keep myself out of the kitchen, and I learned many things. For example, do you know what the secret of happy marriage is? If wife and husband do not have an argument about finances, but argue about the perfect recipe for Tomates Antiboise. Jean-Pierre put the capers together with canned tuna into a blender. While I asked tête-à-tête from Marie-Lucie whether it would be better to chop the capers, she said that when they had been younger, she had a big argument with Jean-Pierre about this fundamental issue and she personally thinks that the capers should be chopped with knife instead of crushed in blender. But now, after several decades of conjugal life, she has given up and lets her beloved husband to do like he wants. On the other hand, although Jean-Pierre liked tête de veau, a French classic dish so vividly described in A Cook's Tour by Anthony Bourdain, and knew how to make it, it was a forgotten delicacy in the family as Marie-Lucie was not particularly fond of it.

I also had breakfasts at their home, enjoying different jams and cheeses. One weekend morning I was served innocent-looking buns that tasted superb. Before even noticing, I was already reaching for the fifth bun. Later I have learned that substantial quantities of cannelés can vanish very quickly in the presence of children and grown-ups alike. This was my first experience with cannelés, a miracle bun from Bordeaux that has not only an extensive Wikipedia entry in English, but even several dedicated web sites in French. Cannelé has interesting history, wrapped in the mystery.

This simple pastry, made of eggs, milk and flour flavoured with rum and vanilla is currently hugely popular both in Aquitaine and Gironde, with hundreds of producers. But as it turns out, it is rather easy to bake at home. Marie-Lucie kept always the batter on hand when the grandchildren were visiting, because they always asked for cannelés.

Traditionally, cannelés are baked in special metal fluted moulds (cannelé means 'fluted'). We have got silicone moulds at home - they are easier to handle, even if they don't yield as caramelised crust as metal moulds do. Usually 8 cannelés can be made with one mould and I strongly recommend buying at least two. If you're based in the US, then you can buy tin-lined copper cannelé molds and silicon mini cannelé molds - both by Matfer Bourgeat - from Amazon.com.

Cannelés
(Cannelé koogikesed)
Makes 16


500 ml milk
25 g butter
100 g plain/all-purpose flour
a pinch of salt
250 g sugar
4 egg yolks and 2 egg whites
1 Tbsp of rum
2 tsp of Bourbon vanilla extract

Whisk sugar, eggs and flour in a large bowl.
Bring milk and butter to a boil in a saucepan. Slowly whish into the egg mixture, stirring constantly.
Add vanilla.
Let cool to room temperature, then add rum.
The batter should be rather runny, just like a crepe batter.
Cover the mixture and keep it in the fridge for at least overnight or up to two days.
When ready to bake your cannelés, stir the batter again, and fill the prepared cannelé moulds three-quarters full.
Start baking at 275C, after 5-10 minutes lower the temperature to 200C and continue baking around 40-50 minutes until cannelés are dark golden to almost blackish brown*.
Extract from the moulds when cannelés are still hot. Cannelés should have a caramelised crust and be chewy, yet soft, inside.

Although I am very happy with the flavour of these cannelés, I have not yet figured out why my cannelés always 'climb' out of the moulds during baking. They finally fall back to the 'normal' size, but not always evenly, leaving the shapes somewhat uneven. I appreciate if you can give me a hint on this one.

* There seem to be two schools: those, who like cannelés golden brown outside and those who prefer them caramelised to black. At the stores in Bordeaux they are usually blackish.

You can read more about cannelés from these foodblogs: Chocolate & Zucchini, Kuidaore, La Tartine Gourmande (and Bea again), The Traveler's Lunchbox and 101 Cookbooks.

Previous guest posts on Nami-nami:
K is guest-blogging about Heston Blumenthal's perfect ice cream (August 2007)