Showing posts with label Recipes: Cakes/Muffins/Cookies. Show all posts

Sunday, July 08, 2018

Estonian layered curd cheese cake (kihiline kohupiimakook)

The photo is from January 2008 


We love our curd cheese cakes in Estonia - and you'll find at least five curd cheese cake recipes here on my blog. This particular one is one of the most common curd cheese cakes out there. It uses a shop-bough yellow cake mix ("Juubeli tordipulber" or "Jubileum cake mix"), making it super-quick to assemble, and many Estonian cooks would have a packed somewhere in the kitchen drawer, just in cake. I'm an avid baker, love baking from scratch, and I do, just in cake :)

I'm posting it here, as someone was looking for the English recipe and I realised I hadn't shared it yet.

It's lovely when enjoyed lukewarm, with a glass of cold milk, but it's also really nice when completely cooled and accompanied with a cup of coffee or tea or cacao.

Layered curd cheese cake

(Kihiline kohupiimakook)
Feeds 6 to 8

400 g creamy curd cheese
200 g sour cream (20% fat content is perfect)
4 eggs (L)
4 Tbsp caster sugar
1 yellow cake mix (450 g)
50 g butter
a handful of seedless raisins (optional)

Break the eggs into the mixing bowl, add sugar and whisk until thick, pale and frothy. Gently fold in the curd cheese and sour cream (and raisins, if using).

Butter a Ø 26 cm (10 inch) cake tin or springform tin.

Sprinkle 1/3 of the cake mix (still dry, in its powder form!) onto the base, then scatter small dots of butter on top.

Gently pour or spoon half of the wet mixture into the tin. Now scatter half of the remaining dry cake mix into the tin, cover with the rest of the wet mixture and then the rest of the dry cake mixture. Scatter the remaining butter on top.

Bake in the middle of a pre-heated 200 C oven for 35-40 minutes, until the cake is golden brown and cooked through.

Let it cool before serving.

Tuesday, October 18, 2016

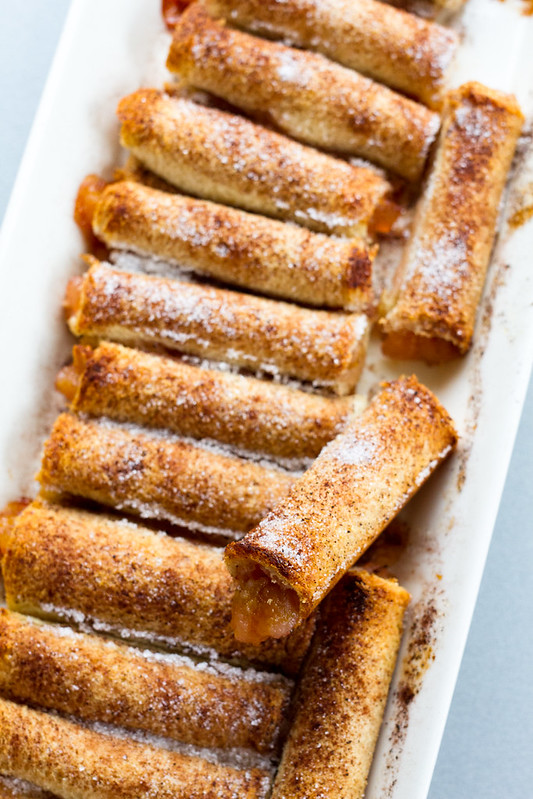
Genius Apple Rollups aka Crispy Apple Bread Cigars

Baked Apple Pie Roll Ups. Krõbedad moositäidisega saiarullid.

Those baked apple pie roll ups by Spend With Pennies turned up on social media last week and I decided to give them a go. It's a very good year for apples in Estonia this year, we're inundated with them! A good reason to try out as many new and old apple recipes out there :)

For the original recipe, see Spend With Pennies blog. Here's what I did, using homemade apple jam of course :)

Crispy Apple Roll-Ups
(Moositäidisega saiarullid)
18 "cigars"

18 sliced of white bread
thick and chunky apple jam
50 g butter, melted
cinnamon
demerara sugar or golden caster sugar

Preheat the oven to 180 C/370 F. Take a medium-sized shallow oven dish and brush lightly with melted butter.

Pour the melted butter onto a small shallow dish.

Remove the crusts off the sliced bread, then roll each slice with a rolling pin until flattened thin. Put a heaped tablespoonful of apple jam alongside one end of the flattened bread (see this pic on my Instagram), then roll tighly. Roll the rolled bread quickly in the melted butter, then place into the oven dish, "seam" underneath.

Repeat with the rest of the bread slices and apple jam. When all "cigars" are done and neatly tucked into the oven dish, then sprinkle with cinnamon and sugar (go easy on the sugar, be generous with the cinnamon).

Place the dish into the preheated oven and bake for about 15-20 minutes, until the bread cigars are golden and crispy.

Remove from the oven, let cool a little. Enjoy - eating either with your fingers, or nicely plated with some vanilla ice cream.

Tuesday, October 04, 2016

It's cinnamon bun day (kanelbullens dag)!

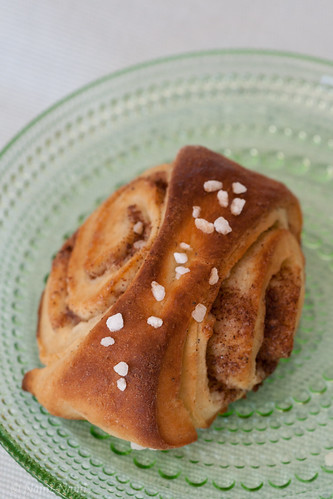
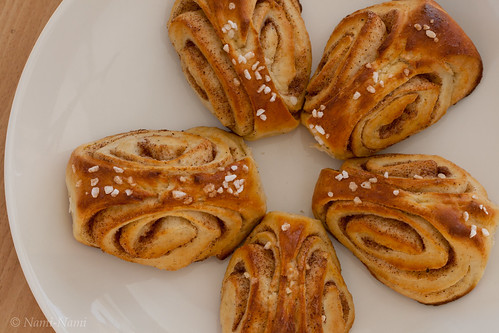
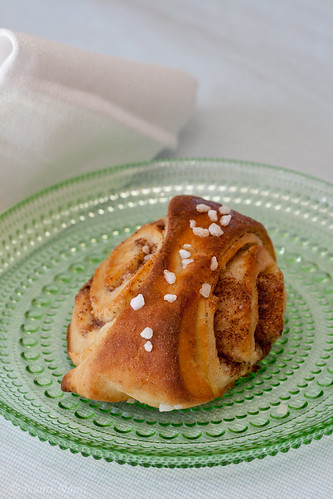
Korvapuustit / Finnish cinnamon rolls / Soome kaneelisaiad

It's Cinnamon Bun Day in Sweden today. Cinnamon Bun Day was established in 1999, or 17 years ago, when Swedish Home Baking Council (Hembakningsrådet) came up with the idea when looking for a way to celebrate their 40th anniversary. Many Swedes rush to their favourite bakery today and buy some kanelbullar - or bake their own. You'll find a good recipe for Swedish kanelbullar over on Sweden.se site (written by Anne).

I've previously given you recipe for my traditional cinnamon rolls (with step-by-step photos), as well as the hugely popular cinnamon pull-apart bread. Today's recipe is for Finnish korvapuustit ('Slapped ears') - more or less the same thing, just shaped and braided slightly differently.

Korvapuustit/Finnish cinnamon buns
(Soomlaste kaneelisaiad)
Makes about 16 large buns

Korvapuustit / Finnish cinnamon rolls / Soome kaneelisaiad

450 g all-purpose flour (about 750 ml or 3 cups)
85 g caster sugar (100 ml)
1.5 tsp ground cardamom pods
0.5 tsp salt
1 packet of fast-action dried yeast (about 11 g)
250 ml lukewarm milk (1 cup)
1 egg (divided)
75 g butter, softened

Filling:
50 g butter, softened
4 Tbsp caster sugar
cinnamon

Topping:
pearl sugar (optional)

In a large mixing bowl, mix most of the flour, sugar, cardamom, salt and yeast. Stir in the milk and about half of the egg (leave some for brushing the buns before baking). Knead in the softened butter and the rest of the flour, if necessary. Knead until you've got a soft and pliable dough that releases from the sides of the bowl. Cover with clingfilm or a clean towel and leave to prove for about 45-60 minutes, until doubled in size. (The place for proving should be warm and draught-free).
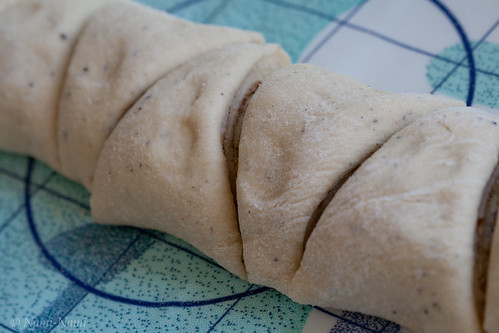
Turn the dough onto a lightly floured table, knead gently couple of times. Roll into a reclangle sized 30x60 cm. Spread soft butter over the dough, then sprinkle generously with cinnamon and sugar. Roll up tightly, starting from the long side, leaving the "seam" under the roll.

Now use a sharp knife to cut into buns, following the scheme here. The buns should be about 2 cm wide on the narrow end and 5 cm on the wide end.

Korvapuustit / Finnish cinnamon rolls / Soome kaneelisaiad

Transfer onto a parchment-lined baking sheet, placing them upright. Using your thumbs or a large pencil, press a dent into the middle of each bun, just like this:

Korvapuustit / Finnish cinnamon rolls / Soome kaneelisaiad

Cover with a kitchen towel and leave to raise for another 30 minutes in a warm place. Meanwhile, preheat the oven to 225 C/450 F.

Brush with egg wash and sprinkle with pearl sugar. Bake in a preheated oven for 10-15 minutes, until the buns and golden brown.

Take the baking sheet out of the oven, and cover the buns with a kitchen towel and let them cool (a little) - this way they remain nice and soft.

Korvapuustit / Finnish cinnamon rolls / Soome kaneelisaiad

Monday, August 08, 2016

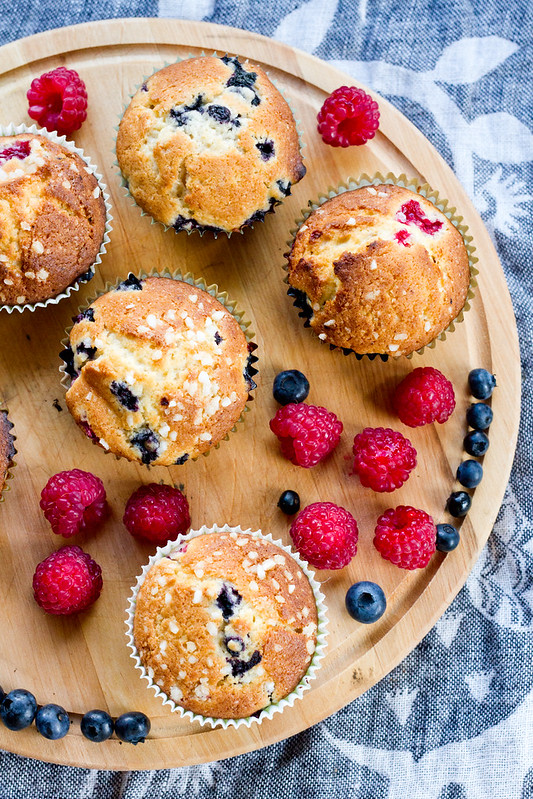
Berry muffins, fit for the Queen

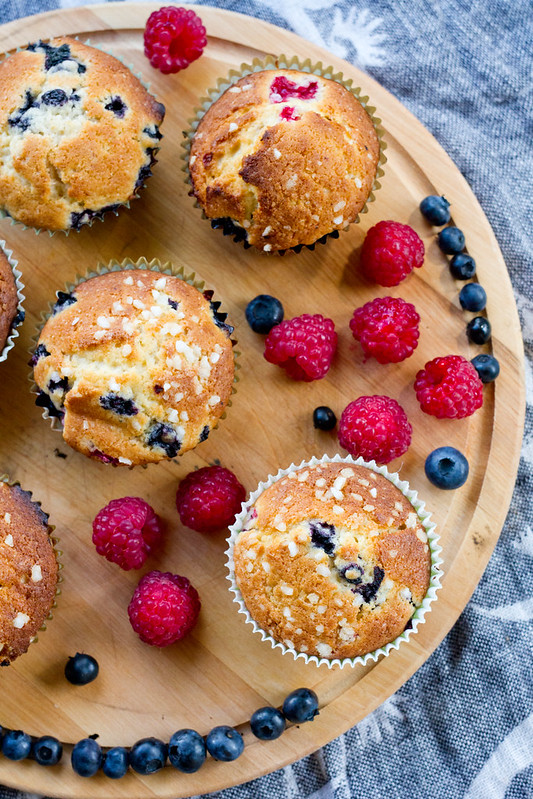
Kuningannamuffinid ehk vaarika-mustikamuffinid. Raspberry and blueberry muffins.

For some reason, our northern neighbours, the Finns, call dishes containing raspberries and blueberries (well, actually bilberries) kuningatar-this and kuningatar-that, the prefix kuningatar- meaning the queen. I'm yet to conduct research why this is so (any Finnish readers out there who know? Ritva, perhaps?), but here are some delicious summer muffins containing blueberries and raspberries - and would hence be called kuningatarmuffinsit or "queen's muffins" in Finland :)

I call them simply:

Summer Berry Muffins
(Kuningannamuffinid)
Yields 12 regular muffins

100 g butter, at room temperature
125 g caster sugar
2 tsp vanilla sugar
2 eggs (L)
50-100 ml (about 4-7 Tbsp) milk, buttermilk or kefir
120 g all-purpose flour or fine white spelt flour
60 g wholemeal flour
1.5 tsp baking powder
200 g blueberries and raspberries
pearl sugar (optional)

Cream the butter and sugars until white and soft (I use the paddle attachment of my standing mixer). Add the eggs, one at a time, and whisking thoroughly after adding each egg. Pour in the milk.

Mix the dry ingredients (flours and baking powder), fold into the egg, butter and sugar mixture.

Finally, gently fold in the berries.

Line the muffin pan with paper muffin liners, then divide the muffin mixture into the muffin cups. Sprinkle with pearl sugar, if you feel like.

Bake at pre-heated 200 C (390 F) for 15-20 minutes, until the muffins have risen and are lovely golden brown.

Let cool a little and serve.

These are best on the day they are baked. Here's a sneak peek to the inside of the muffin: my instagram muffin-pic. 


Kuningannamuffinid ehk vaarika-mustikamuffinid. Raspberry and blueberry muffins.

Tuesday, February 09, 2016

It's not Pancake Day, it's Shrove Tuesday cream bun day soon ;)

Vastlakuklid 2014
Photo by Juta Kübarsepp for the March 2014 issue of Kodu ja Aed magazine. 

It's time for semlor or lenten cream buns again soon - February 9th, to be precise. Remember, instead of pancakes, in Estonia and other Nordic countries cream-filled buns are eaten (semlor in Swedish, vastlakuklid in Estonian, laskiaispulla in Finnish). I've got three different recipes here on Nami-Nami, all delicious :)

Recipe for classic lenten buns
Recipe for chocolate lenten buns
Recipe for raspberry and marzipan lenten buns

So, are you having pancakes or cream buns next week? ;)

Saturday, March 21, 2015

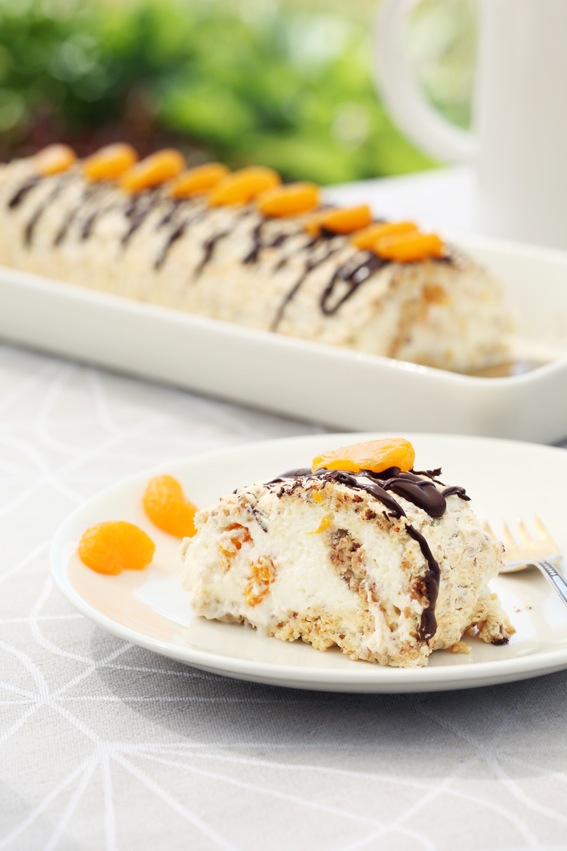
A recipe for gluten-free hazelnut meringue roulade aka Budapestrulle (Budapestbakelse)

ROOTSI: Budapestrulle. Budapest hazelnut meringue roulade.

I am writing this post while sitting on a really comfortable bed in a brand new hotel in Helsinki, called Indigo Hotel. I'm in town for a long weekend to enjoy the Streat Helsinki street food festival. The press trip is organised and hosted by Visit Helsinki, and we have been taken very good care of. This morning Heather of Heather's Helsinki took us for a coffee and Budapest cake at Karl Fazer Café at Kluuvikatu 3. The cake in question was a Budapest slice.

It's a popular cake from Sweden, attributed to a pastry chef Ingvar Strid who was born in 1926 in Vetlanda. It's a hazelnut meringue roulade filled with whipped cream and peeled clementine slices. Delicious! The version popularised by Fazer in Finland is slightly different - the clementines/mandarine oranges are replaced with bananas and raspberries. Different - and sweeter - but still nice.

Here's my version of Budapestrulle - I make the classic Swedish version. The recipe below uses a popular and widely available Swedish product, Marsán snabb vaniljsås, but feel free to replace it with cornflour or potato starch or even all-purpose flour (in latter case it won't be gluten-free, of course).

Since 2013, May 1st has officially been the Budapestbakelsensdag in Sweden.

Budapest slice
(Besee-pähklirull)

Serves 8 to 10

Meringue:
4 large egg whites
100 g caster sugar
150 ml (about 90 g) vanilla custard powder
100 g toasted hazelnuts, finely chopped

Filling:
200 ml whipping cream
1 tsp caster sugar
300 g canned mandarine oranges/clementines, drained

Decoration:
50 g dark chocolate
some canned mangarine oranges/clementines

Heat the oven to 200 C. Grease and line a shallow Swiss roulade tin/baking tray with a parchment paper.

Using electric mizer, whisk the egg whites until stiff but not try. Add the sugar in 2-3 installments, continue whisking until the mix is shiny and white.

Combine the hazelnuts and vanilla custard powder, then gently fold into the meringue mixture. Spread the mixture into the prepared tin. Bake in the middle of pre-heated oven for 12-15 minutes, until the meringue is risen and slightly golden on edges.

Take out of the oven and cool completely. Then turn over onto a new piece of parchment paper and peel off the "baked" parchment paper.

For the filling, whisk the cream and sugar until thick and fluffy, then spread over the meringue. Put some mandarine slices aside for decoration, then scatter the rest over the cream. Roll up the roulade, starting with the long end, and using the paper underneath to help. Carefully lift onto a serving dish, leaving the "seam" underneath.

Melt the chocolate, drizzle over the meringue roulade. Garnish with mandarine orange slices. To serve, cut the cake into thick slices.

The photo above is by Juta Kübarsepp, taken for my cookbook "Nami-Nami. Maailma maitsed 1" (Varrak, 2013).

Wednesday, February 18, 2015

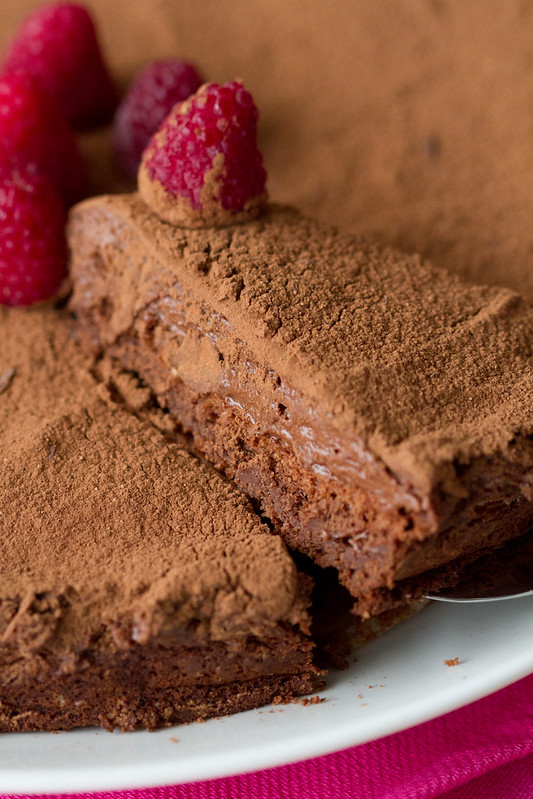
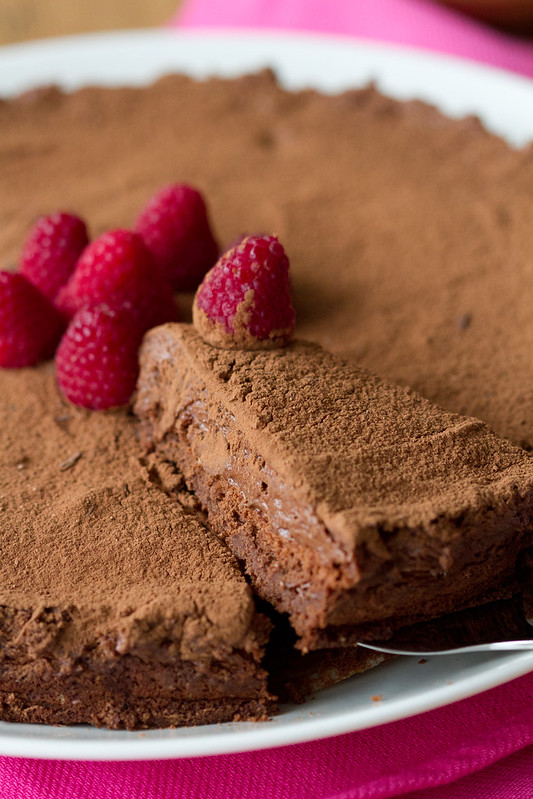
Gâteau Marcel. A recipe for a delicious layered chocolate mousse cake (gluten-free)

Gâteau Marcel. Chocolate mousse cake. Šokolaadikook.

Happy Valentine's Day to all the lovely Nami-Nami readers out there!

Today's recipe is this gluten-free and fun cake from Denmark, where it's considered to be the French chocolate cake. The recipe is from Michel Michaud, a French chef. Well, Michel Michaud was born in France in 1946, but moved to Denmark in 1971, where he introduced the Danes to the culinary delights of French cuisine. Including this cake.

I never came across this cake when living in Denmark at the tender age of 18. I only came across the cake few weeks ago, when somebody mentioned in one Danish-language Facebook group that "oh, this [cake] is very similar to Gateau Marcel." Well, I had to check out what's behind that fancy name and turned out that it's a gluten-free cake that consists of only 4 ingredients (chocolate, butter, eggs, sugar), results in three dirty bowls and one decadent two-layer chocolate mousse cake.

Intrigued? So was I - and we loved this cake a lot!

Best made on a previous day.

Gâteau Marcel 
(Eestikeelne retsept)
Adapted from several Danish-language sources, but modfied
Serves 10

Gâteau Marcel. Chocolate mousse cake. Šokolaadikook.


200 g good-quality dark chocolate (chips/pellets or chopped)
200 g unsalted butter
200 g caster sugar
6 large eggs
a pinch of salt (optional)

To serve:
cacao powder (un-sweetened)
fresh raspberries or chocolate curls

Pre-heat the oven to 175 C/350 F.

Melt the chocolate chips and butter in a bowl set over barely simmering water. Stir until combined, then cool a little.

Separate egg yolks from egg whites. Whisk egg yolks and about 2/3 of the sugar in a large bowl until pale and fluffy. In another, very clean bowl, whisk the egg whites until soft peaks form, then continue whisking and adding the sugar, until the egg white mixture is shiny and stiff.

(You've got 3 bowls now - one with melted chocolate and butter, one with egg yolks and sugar, one with egg whites and sugar).

Gently fold the chocolate mixture into the egg yolk mixture. Then fold in about a third of the meringue (aka egg white mixture) until combined, then very gently add the rest of the egg whites to the batter.

Grease a 24 cm/9 inch springform tin thoroughly with butter, sprinkle lightly with sugar or cocoa powder. Spoon up to a half of the batter into the tin, smooth the top. Bake in the preheated oven for 30 minutes. Remove from the oven and cool a little - it'll collapse a little, which is perfectly normal.

Then spoon the rest of the chocolate batter on top of the cooled chocolate cake - this will become the chocolate mousse layer. Smooth the top, then place into a fridge for at least 4 hours or until the next day.

Before serving, remove the cake carefully from the tin and transfer onto a serving plate. Sprinkle generously with cocoa powder, then decorate with fresh or frozen raspberries or fancy chocolate curls.

Tuesday, December 09, 2014

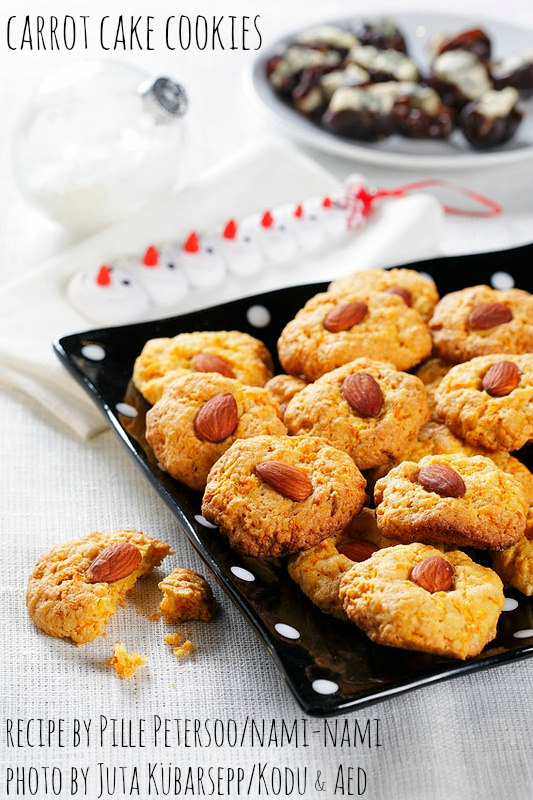
Holiday baking: Carrot cake cookies recipe

Carrot Cake Cookies. Porgandiküpsised.

Time to start preparing for the Christmas holidays and I offer you a lovely cookie recipe! Although we'll be mostly eating piparkoogid aka gingerbread cookies here in Estonia, these slightly chewy carrot cake cookies would do just as well.

For over two years now I've been contributing recipes for one of the biggest home and gardening magazines here in Estonia, Kodu ja Aed (that translates "Home and Garden"). Since spring we've been focusing on a specific vegetable both on the gardening pages and in the food section. Carrot happened to be the vegetable of the month in December. December, of course, being the Christmas month, so I was trying to think of recipes that would feel right at the Christmas table as well. I think these cookies fit the bill brilliantly. They are easy to make, go brilliantly with a glass of glögg or mulled wine, they're "healthy" as containing a vegetable (carrot is also providing both texture and flavour), and they are egg-free, making them also suitable for some special diets. Most of all, they have a pretty colour and they taste great. As an added bonus, the kids loved them - something to think about when you've got 3 small ones running around the house!

So when you're planning your next glögg party, think of adding these carrot cake cookies to the menu!

You'll find all of Nami-Nami's Christmas recipes here and a selection of cookie recipes here.

TIP! You could make these cookie more festive by adding a scant teaspoon of mixed spices, gingerbread spice or pumpkin pie spice - all of these would work.

TIP! If you forgot to take your butter out of the fridge in advance, then simply grate the cold butter into your mixing bowl. Instant softened butter! 

Carrot cake cookies
(Porgandiküpsised)

200 g butter, at room temperature (7 oz)
150 g caster sugar (2/3 cups)
200 g carrots, finely shredded (2 medium carrots)
300 g all-purpose flour (2 cups)
1 tsp vanilla sugar or extract
1 tsp baking powder
a pinch of salt
whole almonds

Pre-heat the oven to 200C/400F. Line a baking sheet with a parchment paper.

Cream the butter and sugar in a mixing bowl, either using a wooden spoon or the paddle attachment of your standing mixer. Add the carrots, then the dry ingredients (flour, vanilla sugar, baking powder, salt). Mix the dough until combined, then take small chestnut-sized chunks of the dough and form into small balls.

Place the balls onto the baking sheet, flattening them with your palm. Press a whole almond onto each cookie.

Bake for 15 minutes or until the cookies are golden brown.  Remove from the oven, leave for a few minutes before transferring the carrot cookies onto a metal rack to cool completely.

More carrot cookie recipes:
Carrot oatmeal cookies by Heidi @ 101 Cookbooks
Chocolate chip carrot cookies by Jeanine @ Love & Lemons
Gingered carrot cake cookies by Michelle @ Brown-Eyed Baker
Porgandiküpsised by Marit @ Magusad fotod (recipe in Estonian)
Porgandiküpsised by Kaare @ Koopatibi (recipe in Estonian)
Porkkanakeksit @ Kotiliesi (recipe in Finnish)

Saturday, June 14, 2014

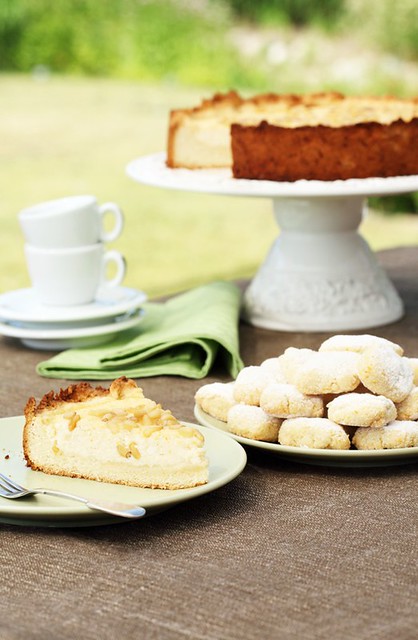
Recipe for torta della nonna, or Tuscan ricotta cake with pinenuts or almonds

Case Vecchie, Sicily

I am still in Sicily, still enjoying the hospitality of Anna Tasca Lanza’s cookery school in Case Vecchie, near Vallelunga. I’ve just got back from the most amazing garden party I’ve ever attended - just under 200 guests seated around a huge long table, set under an elegant makeshift canopy built in the middle of a vegetable patch :) 

Who knows, we may have lingered at the table for another few hours, sipping one of the extremely “quaffable” wines from Tasca d’Almerita, if it weren’t for the thunder and rain that suddenly appeared. Not really out of nowhere - the skies were threatening with rain already yesterday - but apparently heavy showers are pretty much unusual in this part of Sicily in this part of the year. In any case, I use the thunderstorm as an excuse to retreat to my room for a short while and finish another blog post. Being in the company of all those bloggers mentioned yesterday - David, Rachel and Johanna - as well as some others I met today (Elizabeth, Elisia, Alec, Anissa, Linda) - has certainly been very inspiring :)

Filippo and his ricotta.

We arrived at Case Vecchie on Wednesday evening, just in time to have dinner overlooking Fabrizia’s (she’s the owner of the cooking school) gorgeous herb garden. On Thursday morning, just after the breakfast, we ventured out to visit a local shepherd, Filippo at Azienda Agricola Rivitera. We were shown his sheep - 400 in total, milked by hand twice a day, to produce about 800 litres of sheep’s milk during peak times (winter, usually). The milk is turned into wonderfully tasty and fresh ricotta and flavoursome picurinu sicilianu or pecorino siciliano right there, at the small dairy at the premises. We were privileged to watch Filippo making the cheese, and get to taste freshly made tuma and ricotta.


Just before dinner at the courtyard of Case Vecchie (Instagram)

Back at the Case Vecchie, the location for the Anna Tasca Lanza’s cooking school, we perused some of the wonderful products at the Natura in Tasca’s produce range. I chose to bake a cake from my latest cookbook, Torta della Nonna. It’s a typical cake from Tuscany, and while the pâtisseries would fill the cake with thick custard, then at homes the grandmothers (nonna stands for grandmother in Italian :)) would use ricotta cheese. I couldn’t resist the chance to bake this cake with sheep’s milk ricotta, as it’s supposed to be. Back at home in Estonia, I’ve made it with cow’s milk ricotta or goat’s milk ricotta. It’s still lovely, though much milder in flavour. 


The Tuscan ricotta cake I baked at the Case Vecchie (Instagram)

Torta della Nonna or Tuscan ricotta cake
(Toscana ricotta-kook)

Serves eight to ten

Pastry:
100 g butter, at room temperature
85 g caster sugar (100 ml/7 Tbsp)
1 large egg
180 g all-purpose flour (300 ml/1 cup + 3 heapedTbsp)
0,5 tsp baking powder
a pinch of salt

Filling:
500 g fresh ricotta 
85 g caster sugar (100 ml/7 Tbsp)
1 lemon, juiced and zested
2 Tbsp all-purpose flour
3 large eggs
75 g pinenuts or almonds

Butter a 24 or 26 cm (9 or 10 inch) springform pan and/or line with a parchment paper. Preheat the oven to 180 C/375 F. 

First, prepare the pastry. Put the butter and sugar into a mixing bowl and cream with a wooden spoon or a mixer fitted with the blade. Add the egg, then the dry ingredients (mix these first). Spoon the dough into the springform pan and using your hands, spread the dough at the bottom and halfway up the sides - the dough is pretty soft and sticky, so you’re almost pasting it to the bottom and sides. (You may be tempted to add more flour - go ahead, if you wish, but the cake base will be somewhat denser and harder then). 

Place the springform pan into the fridge to wait, while you make the filling. 

(You may use the same bowl you made the dough in). Mix the ricotta, sugar, the juice and finely grated rind of the lemon, flour and eggs in a bowl until combined. Stir in about two-thirds of the pine nuts or almonds. 

Take the cake pan out of the fridge, pour in the ricotta filling. Sprinkle the remaining pine nuts or almonds on top.

Carefully transfer the pan to the pre-heated oven and bake in the middle of the oven for about 45 minutes, until the cake is lovely golden brown on top. 

Take out of the oven, and let it cool till room temperature before cutting into slices and serving. 


Torta della Nonna and ricciarelli cookies. Photo by Juta Kübarsepp for Nami-Nami. 

Friday, June 13, 2014

Recipe for ricciarelli, delicious gluten-free almond cookies from Siena, Tuscany

TOSKAANA: torta della nonna & ricciarelli
This photo was taken by Juta Kübarsepp for Nami-Nami, the rest are by me or my husband.  

I’m writing this post in Sicily. I’m in a lovely company of David, Rachel and Johanna, enjoying the delicious hospitality of Anna Tasca Lanza Cookery School. La dolce vita, but more about all that in future posts. I do mention that some very nice cookies were baked here yesterday, which reminded me of a lovely Italian cookie recipe I’ve got in my latest cookbook. 

San Gimignano: Agriturismo Montegonfoli

Just over a year ago, in April 2013, I had a lovely holiday in Tuscany with my dear partner and our three small kids - the youngest was just under 6 months back then. We began our family holiday in Florence, then staying in various agriturismos near San Gimignano. On my birthday we took a day trip to Siena. Everybody said that we’d love Siena, but the truth is, we were not so impressed at all - San Gimignano, Volterra, Lucca, Certaldo and the old parts of Colle di Val d'Elsa had been more charming, more real. However, we did love the ricciarelli, the famous almond cookies from Siena. They are light and soft, yet chewy, just a wee bit resistant. If you love marzipan, then you’ll love these!

Certaldo: Osteria del Vicario

Ricciarelli are wonderful with a cup of strong coffee or tea, if you’re not a coffee drinker. In Toscana, they’re a festive food, baked and eaten especially during Christmas, and dipped into a glass of Vin Santo. 

They’re gluten-free. 

Ricciarelli cookies
(Siena mandliküpsised)

300 g ground almonds/almond meal
280 g caster sugar
100 g icing sugar/confectioner’s sugar 
1 tsp baking powder
a pinch of salt
1 orange, finely zested
2 egg whites 
2 tsp almond extract (optional)

For dusting:
icing sugar/confectioner’s sugar

Mix ground almonds, caster sugar, icing sugar, baking powder, salt and the finely grated orange zest in a bowl. 

In another bowl, whisk the egg whites until soft peaks form. Add the almond mixture, folding gently to combine. You’ll have a rather sticky mixture. (Add the almond extract now, if using). 

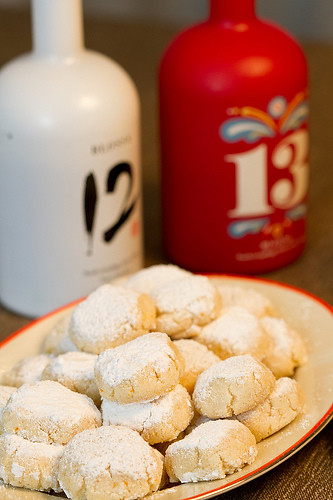
Using a teaspoon, take about 20 to 30 grams (about an ounce or so) of the mixture and form into oval/oblong patties, flattening them lightly between your palms. Place onto a cookie sheet, covered with parchment/baking paper, leaving some space between the cookies. They won’t spread a lot, but it’s better to be safe. 

Once you’ve formed all the cookies and arranged them onto the cookie sheet, dust them generously with icing sugar. Leave to dry them out at the room temperature for 1-3 hours - the bigger the cookies, the more time they need to dry. 

Bake in a pre-heated 150C oven for 20-25 minutes, until the cookies are just a little bit golden and hardened at the edges - you don’t want them golden brown, or they’ll be too crispy when they cool. You want your ricciarelli to remain soft and chewy inside!

Cool completely. These will keep for a week in an airtight container.  

ricciarelli2012


More ricciarelli recipes:
Divina Cucina
Jul's Kitchen
Lemons and Anchovies
Cook's Hideout
The Curious Baker

Saturday, June 07, 2014

Equal rhubarb cake


I've got a new favourite to-go rhubarb cake recipe. Just because it's one that can be memorized in seconds. Actually you just need kitchen scales and the list of ingredients. No amounts, imagine :)

Here's how it works. I call it equal rhubarb cake, because you need equal weighed amounts of all the main ingredients. I usually take four eggs, chicken or duck, to make this cake. 

Rhubarb sheet cake

eggs
butter, at room temperature*
caster sugar 
all-purpose flour
rhubarb, thinly sliced 

Topping:
demerara sugar and cardamom

Line a baking sheet with a parchment paper/baking paper (if the eggs are large, you can use a large baking sheet, say 35x40 cm, if the eggs are smaller, I tend to use 25x35 cm).  Put aside. 

Put a bowl onto your kitchen scales, switch the scales on and break eggs into the bowl. Weigh the eggs - and remember the number. Put the eggs aside, take another bowl. 

Now, remember the weight of eggs? Add the same amount of butter into the mixing bowl, then the same amount of sugar. Mix the butter and sugar until pale and creamy.

Now add the eggs, one at a time, and mixing thoroughly after each egg. Fold in the same amount of flour. 

(So if your eggs weighted, say, 250 grams, you'll also need 250 g butter, 250 g sugar, 250 g flour and about 250 g rhubarb). 

Now spread the dough mixture onto the baking sheet. Spread the rhubarb evenly across the cake, then sprinkle with demerara sugar and ground cardamom. 


Now bake at 200 C/400 F for about 20 minutes, until cooked and nicely golden. Let cool a little, then cut into squares, dust with icing sugar and serve. 


Keeps well for a day or two, covered.

Tuesday, May 06, 2014

Best rhubarb muffins recipe ever

I just baked a batch and had to dig out this recipe from the depths of Nami-Nami and share this with you again :) The post is actually from 2007, the photo below from 2009. They are still my very favourite rhubarb muffins!!!

Rhubarb muffins / Rabarbrimuffinid

We are still enjoying the rhubarb bounty. Here's a recipe for really moist rhubarb muffins that I made twice last week. Firstly, they were served at a 'girly' housewarming/birthday party last Thursday, attended by all my aunties (that's three maternal and one paternal), my parents (my dad was unable to attend the 'real' birthday party on a previous weekend), as well as some of my first cousins (not all 11 though:). Instead of birthday cake, I made lots of these rhubarb muffins that day, served as a pyramid on a cake stand. Very pretty!! But in the midst of all the buzz and excitement, we forgot to take a picture. Not that it mattered much, as it gave me a good excuse to make these very same muffins again on Sunday.

These muffins, let me tell you, are the moistest muffins you'll make. They're so moist, that even if you eat them on the following day, they taste like they're freshly baked. Delicious!

Rhubarb muffins
(Maailma parimad rabarbrimuffinid)

Serves 12

2 medium eggs
125 g sugar (150 ml)
150 g plain flour (250 ml)
1 tsp baking powder
2 tsp vanilla sugar
1 tsp cinnamon
150 grams sour cream (20%)
50 grams butter, melted and cooled
400 grams rhubarb, (peeled and) chopped

Cinnamon and demerara sugar for sprinkling (optional)

Whisk eggs with sugar until pale and frothy.
Mix the dry ingredients. Add to the egg mixture together with sour cream and melted butter. Fold in the rhubarb.
Fill 12 hole muffin tray (they'll be pretty full, as rhubarb gives a lot of bulk initially, but shrink while the batter rises), sprinkle with cinnamon and demerara sugar
Bake at 225 C for 13-15 minutes, until muffins have risen and turned golden brown.
Cool a little before serving, as the rhubarb pieces can be very hot!

Other rhubarb recipes @ Nami-nami:
A creamy rhubarb pie (June 2005)
Rhubarb jam with ginger (May 2007)

Other muffin recipes @ Nami-nami:
Apple muffins (March 2007)
Cocoa and raspberry muffins (August 2005)
Dark chocolate and cherry muffins (April 2006)
Dark chocolate and chilli muffins (July 2005)
Savoury muffins with beetrot and blue cheese (October 2006)
Savoury muffins with feta cheese and sun-dried tomatoes (June 2006)

Friday, April 25, 2014

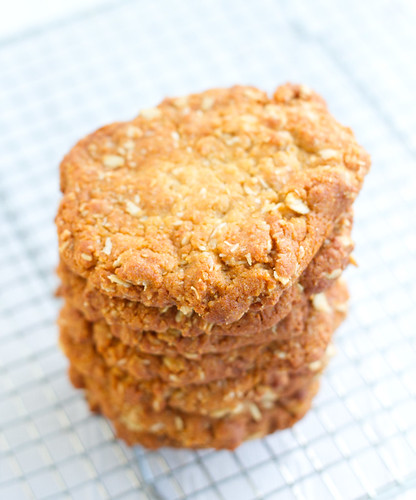
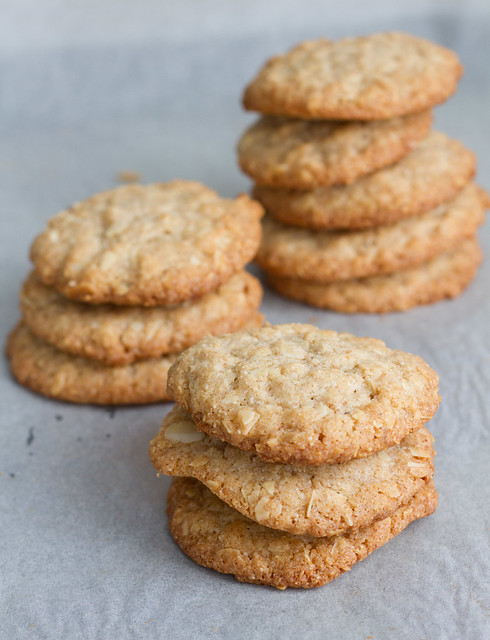
ANZAC biscuits (recipe for coconut oat cookies)

ANZAC cookies / ANZAC biscuits / ANZAC küpsised 
From the recipe archives. Originally posted in 2013.

Did you know that it's ANZAC Day today? ANZAC stands for Australian and New Zealand Army Corps. The Department of Veterans' Affairs of the Australian Government explains the Anzac day and tradition in detail. This being a food blog, it suffices to say that apparently these eggless crispy oatcakes were the cookies sent by the Australian and New Zealand women to the soldiers on the frontline during the WWI. And they're lovely - at least their modern equivalent!

The original recipe uses golden syrup, but honey works as well. I actually find the flavour very appealing, similar to the Estonian honey cake, and the chewy-crispy texture went down a treat with my family.

ANZAC-biscuits 
(ANZAC-küpsised)
About 20 cookies
ANZAC cookies / ANZAC biscuits / ANZAC küpsised

125 g butter
2 Tbsp or 45 g golden syrup or runny honey
1 tsp bicarbonate soda
2 Tbsp water
150 g or 250 ml or 1 cup all-purpose flour
100 g rolled oats
60 g shredded coconut
150 g caster sugar

Line a large baking sheet (or two smaller ones) with a parchment paper. Heat the oven to 175 C/350 F.

Place butter and honey/syrup into a medium-sized saucepan, heat and stir until melted and combined.
Mix soda with water and pour into the saucepan. The mixture will sizzle and foam - this is exactly what should happen. Stir until combined and remove the saucepan from the heat.
In a mixing bowl, combine flour, oats, coconut and sugar. Pour in the butter-syrup-soda mixture and stir until combined.
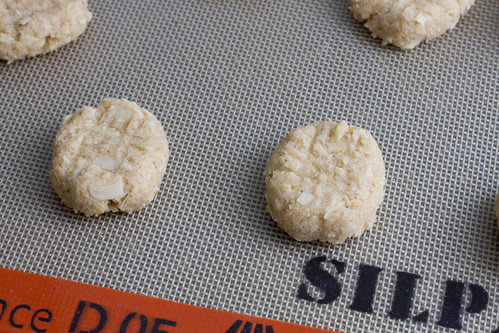
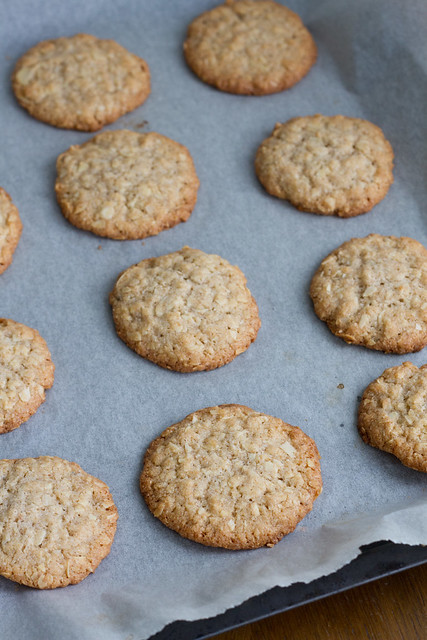
Using your hands, roll the cookie mixture into golfball-sized balls. Place these on the baking tray, leaving plenty of room between the cookies. Press the cookie dough into thinner disks for especially crisp cookies (that's the way I like them).
Bake in a preheated 175 C oven for about 10 minutes or until cooked (the cookies will harden as they cool down; if you didn't pat the cookie dough down, they may need few more minutes in the oven).

Store in an air-tight cookie jar.

SIMILAR POSTS:
Heidi @ 101 Cookbooks (Heidi adds some orange zest)
Lottie + Doof
Tori @ The Shiksa in the Kitchen (Tori toasts the coconut first)
Emily @ Chilli Marmalade
Jennifer @ Use Real Butter (nice step-by-step photos!)
Sneh @ Cook Republic
Martha Stewart
Laura @ Pies & Plots

Sunday, March 16, 2014

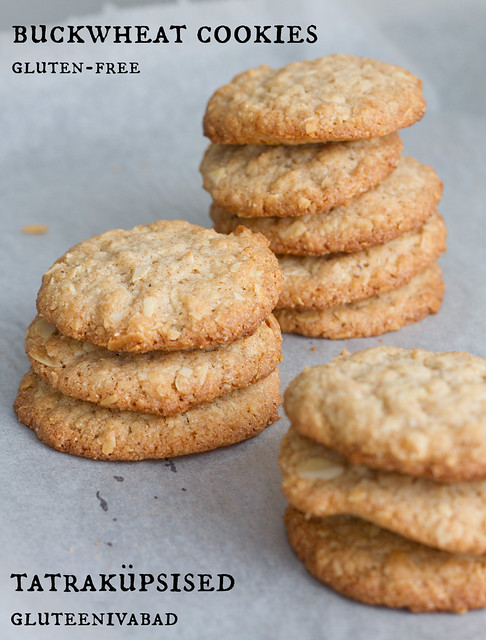
Gluten-free buckwheat cookies recipe

Tatraküpsised. Buckwheat cookies.

Are you on Pinterest? I am, with a nice number followers (thank you, all!) and various "boards". One of my boards is called buckwheat recipes, and I've been pinning various recipes there utilising this non-grain/pseudo-grain. Despite the name, you see, buckwheat is not a grass, but a plant related to sorrel and rhubarb.

During the recent months I've noticed that this particular board is getting new followers on a daily basis, and individual buckwheat recipes get repinned by increasingly many pinners. Buckwheat is "in". I guess the popularity of buckwheat recipes is caused by a) this "pseudo-grain" being gluten-free and hence suitable as a wheat substitute for all those avoiding gluten and b) some popular Paleo templates/frameworks allow small to moderate consumption of buckwheat dishes. Plus it has a lovely nutty flavour when baked.

Have you tried buckwheat? It's pretty popular here in Estonia and I've got several buckwheat recipes here on Nami-Nami (listed at the end of this post, see below). While I prefer cookies with buckwheat groats, then I tend to have some buckwheat flour in the house as well. It's the compulsory ingredient in blini, the small yeasted pancakes served with smetana and caviar. Plus I love this buckwheat cookies recipe that I discovered years ago in a British food giant's Sainsbury's client magazine. Apparently the original recipe is by Doves Farm, and you could also use rice flour instead of buckwheat flour. I prefer buckwheat, for it has a lovely flavour of its own. Note that my version has way less sugar (100 g instead of 150 g)  - if you've got a very sweet tooth, you may want to use more sugar perhaps.

I used to make these with chopped hazelnuts, but since our son is sensitive to hazelnuts, I've been using sliced/slivered almonds instead.

Have I missed your excellent buckwheat recipe and you'd like me to include it to the buckwheat recipes board? Leave a link to your blog post in the comments and I'll check it out!


Buckwheat cookies
(Tatraküpsised)
Makes about 2 dozens

Buckwheat and almond cookies. Mandli-tatraküpsised.

125 g butter, at softened
100 g caster sugar
1 egg
150 g (light) buckwheat flour
1 tsp baking powder
100 g chopped hazelnuts or chopped/sliced almonds

Heat the oven to 180C/350F. Line a baking sheet with parchment paper.

Cream together the butter and sugar, followed by the egg. Mix in the flour, baking powder and nuts/almonds, combine. (If the mixture is on the dry side, add a spoonful or two of cold water)*.

Take a heaped teaspoonful of the mixture, roll into balls and place onto the baking sheet. Gently press with a fork to flatten the cookie dough balls a little.

Tatraküpsised. Buckwheat cookies.

Bake for 15-20 minutes in the preheated oven until the cookies are light golden.

Let cool for about 5 minutes, then transfer onto the metal rack to cool completely.

* I've also used a different method - combined all the dry ingredients (buckwheat flour, sugar, baking powder), added the grated softened butter and the egg, and simply mixed everything and rolled into walnut-sized balls.

Buckwheat cookies. Tatraküpsised mandlitega.

More buckwheat inspiration here on Nami-Nami:
Buckwheat with leeks and soy sauce
Buckwheat with beets and dill
Cabbage and buckwheat kasha
Buckwheat kasha with mince
Warm buckwheat and mushroom salad
Buckwheat with beef liver
Buckwheat and mushrooms casserole

More buckwheat cookies by other bloggers:
Buckwheat chocolate chip cookies by Karina @ gluten-free goddess
Multiseed buckwheat cookies  by Clotilde @ Chocolate & Zucchini
Nibby buckwheat butter cookies by Heidi @ 101 cookbooks
Buckwheat sugar cookies @ LA Times
Buckwheat chocolate chip cookies by Garrett @ Vanilla Garlic
Buckwheat chocolate chip cookies by Alanna @ The Bojon Gourmet

Saturday, March 01, 2014

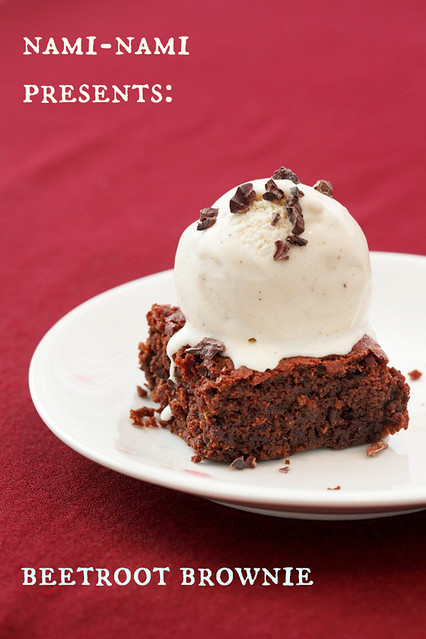
Beetroot Brownies (wheat-free, possibly gluten-free)

Beetroot brownies.
Photo by Juta Kübarsepp for the March 2014 issue of Kodu ja Aed magazine. 

March. While in some far away corners this means new season's rhubarb and spring greens, then here in far North it's time to dig out the last of the last season's root vegetables and do something nice with them. Beetroot is one of my favourites (see all those beet recipes!?) and luckily it's one vegetable that's still nice and good at this time of the year.

Chocolate-laden brownies are loved by many, and here's a lovely version I've been baking recently. The cooked (either boiled or roasted) beet makes these extra moist and soft, and you can easily make this gluten-free by using appropriate flour (see notes below).

Enjoy!

Beetroot and Dark Chocolate Brownies
(Peedi-šokolaadiruudud)
Makes 16 small squares

200 g unsalted butter
200 g dark chocolate (70%)
200 g cooked beetroot
3 large eggs
200 g caster sugar
1 tsp vanilla sugar or extract
100 g flour*
50 g coarsely chopped almonds or walnuts (optional)

* A note on flour: As my son is sensitive to wheat, I use rye - and a wholemeal rye - when baking this. You can use regular wheat flour for this, or even buckwheat or rice flour for a gluten-free version. 

Pre-heat the oven to 200 C/390 F. Line a 24 cm (10 inch) square cake tin with parchment paper.

Break the chocolate into pieces, cut the butter into chunks. Place both into a small saucepan and heat gently on a low heat, stirring every now and then, until the chocolate melts. Remove from the hob and stir until combined. Leave and let it cool to room temperature.

Finely grate the beets, fold into the melted chocolate and butter mixture.

Whisk the eggs and sugar until thick and pale. Gently fold in the vanilla, then the beet-chocolate-butter mixture. Finally fold in the flour and the nuts, if using. Spoon the mixture into the prepared cake tin.

Bake in the middle of the oven for 20-25 minutes - or only until the cake looks cooked from the top. Remove from the oven and let cool before cutting into squares.

brownienov2013.jpg
Photo by Juta Kübarsepp for Nami-Nami.

Friday, February 14, 2014

Chocolate Muffins Recipe

Nami-Nami chocolate muffins / Nami-Nami šokolaadimuffinid
Recipe repost. This was originally posted in February 2010.

I'm jumping on the Valentine's Day bandwagon here. I must admit it's not a holiday that we celebrate, really. Though Valentine's Day/Friends' Day has become increasingly popular amongst the younger generation here in Estonia, I was out of high school way before that trend began here. But it's a good excuse to bake some chocolate muffins and decorate them with heart-shaped sprinklers :)

When I started looking for a good chocolate muffin recipe, I realised that the choice was endless. Instead I took my excellent rhubarb muffin recipe, replaced the rhubarb with chopped dark chocolate and added some cocoa powder for extra colour and deeper chocolate flavour. The muffins have a very low fat content, as most of the butter has been replaced with yogurt/sour cream - resulting in moist muffins with a nice crumb. I loved them!

Chocolate Muffins
(Mõnusad šokolaadimuffinid)
Makes 12 smaller muffins

2 large free-range eggs
125 soft brown sugar
135 g plain flour
3 Tbsp cocoa powder
1 tsp baking powder
2 tsp vanilla sugar
150 g plain yogurt or sour cream
50 g butter, melted
100 g coarsely chopped dark chocolate

Whisk eggs and sugar until light and frothy.
Sieve flour, cocoa, baking powder and vanilla sugar into a bowl, stir to combine.
Fold the dry ingredients, yogurt/sour cream and cooled melted butter into the egg and sugar mixture.
Finally add the chopped chocolate.
Spoon the batter into muffin tins that have been lined with paper cups. Sprinkle with heart-shaped sugar sprinklers*, if you feel like :)

Nami-Nami chocolate muffins / Nami-Nami šokolaadimuffinid

Bake in the middle of a pre-heated 200 C/400 F oven for 15-20 minutes, until the muffins are cooked and have risen nicely.

* I used some from Finnish company MEIRA - I liked how the baked into the muffins. No need for a frosting to keep them in place :)

Sunday, December 15, 2013

Holiday baking: Sliced Almond Christmas Cookies

French gingerbread / Christmas cookies / Piparkoogid / Viilupiparkoogid
From the recipe archives!

It's the time to bake various Christmas cookies again. While I'll certainly be making and baking and decorating a batch of these favourite Estonian piparkoogid ("pepper cakes"), then this year I have another recipe in mind as well. These sliced Christmas cookies with almonds found their way into my heart in the midst of the summer heatwave, as I was choosing and testing recipes for my Christmas cookbook. I had seen a recipe for "French gingebread cookies" in a Swedish food magazine that I liked, and that reminded me of Jules Destrooper's wonderful almond thins that I used to love. After some tweaking here and there (less sugar and less cloves, more almonds), I ended up with this great recipe.

I usually divide the dough into four equal portions and roll and wrap them individually. Then I bake one and place three in the freezer - I can then bake fresh and aromatic Christmas cookies whenever I feel like :)

Almond Gingerbread Cookies
(Viilupiparkoogid)
Makes a lot - about 4 large sheets

viilupiparkoogidNAMI

250 g butter
200 g caster sugar
140 g light baking syrup (about 100 ml)
420 g plain flour (700 ml)
1 Tbsp ground cinnamon
0.5 Tbsp ground cloves
0.5 Tbsp baking soda
100 g sliced almonds

Melt the butter in a saucepan. Add sugar and syrup, stir until combined. Remove from the heat and let cool completely.
Combine flour, cinnamon, cloves, baking soda and almonds in a bowl, then fold into the cool butter-sugar-syrup mixture. Stir until combined.
Divide the cookie dough into four equal parts, then form each one into a cylinder/sausage, about 4 cm in diameter. Wrap in clingfilm or baking paper and place into the fridge to rest. (Ideally for 24 hours).

To bake the cookies, cut each "sausage" into 3-4 mm (1/8th inch) slices, and place onto a parchment covered cookie sheet.
Bake in the middle of a preheated 200 C oven for 6 to 8 minutes, until golden brown.
Remove from the oven, let rest for a few minutes, then transfer onto a metal rack to cool completely.

French gingerbread / Christmas cookies / Piparkoogid / Viilupiparkoogid

This recipe was also included in my second cookbook, Jõulud kodus ("Christmas at Home"), published in Estonian in November 2011.

Wednesday, October 30, 2013

Apple crumble, the perfect autumn dessert

Õunakrõbedikud kaneelise toorjuustuvahuga / Apple crisps with cinnamon cream cheese
Recipe by Pille @ Nami-Nami. Above photo by Juta Kübarsepp for the November 2012 issue of Kodu ja Aed ("Home and Garden", an Estonian monthly magazine. I've been their food writer since October 2012). 

As for the perfect autumn dessert, you cannot go wrong with a classic apple crumble. Surprisingly apple crumble - or crumbles in general - aren't particularly well-known in Estonia - we're more cake and pie and tart type of people, I guess. I love adding oats to my crumble topping - or any other porridge flakes (rolled spelt or rye flakes work brilliantly, for example). Oat addition makes the crumble somewhat healthier and the topping more crunchy. If you have some red-skinned crab apples - like the ones on the photo above - add those to the apple mixture for extra colour.

I served the crumble with a cinnamon and cream cheese whipped cream - a wonderfully aromatic addition to the crumble.

Apple crumble
(Õunakrõbedik)
Serves six

600 g tart apples (f. ex. Antonovka, Granny Smith)
25 g seedless raisins
25 g caster sugar
ground cinnamon

Crumb topping:
100 g all-purpose wheat flour
50 g porridge oats or rolled rye or spelt flakes
100 g cold butter
50 g demerara brown sugar

Peel* and core the apples, cut into smaller chunks or sectors. Place into a bowl, toss together with raisins, sugar and cinnamon. Transfer into a buttered 24 cm pie dish or 4-6 portion dishes/ramekins.

Combine the flour, rolled grains and sugar in a bowl. Cut the butter in with two knifes or a pastry cutter or simply using your fingers. (Or simply put everything into the food processor and pulse until you've got pea-sized pieces). Spread the crumb topping over the apples.

Place in the pre-heated 200C/400F oven and bake for about 30 minutes, until the apples are soft and the topping golden brown and crispy. Let cool for about 15-30 minutes before serving.
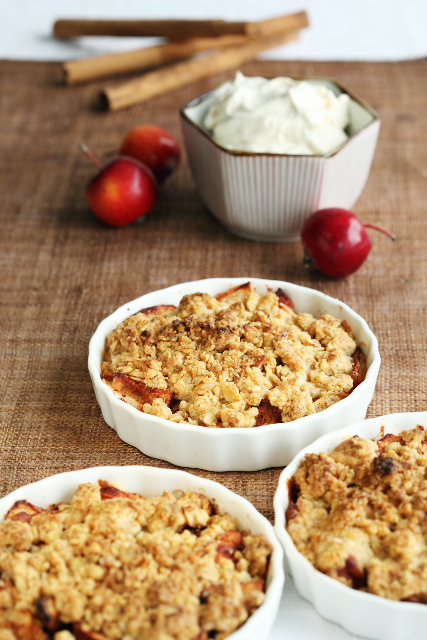
Serve with cinnamon-flavoured cream cheese, vanilla custard, vanilla ice cream or simple whipped cream.

* There's no need to peel organic apples from your own backyard or a reputable orchard.

More crumble recipes:
Rhubarb crumble @ Nami-Nami (gluten-free, if using certified gluten-free oats)
Raspberry and coconut crumble @ Nami-Nami
Pumpkin and apple crumble @ Nami-Nami
Apple cinnamon crumble @ Two Peas and Their Pod
Speculoos + Apple Crumble @ Dorie Greenspan
Butterless apple crumble @ Chocolate & Zucchini

Wednesday, August 07, 2013

Blueberry cake with sour cream filling and coconut topping

Mustikakook. Blueberry cake.

We love crumb cakes here in Estonia. Quite a lot. They're cheap, quick, and an excellent way of using up all those jams and preserves and marmalades we're busy making in July and August and September each year. I've stocked my larder with considerable amounts of wild strawberry fridge jam, apricot jam, sour cherry jam with almonds, and cloudberry jam thus far. And while we consume a jar each weekend, spreading generous amounts of last summer's flavour on our Saturday morning pancakes, we still have plenty of jars of canned goodies to spare. That's when you'll make a good old-fashioned Estonian crumb cake with jam filling.

But sometimes you want something different. Although I've got a good variety of crumb cake and blueberry cake recipes up my sleeve, I was immediately drawn to this simple crumb cake with blueberries on Ragne's foodblog (a popular Estonian food blog). I made it couple of times before tweaking a bit. A bit more sour cream in the filling filling makes the cake even creamier, a generous helping of coconut in the topping makes it more flavourful, and a teaspoonful of vanilla in the cream can do no harm either. Note that the cake isn't very sweet - there's less than a cup of sugar, a scant 170 grams, in the whole lot. If you have a really sweet tooth, you may add a wee bit more sugar, but trust me, it's lovely with the amount specified!

Remember: an American cup is about 240 ml and a stick of butter is 113 grams. That - and your high school math - should help you when doing the conversions :)

Blueberry sour cream cake with coconut crumb topping
(Purukook mustikate, hapukoore ja kookoshelvestega)
Serves about 12
Purukook mustikate ja hapukoorekreemiga. Blueberry cake with sour cream filling and coconut crumble.
Crumb mixture:
180 g all-purpose flour (300 ml)
85 g caster sugar (100 ml)
0.5 tsp baking powder
a pinch of salt
150 g cold butter, cut into cubes
50 g unsweetened desiccated coconut (optional)

Filling:
2 large eggs
85 g caster sugar (100 ml)
250 g sour cream or Greek yoghurt
30 ml all-purpose flour (50 ml)
1 tsp vanilla sugar or extract
200 g blueberries or bilberries

Line a 30x40 cm Swiss roll tin with a parchment paper. Put aside.

Preheat the oven to 180 C/350 F.

Start with the crumb mixture. Mix the flour, sugar, baking powder and salt until combined. Add the cubed butter and pinch with your fingers until a coarse wet sands forms (I usually use my food processor for that).

Take about two-thirds of the mixture and scatter into the baking tin. Press with the palms of your hand until compact.

Whisk eggs with sugar, sour cream/yogurt, flour and vanill until combined. Spread over the base. Scatter blueberries on top.

Fold coconut flakes into the remaining third of the crumb mixture (if using), then scatter the crumbs over the blueberries.

Bake in a preheated oven for about 40 minutes, until the crumb topping is lovely shade of golden brown.

Cool before cutting into small squares and serving.
More crumb cake recipes:
Classic crumb cake with jam filling @ Nami-Nami
Mascarpone and curd cheese crumb cake @ Nami-Nami
Purukook @ Siit nurgast ja sealt nurgast (recipe in Estonian)
Blueberry crumb cake @ The Pioneer Woman

More blueberry cake recipes:
Coconut and blueberry cake @ Nami-Nami
Blueberry cheesecake @ Nami-Nami
Blueberry sour cream tart @ Nami-Nami
French blueberry tart @ Nami-Nami
Buttermilk-blueberry breakfast cake @ Alexandra's Kitchen
Simple blueberry cake @ Bake or Break

Monday, May 27, 2013

Cinnamon coffee cake recipe

Kaneelikook. Cinnamon coffee cake.

A coffee cake, defined:


Are you in camp No 1 or No 2? I tend to go with number two - I think that's also how coffee cake is usually defined in the UK (evidence: Mary Berry's coffee cake in The Telegraph has coffee in the batter and in the icing/frosting). However, about half of my readers hail from across the pond, and there definition No 1 seems to be more common (evidence: The Pioneer Woman's "the best coffee cake ever" has no coffee in it; you won't find any coffee in Martha Stewart's 12 favourite coffee cakes either). I'm not sure how coffee cake is defined in down under. Anyone?

In any case, here's a cake I've baked no less than four times during the last week - twice for my family and friends, and two cakes for the pop-up café on Saturday. Although modest in appearance, I love the strong cinnamon flavour and the moist crumb, and the just ever-so-crisp caramelised sugar topping.
I warn you - it's rather sweet, so my Estonian readers may actually want to reduce the amount of sugar a little. Also, as the cake contains yoghurt AND baking soda, it is important that you have your oven and cake pan ready before mixing the cake batter. If you wait too long with baking, the soda reacts with the yoghurt and you won't get a soft and lovely cake, but a flat dense one.

Cinnamon cake
(Kaneelikook)
Serves 12

150 g unsalted butter, softened
200 g caster sugar
2 large eggs
250 g plain yoghurt (regular, not thick)
270 g all-purpose flour
2 tsp vanilla sugar or extract
1 tsp baking powder
0.5 tsp bicarbonate soda/baking soda
0.5 tsp salt

Cinnamon sugar:
4 Tbsp caster sugar
1 Tbsp ground cinnamon

Preheat the oven to 175 C/350 F. Line a 24 cm/10 inch springform tin with a parchment paper.

Beat butter and sugar until pale and fluffy, either using your stand mixer or a regular electric mixer. Add eggs, one at a time, whisking after each addition. Fold in the yoghurt.

Measure the dry ingredients into another bowl, stir to combine, then fold gently into the egg and butter mixture.

Spoon half of the cake batter into the prepared cake tin, then sprinkle a generous 2/3 of the cinnamon mixture on top. Top with the rest of the cake batter and sprinkle the rest of the cinnamon sugar on top of the cake.

Bake in the middle of the preheated oven for 45-50 minutes, until the cake is lovely golden brown and pulls slightly away from the sides of the pan. Test for doneness - a toothpick inserted in the centre of the cake should come out clean.

Cool in the cake pan, then transfer onto a serving plate and cut into slices.