Showing posts with label Recipes: Chicken/Poultry. Show all posts

Friday, November 24, 2017

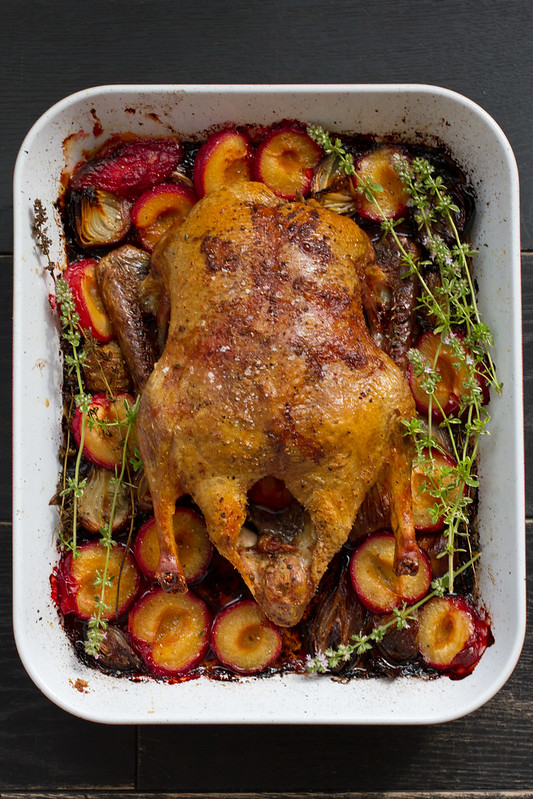
Oven-roasted duck with plums and red onions

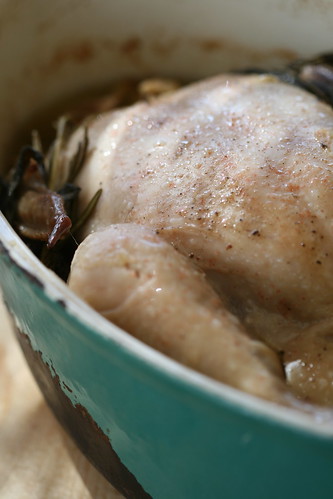
Ahjupart ploomidega. Duck with plums.


We love duck in our house. It's just as easy to cook as your regular Sunday chicken roast, but because it's less common, somewhat pricier and much bitter, it has a more festive feel to it. We don't cook duck for weeknight dinners, but for weekend roasts and entertaining at home, it's such a worthy bird.

Here's a version I cooked a few times this autumn, trying to perfect it for a magazine photo shoot :)

Serves around 6


Oven-roasted duck with plums and red onions

(Ahjupart ploomide ja sibulaga)

1 whole duck (ca 3-3,5 kilograms; I prefer chilled to frozen)
salt and freshly ground black pepper
300-400 ml of hot water
5-6 smallish red onions
few decent garlic cloves
4 cloves  (the spice)
1 kilograms large red plums
3-4 fresh thyme sprigs

Preheat the oven to 180 °C/350 °F.

Season the duck with salt and pepper, both inside and out. Place into a good-sized oven dish (I used a lasagne dish on the photo, but a wide dutch oven would do as well). Pour  hot water into the dish, place the dish into the preheated oven and roast for an hour.

While the duck is roasting, peel the onions, halve lengthwise. Peel the garlic cloves.

Remove the duck from the oven and place the onions, garlic cloves, cloves (the spice) and thyme sprigs around the duck. Return to the oven for another hour.

Halve the plums, remove the stones. Take the duck out of the oven, and place the plum halves around the duck.

Increase the heat to 220 °C/425 °F.  Return the duck into the oven and roast for another 30 minutes or until the duck skin in deliciously golden brown and crispy. The meat thermometer should read 73-74 °C/163-165 °F when pierced into the middle of the thickest part of the duck leg.

Remove the duck from the oven and let rest of 10 minutes. Pour the pan jus through the sieve, place into a small saucepan and cook until slightly thickened. 

Then carve the rested duck into portions and serve with roasted plums, onion and garlic and the reduction.

Thursday, June 20, 2013

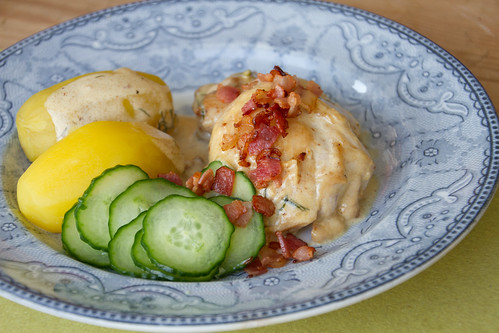
A summery dish of chicken with bacon

IMG_5830.jpg
Recipe originally posted in August 2006, fully revised and updated with a new photo in June 2013.

The first time I cooked this delicious dish was in August 2006 in Edinburgh. I had some Estonian visitors from Cambridge. Trying to stay close to our Nordic roots, I had boiled some potatoes (the staple back home) and scoured the Swedish Arla site for recipes. This recipe for klassisk sommarkyckling aka Classic Summer Chicken caught my eye and, with small adaptations, was served to my friends. They liked it, as did I. The creamy-mustardy sauce was especially delicious, and dill added a very summery touch indeed (the original recipe used chives, which also sounds lovely).

That was seven years ago - and I still cook this to my family every now and then. I'm especially fond of the crispy bacon garnish, which complements the mild chicken and the creamy mustard sauce beautifully.

Chicken with creamy mustard and dill sauce and crispy bacon
(Suvine kanaroog koore-sinepikastmega)
Serves 4

about 500 g chicken thigh fillets or chicken breast escalopes*
butter for frying
200 ml whipping or double cream
2 tsp Dijon mustard or 1 heaped Tbsp mild MEIRA mustard
2-3 cloves of young garlic, skins off and slightly crushed
100 grams of smoked bacon rashers, chopped
3-4 Tbsp fresh dill, chopped

To serve:
500-750 grams of new potatoes, boiled
sliced cucumbers or this wonderful shaken Estonian cucumber salad

Heat the butter in a heavy-bottomed frying pan. Add chicken fillets and brown on both sides (7-8 minutes in total).
Pour over the cream, add garlic cloves and mustard. Cover the pan and simmer on a medium heat for about 10 minutes.
Add the chopped dill, season with salt and pepper.

Meanwhile, fry chopped bacon on a dry non-stick pan until golden brown and crispy. Transfer onto a sheet of kitchen paper to drain off excess fat.

To serve, place chicken fillets on heated plates, pour some sauce on top and sprinkle with crispy bacon.

* A chicken escalope (also called 'scallop') is a thin piece of chicken breast meat that's been pounded to make it thinner. If you cannot find them at your butcher or local supermarket, then it is really easy to make them yourself. 
Place a large chicken breast on your chopping board and cut it horizontally into two. If your chicken breasts are on the small side, then cover with clingfilm/plastic wrap and simply pound them with a rolling pin until about 3-4 mm thick.

UPDATE 12.8.2006
Kalyn has included this recipe in her weekly round-up of South Beach Diet friendly recipes. Thank you, Kalyn!
Amsterdam-based Swedish foodblogger Henrik made this dish and liked it

Friday, February 08, 2013

Braised rabbit with mustard (lapin à la moutarde)

Sinepine küülik / Mustard and rabbit stew
Photo by Juta Kübarsepp for the November 2012 issue of Kodu ja Aed magazine.

It's snowing outside, and once again I'm craving something belly- and heart-warming. This braised rabbit with mustard sauce (lapin à la moutarde) hits the spot. Rabbit has become more easily available here in Estonia for an average shopper (read: you can get it vacuum-packed in your local supermarket), and this rabbit stew with a creamy mustard sauce is an excellent way of cooking rabbit.

The recipe is French-inspired and adapted from Anthony Demetre, the chef patron at the London restaurants Arbutus, Wild Honey and Les Deux Salons; more specifically, from his book Today's special: A new take on bistro food - Recipes from Arbutus and Wild Honey. Demetre uses rabbit legs, but for a home cook, using a whole rabbit makes much more sense - and is much more economical, of course.

It's my favourite way of cooking and serving rabbit - I included the recipe in my first cookbook, as well as in the November 2012 issue of Kodu ja Aed magazine. You can braise this one on the stovepot or bake in the oven - the choice is yours.

Braised rabbit with mustard
(Sinepine küülikuhautis)
Serves four to six
Mustard Rabbit / Küülik sinepikastmes

1 rabbit
sea salt and freshly ground black pepper

75 g butter

75 ml white wine vinegar (5 Tbsp)
3 Tbsp good Dijon mustard
500 ml (2 cups) hot chicken stock
200 ml double or whipping or heavy cream
1 Tbsp dried oregano
1 tsp smoked paprika powder (pimentón de la Vera)
1 tsp finely chopped fresh rosemary
5 garlic cloves
2 bay leaves

If braising the rabbit in the oven, then pre-heat the oven to 200 C/400 F.

Cut the rabbit into serving pieces (here's a photo of me tackling another rabbit, I usually end up with two shoulders, two legs, two belly flap pieces, 2 saddles; I throw the rib cage into the stew as well to give extra flavour, but I don't eat it; here's Hank Shaw's very detailed step-by-step guide, which I find a wee bit over-complicated, but perhaps the rabbits here and there are somewhat different :); and finally, here's Saveur's guide).

Season the meat with salt and pepper.

Take a heavy saucepan or Dutch oven or casserole dish. Melt the butter, then brown the meat pieces on all sides (you'll need to do that in 2-3 instalments probably). Remove the browned pieces and put aside.

Pour the wine vinegar into the saucepan, bring to the boil and reduce by half. Add the rest of the ingredients, bring into the boil again. Season to taste with salt and pepper, then return the browned rabbit pieces into the saucepan again.

Once again, bring into the boil, cover tightly with the lid and transfer into the pre-heated oven. Cook for about 1,5 hours, until the meat falls off the bone.

(If you opt for stove-top braising, then simmer over moderately low heat, covered, until the meat falls off the bone).

Serve with seasonal vegetables.

Similar recipes:
Hank Shaw's rabbit in mustard sauce @ Simply Recipes
Raymond Blanc's braised rabbit with mustard @ BBC Food
Rabbit cooked with Dijon mustard @ Saveur
Rabbit with mustard @ Gourmet Traveller WINE
Mustard rabbit @ The Evening Hérault
Rabbit in mustard sauce @ French cooking for Dummies
Rabbit in mustard cream @ Lindaraxa

Thursday, January 24, 2013

Scottish food: Cock-a-Leekie soup

Originally posted in February 2007; fully updated in January 2013. Cock-a-leekie soup / Kana-porrusupp

Photo by Juta Kübarsepp for the January 2013 issue of Kodu ja Aed. Recipe and styling by Nami-Nami. The tablecloth is Estonian national tartan - the blue, black and white representing the Estonian flag, the red and golden representing Scotland's Rampant Lion. 

Tomorrow the friends of Scotland and all things Scottish across the world celebrate Robert Burns' birth anniversary, hosting or attending a Burns Supper. And any self-respecting Burns Supper begins with a proper Scottish soup - either Scotch Broth or Cock-a-Leekie. As the latter is a) considerably cheaper and b) considerably easier, and something that I've cooked over and over again. Amazingly, so few ingredients (a chicken, some leeks and some juicy prunes) can result in such a flavoursome soup.

Here's the recipe for a lovely and flavoursome cock-a-leekie. It started off as a recipe from Sue Lawrence's Scots Cooking: The Best Traditional and Contemporary Recipes (excellent book, by the way!), but I've tweaked both the amounts and the instructions, including the cooking method, considerably.

Cock-a-leekie
(Cock-a-leekie supp ehk šotlaste kana-porrusupp)
Serves 10 as a starter or 4 to 6 as a main course. 

1 chicken (1.5 kg)
3-4 large leeks (1 kg)
20 black peppercorns
1 bay leaf
about 2 litres water
20 juicy prunes, stoned and sliced
fresh parsley, chopped

Place the chicken in a large saucepan. Halve the leeks lengthwise, wash them well, then cut off the green parts. Chop these roughly and add to the pan with the peppercorns and bay leaf. Add the water - it should just cover the chicken. Season lightly with salt.
Bring slowly into the boil, skim off any scum that appears at the surface. Then cover and simmer for about 1.5-2 hours, until the chicken is cooked. Remove from the heat and let it cool.
Take out the chicken and remove the leeks, either with a slotted spoon or by draining the soup through a colander. Discard the cooked leeks. Remove the chicken flesh from the bones and chop into smaller pieces.
Chop the white part of the leeks, add to the pan with the prunes and chicken and bring to the boil again. Simmer for about 10 minutes, until the leeks are just done.
Season with plenty of salt and pepper and serve with chopped parsley on top.

Thursday, November 08, 2012

Chinese Lemon Chicken Recipe

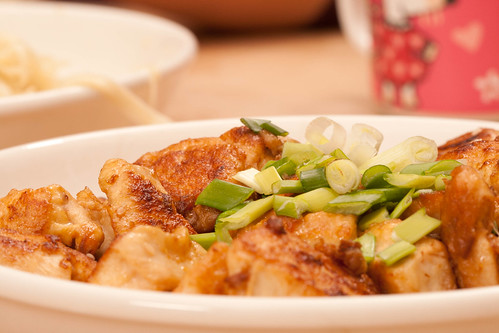
Chinese lemon chicken / Hiina sidrunikana

Now that I'm a young mum with three kids, I am looking for and cooking more and more quick and universally appealing dishes. Luckily it doesn't just mean macaroni with fried pork or pasta with pesto - the "older" kids are happy to try different foods (like mussels), and I can still cook my old favourites from across the world. Last week (when I was still a mum to just two :)) I made this quick and easy Chinese chicken dish, which they all loved. It's a lighter and healthier version of the popular Cantonese dish.

The recipe is adapted from Wynnie Chan's 2007 cookbook "Fresh Chinese". Wynnie Chan is a nutritional consultant for the Chinese National Healty Living Centre in the United Kingdom, so she's dedicated to adjusting popular Chinese dishes to modern healthy palates. That isn't always easy, but seems to work for this lemon chicken recipe.

I usually serve it with rice, but egg noodles work just as well, especially if doused with a little sesame oil and sprinkled with some sesame seeds.

Chinese Lemon Chicken
(Hiina sidrunikana)
Serves four

400-500 g chicken breast filets
1 egg
2 garlic cloves, finely crushed or grated
2 small lemons
1 Tbsp soy sauce
1 tsp sesame oil
4 Tbsp cornflour
1 Tbsp groundnut oil or other mild vegetable oil
2 spring onions, sliced at an angle

Whisk the egg, garlic, finely grated zest of 1 lemon, soy sauce, sesame oil and cornflour until combined. Cut the chicken breasts into 2 cm cubes or strips, put into the lemony cornflour mixture. Leave to marinate for at least 15 minutes, preferably an hour.

Heat the wok or a large frying pan until very hot, then add the oil and heat until almost smoking. Add the chicken pieces in batches and fry until golden brown on all sides (reduce the heat, if necessary). Transfer the golden chicken nuggets onto a plate and fry the rest in a similar manner.

When all the chicken pieces are cooked, then return them all to the pan. Add the juice of one lemon, give the dish a quick stir. Taste for seasoning - add more soy sauce or juice of another lemon, if you wish.

Garnish with spring onions and serve at once.

Friday, March 30, 2012

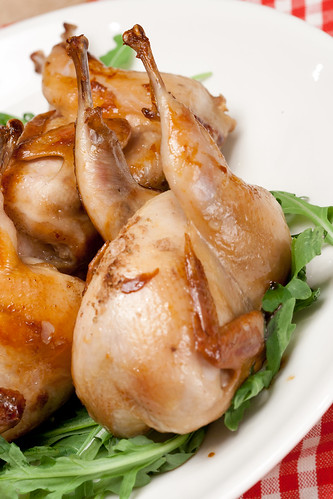
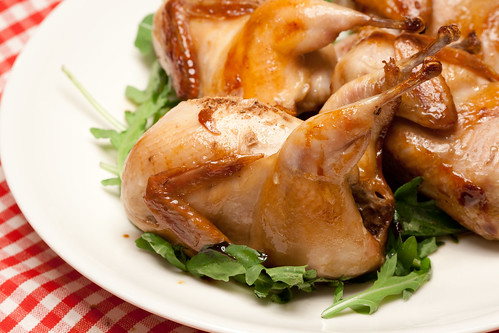
Recipe for honey-soy glazed oven-baked quails

Honey and soy glazed quails / Mesine-sojane vutike

Every now and then I come across some young fresh quails, and cannot resist buying them. They're sold oven-ready here, so it's just the matter of seasoning the birds and popping into the oven for half an hour. A weekend night dinner that looks pretty elegant and is a little bit more exciting than your average roast chicken - is ready in less than an hour (and that includes the marinating time). Here's a lovely recipe I discovered a while ago from Jill Dupleix's excellent Simple Food. Jill uses honey to sweeten the glaze. Although it's lovely with honey, it's even lovelier with a good maple syrup, and that's what I've been using recently.

PS Our kids - both the one-year old and the three-year old - love this dish, especially the drumsticks!

NB For other Chinese recipes here on Nami-Nami, click here.


Honey-Soy Quails

(Mesine ja sojane vutt)
Serves 4

Honey and soy glazed quails / Mesine-sojane vutike

4 quails about 200-250 g each
2 Tbsp runny honey or 4 Tbsp maple syrup
3 Tbsp soy sauce
1 tsp sesame oil

Flavouring salt:
1 tsp Chinese five-spice powder
1 Tbsp sea salt flakes

To serve:
2 Tbsp sweet Thai chilli sauce

Rinse the birds, pat dry with a kitchen paper. Tuck the wing tips behind the back, tie the legs with a cotton string.
Combine honey/maple syrup and soy sauce in a large bowl. Add the quails and turn them in the marinade. Leave to marinade for 30 minutes.
Meanwhile, preheat the oven to 200 C/400 F.
Remove the quails from the marinade and place into an oven dish where they fit snugly. Drizzle with sesame oil.
Bake in the middle of the preheated oven for about 30 minutes, turning them once or twice, until the meat is cooked and the skin is crispy and golden.
Sprinkle some five-spice salt on top and serve with sweet chilli sauce.

For a side dish, Jill suggests some stir-fried spinach and mangetout/sugar snap peas and spring onions. Something green and quick and simple.

Saturday, January 14, 2012

Italian-style chicken with capers, anchovy and tomatoes

IMG_9370.jpg

After lousy November and December (read: dark, wet, cold, windy) we are now in the middle of beautiful January (read: bright, snow, cold). Proper winter weather, which I enjoy, even though it's much harder to push a pram on a snow-covered street, and it's occasionally slippery and icy - sometimes I think that holding on to a pram is the only thing that keeps me upright and in balance :) Ah, the joys of snow-filled cold Nordic winters :)

You need proper hot food to keep your body and soul warm on days like these - and this chicken stew is just the thing. Rosemary and tomatoes, capers and anchovies give this dish plenty of character and a strong Mediterranean feel, almost taking you back to those sun-drenched summer days and warm sea breeze.

I used a whole chicken, cut up to feed six, but you can easily use just drumsticks or bone-in thighs or just breasts, if you're ready to give up some of the chicken flavour.

The recipe is adapted from a recent issue of a Danish food magazine, Mad (that's 'food' in Danish, not a state of mind ;)) They suggested serving this with quinoa. Though I loved quinoa, it seemed too mushy to accompany this dish, so I opted for good Italian bulgur wheat instead.

Italian-style chicken with capers, anchovy and tomatoes
(Mõnus tomatine kanahautis kapparite ja rosmariiniga)
Serves six
Takes about an hour

1 whole broiler chicken, cut up into 8 or 10
some olive oil
4 good anchovy fillets, chopped
6 garlic cloves, sliced thinly
2 onions, peeled, halved and sliced thinly
250 ml (a cup) of dry white wine
300 g cherry tomatoes, halved
400 g can chopped tomatoes
2 Tbsp chopped fresh rosemary
sea salt and freshly ground black pepper
4 Tbsp capers, rinsed and drained

Heat oil on a large heavy sauté pan. Brown chicken pieces on all sides (do that in batches, avoid over-crowding the pan). Put browned chicken pieces on the side.
If the pan looks too dry, add another splash of oil. Add anchovies, sauté for a minute. Add the onions and fry gently for a few minutes. Add garlic, fry for another minute. Do not brown!
Return the chicken pieces on the pan, pour over the wine. Simmer for 5 to 10 minutes, until the wine has reduced by half.
Add the tomatoes (both crushed and halved), season with salt, pepper and rosemary. Simmer gently for 25 minutes or so, until the chicken is cooked through and the sauce has thickened.
Add capers, taste again for seasoning and serve.

Tuesday, January 10, 2012

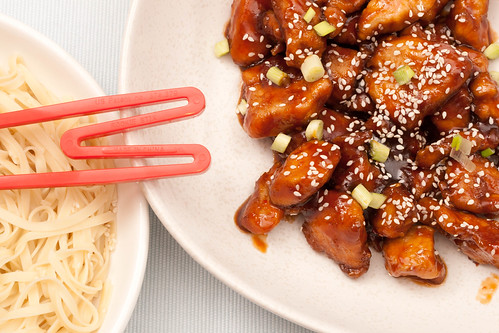
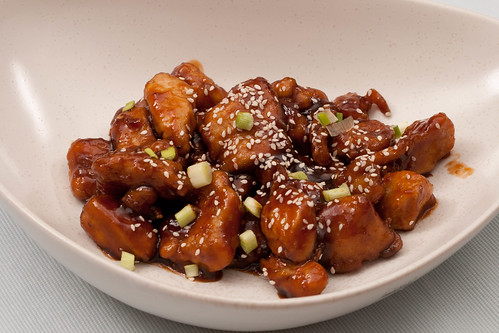
Sesame Honey Chicken

Sesame honey chicken / Meekana

I've been cooking - and eating - a lot of Chinese food recently, say, since early November. Why, you're wondering? You see, I had to choose the recipes for the Chinese cooking workshops I was organising, and test and fine-tune the ones that made the cut. Now, three workshops (and some 45 happy Nami-Nami readers later), I feel confident that I have a pretty good Chinese recipe repertoire to work with and feed my friends and family. While I was trying to use pretty authentic Chinese recipes for those workshops - mainly from Sichuan and Cantonese cuisine - then here's a delicious American-Chinese classic, sesame honey chicken.

NB For other Chinese recipes here on Nami-Nami, click here.

Sesame Honey Chicken
(Seesami-meekana)
Serves four

Sesame honey chicken / Meekana

400 to 500 g chicken breast fillets or boneless thigh fillets
1 Tbsp light soy sauce
1 Tbsp Shaoxing rice wine or (medium) dry sherry
2 tsp sesame oil

For the batter:
4 Tbsp cornflour/cornstarch

For deep-frying:
groundnut oil or rapeseed oil

Honey sauce:
3 Tbsp sweet chilli sauce
2 Tbsp good-quality ketchup
2 Tbsp honey
1 Tbsp oyster sauce
2 Tbsp light soy sauce
3 Tbsp water

To garnish:
toasted white sesame seeds

Cut the chicken into 2 cm pieces.
Mix soy sauce, Shaoxing rice wine or sherry, sesame oil in a bowl. Add the chicken, stir and leave to marinate in the fridge for at least an hour.
Sprinkle cornflour over the chicken pieces to cover on all sides, shake off excess flour.
Heat couple of cm of oil in a small saucepan until slightly sizzling. Deep-fry chicken pieces, couple at a time, until golden brown on all sides and fully cooked. Put fried chicken pieces aside.
Combine the sauce ingredients in a small saucepan and bring into a boil. Simmer for a few minutes, until the sauce thickens slightly.
Add the cooked chicken pieces into the honey sauce, heat thoroughly through.
Sprinkle sesame seeds on top.
Serve with steamed rice or cooked noodles.

Tuesday, March 29, 2011

Georgian Recipes: Chicken in Walnut Sauce or Chicken Satsivi

Chicken satsivi / Kana satsivi

Melissa of The Traveler's Lunchbox posted a recipe for Georgian spinach pkhali last week and I got an immense craving for Georgian dishes again. I've been cooking quite a few of them for various reasons - there were some Georgian cooking classes I gave back in 2008 and 2009, there have been Georgian midweek feasts at our home, there are recipes to re-test and re-write for yet another cookbook project ;) But apparently while I've been cooking all those delicious Georgian dishes, I've failed to share the recipes with you, dear readers. I'll try to rectify that shortcoming a.s.a.p., starting as of today. To start with (and that is a 6th Georgian recipe @ Nami-Nami), I'll give you a recipe for a really lovely and unusual chicken dish.

Georgians love walnuts - they are one of the few people who use walnuts as a main ingredient in the kitchen, not just as a garnish here and there - and they do that pretty much on a daily basis. One of the most well-known and popular uses for walnuts is in satsivi sauce, which can be served with chicken, fish and vegetables (aubergine/eggplant satsivi is another very popular dish). There is no one recipe for satsivi - apparently there are at least 20 different versions - and that does not count the secret versions of all individual Georgian cooks! The name 'satsivi' comes from the Georgian word 'tsivi', meaning 'cold/cool' - and it illustrates the fact that a warm satsivi sauce is spooned over a cooked chicken and left to cool and marinate the chicken. Because of that, it's strictly a cold-weather dish. Nobody would pour hot sauce over cold chicken and leave it like that on a hot summer day - it's a health hazard. For hot summer days there are other chicken and walnut dishes (you'll find a recipe both for katmis bazhe and chkmeruli in Darra Goldstein's  Georgian cookbook). If you're interested in the fish satsivi, look out for it in Claudia Roden's excellent book on Jewish cuisine.

Trust me - it's a lot easier to make than it sounds - and the end result is totally worth it!

Georgian Chicken in Walnut Sauce
(Kana-satsivi ehk Gruusia-pärane kana kreeka pähkli kastmes)
Serves six to eight

1 large free-range chicken
1 onion, peeled
2 bay leaves
some parsley stalks
salt
about 1.5 litres of water

Satsivi-sauce:
3 Tbsp sunflower oil
2 large onions, finely chopped
250 g walnuts
6 garlic cloves
1.5 tsp ground cinnamon
0.5 tsp ground cloves
1.5 tsp ground coriander seeds
2 tsp dried marigold leaves
1 tsp freshly ground black pepper
1 tsp paprika powder
0.5 to 1 tsp Cayenne'i pepper or chilli flakes
a pinch of dried savory
0.5 to 1 tsp salt
3 Tbsp white wine or cider vinegar

about 1 litre chicken stock

Heat the oven to 200 C/400 F.
Place the chicken into a saucepan, pour over enough water to cover. Bring into a boil, removing all the froth that appeares on the surface. Then add the peeled onion, bay leaves and some salt. Reduce heat and simmer on a low heat for about 30 minutes.
Remove the chicken from the saucepan and place onto a deep oven dish, "face down". Add half a cup of boiling liquid. Roast in the middle of a 200C/400F oven for about 20-30 minutes, until the chicken is cooked.
Remove the chicken from the oven and let it rest for about 10-15 minutes.

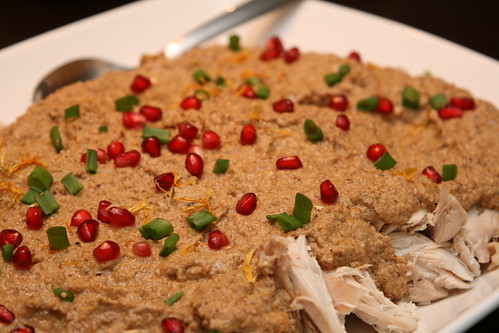
Then you've got two options. Traditionally the chicken is cut into about 8-10 pieces and these are arranged on a serving tray. I've served this dish to a larger group of people and then it's more convenient (for the eaters, that is) to remove the flesh from the bones and cut into large bite-sized pieces, like this:
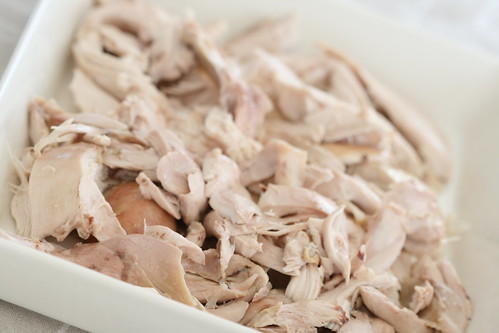
Making chicken satsivi / Kana satsivi tegemine

While the chicken is cooking in the oven, you should

1) Reduce the chicken stock - you'll need about 1 litre

2) Prepare the satsivi-sauce:

Chop the walnuts and garlic cloves in the food processor - you'll want small crumbs, but not a powder!!
Heat oil on a heavy frying pan. Add the chopped onion and sauté for 7-8 minutes.
Add the walnut mixture and fry, stirring all the time, for 3-4 minutes.
Return it all to the food processor and process into a thick coarse paste.
Now - return it to the pan again and add all the seasoning (except wine vinegar):
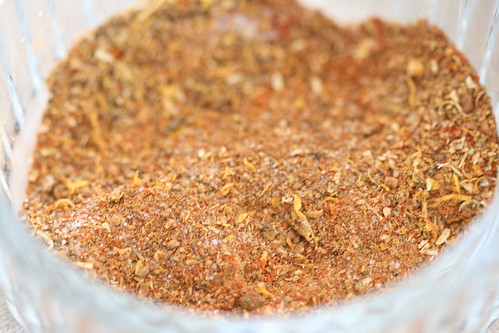
Making chicken satsivi / Kana satsivi tegemine

Fry for a few minutes, stirring carefully. Now start adding the chicken stock, ladleful at the time (you may not need all the stock - it depends on the thickness of your walnut paste - I've used anything from 3 to 4 cups). Let the sauce simmer for about 20 minutes over a low heat, until it thickens.
Season with wine vinegar and again with some salt and pepper, if necessary.

Pour the satsivi sauce over the chicken pieces and let cool to room temperature. Serve at room temperature, garnish with pomegranate seeds or parsley or cilantro leaves.
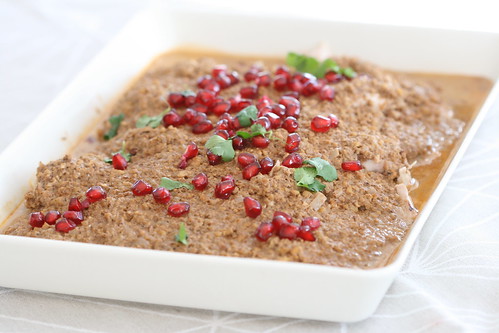
Chicken satsivi / Kana satsivi

Saturday, February 19, 2011

Crispy Chicken in Sweet and Sour Sauce

Crispy chicken in sweet & sour sauce / Krõbe kana magushapus kastmes

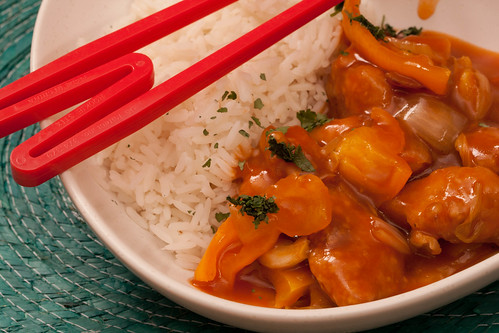
My Estonian Nami-Nami site is currently hosting a Chinese food Cook-Off, and this crispy chicken in sweet and sour sauce has proved immensely popular. I won't give you a recipe here, but send you to my dear friend, the very passionate Johanna, who blogged about Crispy chicken balls with home-made sweet & sour sauce exactly three years ago.

The only changes I made to Johanna's recipe was to use 2 large chicken breasts (about 500 g) instead of four to feed four people, and I doubled the amount of sauce. Excellent - K. had a whopping three helpings and our daughter loved the sauce-covered crispy chicken pieces a lot as well.

Thank you, dear Johanna! Who knows, perhaps we can cook some Chinese food in your Singapore kitchen together one day ;)

Eestikeelne retsept: Krõbe kana magushapus kastmes

  NB For other Chinese recipes here on Nami-Nami, click here.

Thursday, July 01, 2010

Grilled chicken livers in sherry and honey marinade

Chicken livers in sherry honey marinade / Grillitud kanamaksavardad

When planning the menu for the Midsummer's Eve, I knew I wanted something more unusual in addition to the traditional pork shashlik. I ended up making this simple grilled chicken liver dish, which was much liked by everyone. Such a quick dish to throw together and cook, ideal for those quick (yet leisurely) summertime meals in your backyard.

Serve with a green salad or a watermelon & feta or melon & blue cheese salad.

Grilled chicken livers
(Grillitud kanamaksavardad)
Source: Finnish magazine Apu (14.3.2004)
Serves 4

450-500 g chicken livers

Marinade:
2 garlic cloves, minced
a bunch of fresh parsley, finely chopped
4 Tbsp dry sherry
4 Tbsp olive oil
2 Tbsp runny honey

salt and pepper to season

If you're using frozen chicken livers, then transfer them to the fridge night before.
Drain the defrozen chicken livers carefully. Cut each liver into two large pieces.
Mix all the marinade ingredients in a bowl, add chicken liver. Leave to marinate for about 2-3 hours.
Pierce the chicken livers onto a wooden sticks* and grill over hot coals or under a hot grill for about 5 minutes, turning them every now and then.
Season with salt and pepper and serve.

* Soak the sticks in cold water for at least 30 minutes before - then they won't burn as quickly.

Friday, February 26, 2010

Maple-glazed drumsticks and vegetables

Maple roasted chicken drumsticks / Vahtrasiirupised kanakoivad

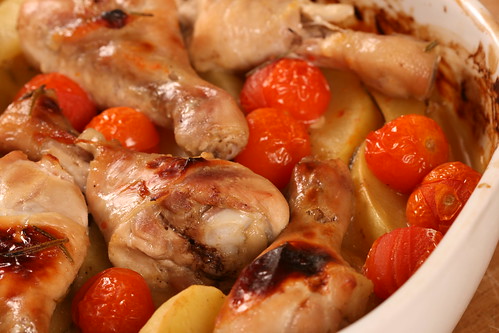
Chicken drumsticks are a really affordable cut of meat that can be made into a number of delicious dishes. I'd call it a perfect recession dish, if it weren't for the maple syrup - hardly a cheap ingredient, at least here in Estonia (and I doubt that the proper stuff is cheap anywhere). Maple syrup lends these drumsticks a lovely sweet flavour, the potatoes add the bulk and roasted cherry tomatoes cheer the whole dish up with their lovely colour.

You could obviously use chicken thighs or even breast fillets instead of drumsticks.

Maple-glazed roasted chicken drumsticks and vegetables
(Vahtrasiirupis röstitud kanakoivad)
Serves three to four

8 chicken drumsticks
4-6 large garlic cloves
6 Tbso maple syrup
2 Tbsp olive oil
1 Tbsp Dijon mustard
2 fresh rosemary sprigs, leaves only
juice of half a small lemon
500 g small potatoes
250 g cherry tomatoes
sea salt
freshly ground black pepper

Mix maple syrup, olive oil mustard, rosemary leaves and lemon juice in a medium-sized oven tray, season generously. Add the drumsticks and stir them in the mixture to cover. Add the garlic cloves (we LOVE oven-roasted whole garlic cloves over here. If that's not your favourite thing, then simply add 2-3 crushed garlic cloves to the maple glaze).
Peel the potatoes and cut into thin wedges. Add to the oven dish and give them a quick stir.
Roast in the middle of a pre-heated 200 C/400 F oven for about 20 minutes.
Scatter the cherry tomatoes on top and roast for another 15-20 minutes, until the potatoes are cooked and chicken is done.

Sunday, February 07, 2010

Sticky & Sweet


No, I'm not talking about Madonna's 2008/2009 concert tour, but about Sticky & Sweet Chicken Wings. I've only discovered the pleasures of chicken wings (very) recently and was surprised to find that there is actually some meat and not just bones and skin involved :) I've been trying out various recipes now - three different ones just during the last week (garlickly Lebanese ones, Teriyaki wings and these sticky and sweet ones), and have bookmarked a number of other recipe ideas (Blake Royer's Baked Buffalo Wings and Susan Russo's Maple-Beer-Chili Chicken Wings, for example). I bet there will be more chicken wing recipes coming up on Nami-Nami as well.

This particular recipe is a slight adaptation of a recipe by the beloved British author, Nigel Slater. The tanginess of the mustard and sweetness of honey make these deliciously sticky and sweet indeed.

Sticky & Sweet Chicken Wings
(Kleepjad magusad kanatiivad)
Serves 3-4 as appetizers, can be easily multiplied to serve a crowd


about 600 g of chicken wings
2 heaped Tbsp grainy French mustard
1 heaped Tbsp runny honey
about 5 Tbsp lemon juice (one medium-sized lemon)
3 large garlic cloves, peeled and crushed
salt and freshly ground black pepper

First, you need to prepare you chicken wings. Using poultry shears or a sharp chef's knife, cut the wings into three parts, as shown on the photo below. Discard the wing tips. Susan mentions in her post that you can buy something called "party wings" in the States - that is chicken wings that have already had their tips removed. No such produce over here, but removing the tips is actually easy.


Combine mustard, honey, lemon juice, crushed garlic in a bowl, season with salt and pepper. Add the chicken wings and move them around, so they're evenly covered with the mixture. Cover the bowl with a cling film and leave to marinate for at least 2 hours.
Line a smallish oven dish with foil, place the chicken wings and any marinade in the tray. Roast in a pre-heated 220 C oven for about 30 minutes, turning once, until the kitchen wings are fully cooked (yet moist inside), gorgeously dark golden brown and very sticky.

Serve with a fresh salad and provide plenty of wet napkins.

Sunday, January 03, 2010

Poulet aux quarante gousses d’áil or chicken with 40 cloves of garlic


Here's a dish that I made several times during last year - and hope to make again as soon as the fresh, new season's garlic appears on the market stalls in a couple of months. It's a dish that I had been intrigued by for ages - imagine, 40 whole garlic cloves to season just one chicken! - and when I finally made it, I fell instantly in love with it. When researching the dish, I came across several and very different versions. After making it several times, I've settled for this minimalist one. Just chicken, olive oil, lots of garlic and some salt'n'pepper. If you like your chicken with crispy skin and sticky, browned bits, then this version isn't perhaps for you, though you can always brown the chicken on a frying pan first and give it a short blast under the grill at the end.

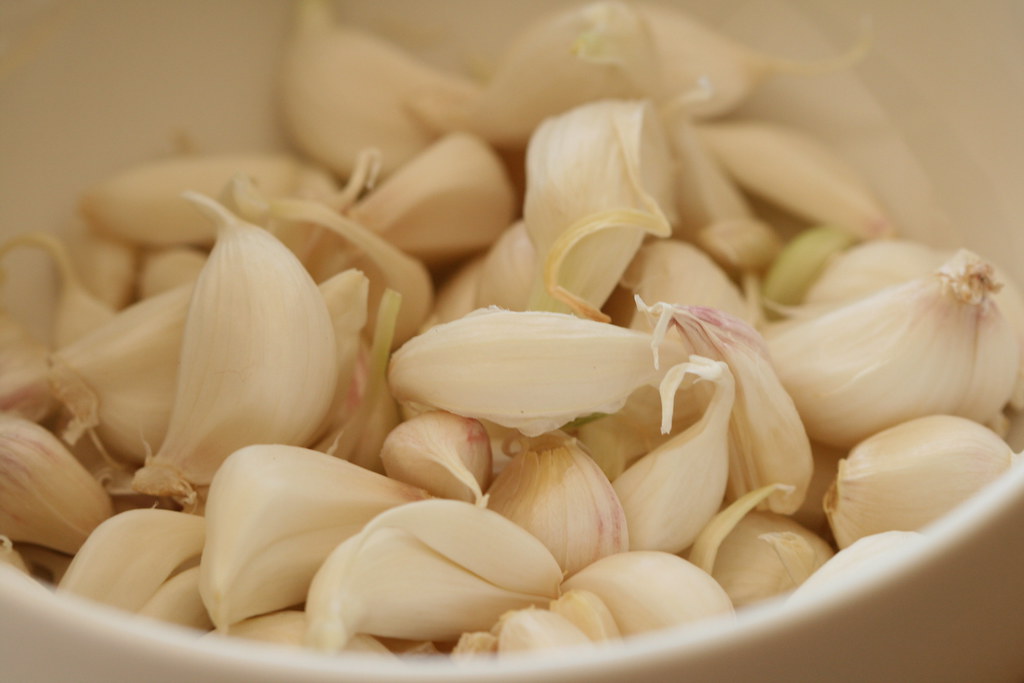
The dish originates in Southern France, Provence, which is famed for its excellent olive oil and large, rosy-tinged garlic cloves. I love making this with young fresh garlic (see photo here), but it works with any garlic. Although the amount of garlic sounds somewhat over the top, then trust me and don't be tempted to choose some tiny garlic cloves. The bigger, the better here. Also, I'm sure the French would use a good extra virgin olive oil here, but if price is the issue, then any good olive oil works here.

Chicken with 40 cloves of garlic
(Kana 40 küüslauguküünega)
Serves 6

Poulet aux quarante gousses d'ail / Chicken with 40 cloves of garlic / Kana 40 küüslauguküünega

1 whole chicken, preferably free-range (about 1,5 kg)
salt and freshly ground black pepper
40 large garlic cloves (from 4-5 whole heads of garlic)
250 ml (1 cup) olive oil
fresh herbs of your choice (rosemary, sage, thyme, bay leaves)

First, prep your garlic cloves. When making this with fresh and young garlic cloves, then there's no need to peel them. During winter you should first blanch your garlic cloves in boiling water for 1 minute, then drain and remove the softened papery skins.
Using a kitchen paper, pat the chicken dry. Season generously with salt and pepper, both inside and out. Place the chicken, breast-side up, into a Dutch oven or heavy casserole dish where the chicken fits snugly (the better the fit, the less oil you need).
Push the garlic cloves and herbs around the chicken, pressing them down between the chicken and the dish.
Pour over the olive oil - check that all the garlic cloves are covered with oil.
Cover the saucepan and place into a preheated 180 C/360 F oven. Bake for 1 hour and 15-30 minutes, until the chicken is cooked.

Poulet aux quarante gousses d'ail / Chicken with 40 cloves of garlic / Kana 40 küüslauguküünega

To serve, carve the chicken into suitably large chunks. Serve with fresh green salad leaves and some wholemeal bread to mop up the delicious garlicky juices. Don't forget the softened and mellowed garlic cloves - these are the extra bonus of the dish. I love pressing them onto piece of bread.

* You can use the leftover garlicky olive oil to dress up a salad or serve as a seasoned frying oil during the next few days.

Monday, May 25, 2009

Spicy Chicken Couscous with Rose Harissa

Chicken couscous with Belazu rose harissa / Maitsev kanakuskuss harissaga

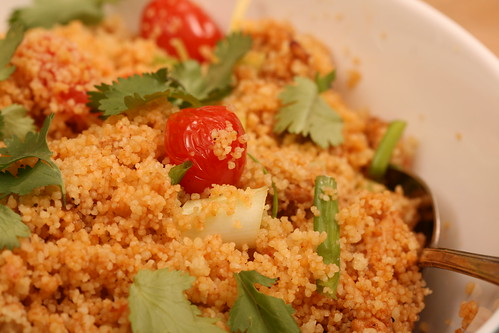
Here's a lovely, and rather fiery, chicken couscous that I made on several occasions earlier this year. The chicken is first marinated in a yogurt-harissa mixture, then gently cooked in the same marinade, before mixed with couscous and some additional ingredients. It's got plenty of taste, good texture and it's definitely not dry - a problem I find with so many couscous dishes and couscous salads.

I used Belazu's Rose Harissa - a rather expensive, but very tasty British harissa paste available in deli shops. But I'm sure your regular harissa would work, too.

Spicy Chicken Cous-Cous with Rose Harissa
(Maitsev kanakuskuss harissaga)
Serves 6

500 g chicken breast or thigh fillets
200 g plain yogurt
1 heaped tsp Rose Harissa paste

CousCous:
300 ml water
1 Tbsp olive oil
1 tsp salt
250 g medium-grain couscous
2-3 Tbsp butter

In addition:
250 g cherry tomatoes
handful of spring onions (white and light green parts only)
handful of fresh coriander/cilantro

Cut the chicken pieces into small strips (about an inch long and 1 cm wide). Fold harissa into the yogurt, then throw in the chicken pieces, stirring, so all chicken pieces are covered with marinade. Cover and place in the fridge for an hour.

Prepare the couscous. Heat the water, salt and oil in a saucepan. Remove from the heat and whisk in the couscous. Cover the saucepan and leave for 2-3 minutes. Return to the heat, add the butter and heat for 2-3 minutes, stirring, until the butter is melted. Remove from the heat and keep covered.

Take a small frying pan, add a splash of oil, rinsed cherry tomatoes and season with salt and pepper. Sauté for 2-3 minutes, until the cherry tomatoes are hot. Add to the prepared couscous and cover again. /No need to stir at this point/.

Take a large frying pan and dip in the chicken strips with the marinade. Heat over a moderate heat for 7-8 minutes, until chicken pieces are cooked through and the marinade hot. Pour over the couscous.

Stir the whole lot gently with a large spoon, then scatter chopped spring onions and coriander leaves on top.

Serve.

Tuesday, May 19, 2009

Julia Child's Waterzooi Recipe - well, almost

Making Waterzooi / Belgia kanahautis Waterzooi

Ruth Van Waerebeek describes this famous Belgian dish in her book Everybody Eats Well in Belgium Cookbook as "a confusion of a soup with a stew, chock-full of herbs and vegetables". Julia Child names this as 'the most interesting recipe she's clipped'. Originally made with fish (perch, preferrably), this dish from the Ghent area of Belgium is now more commonly made with chicken. The chicken is poached alongside julienne of vegetables in a mixture of stock and vermouth, and thickened at the end with heavy rcream and egg yolks. When researching the recipe, I did come across recipes for waterzooi using lemon juice instead of vermouth, but vermouth - as used by Julia Child - sounded so much better :) Eventually I settled for Julia Child's recipe (available here), but adapting it slightly. We thought it was really delicious and rather elegant, and wouldn't look out of place on a slightly more special dinner party.

Now, I wonder what the most famous Belgian of all times, Hercule Poirot, thought of Waterzooi. :D

I used a packet of chicken fillet strips, but sliced chicken fillets or boneless chicken thighs would work as well. You can obviously play around with vegetables, but leeks and carrots are a must here - one for the flavour, the other for the colour.

Belgian Chicken Stew Waterzooi
Serves 4

Making Waterzooi / Belgia kanahautis Waterzooi

3 large carrots
1 large leek (white and tender green part only)
1 medium sized onion
4 celery ribs/sticks
1 tsp dried tarragon
50 g butter (2 Tbsp)
0.5 tsp salt
450-500 g chicken filet strips (1 pound)
250 ml (1 cup) extra dry vermouth (I used Italian Filipeti)
250 ml (1 cup) light chicken or veal broth
100 ml (just under 1/2 cup) heavy/whipping cream
2 large egg yolks
2 tsp cornstarch
salt and freshly ground black pepper
a large handful of finely chopped fresh parsley

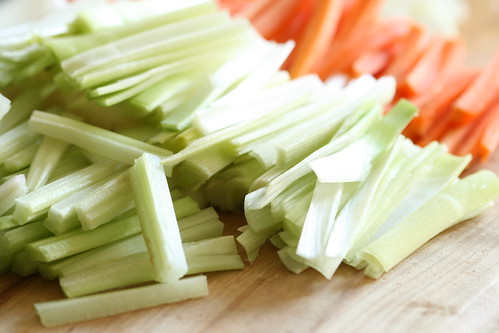
Trim and wash the vegetables. Cut carrots, leek and celery ribs into 4-5 cm (2 inch) julienne matchsticks. Peel and halve the onion, then cut into thin slices.

Making Waterzooi / Belgia kanahautis Waterzooi

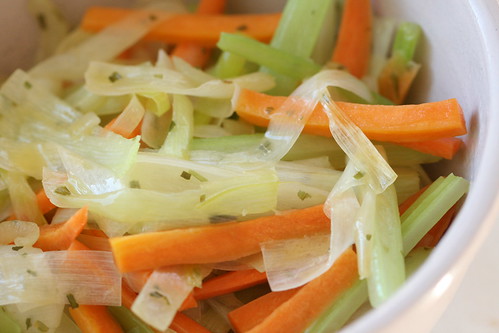
Heat the butter in a heavy casserole dish, add the vegetables, half a teaspoonful of salt and dried tarragon. Sauté for about 5 minutes, without browning! Transfer 2/3 of the vegetables into a bowl.

Making Waterzooi / Belgia kanahautis Waterzooi

Layer the sautéed vegetables and chicken strips into the casserole dish in this order, starting from the bottom: a third of vegetables, half of chicken strips, a third of vegetables, half of chicken strips, a third of vegetables. 

Making Waterzooi / Belgia kanahautis Waterzooi

Pour over the vermouth and chicken or veal broth, so the chicken and vegetables are just covered (you may need a bit more broth). Bring to the boil, then reduce the heat, cover and simmer gently for about 30 minutes, until the vegetables are soft and chicken cooked through. 

Now strain the cooking liquid into a bowl. Whisk egg yolks, cream and cornflour until combined, then add the hot cooking liquid, spoonful at the time in the beginning ('to temper' the egg yolk mixture). Pour the sauce back into the casserole dish over the chicken and vegetables, stir in most of the parsley and heat until the first bubbles appear. Remove immediately (overheating will cause the egg yolks to curdle).

Divide into hot soup bowls and serve with boiled new potatoes, gnocchi, noodles or good French bread. 

Friday, July 25, 2008

Oven-baked Chicken with Feta Cheese


I'm not doing much cooking these days. It's too hot, I'm not in the mood, and I'm taking it easy on my summer vacation. Of course I do cook - and I've already made quite a few nice jams for the winter - but it's mostly tried-and-tested old favourites of mine, so there's not much to blog about. However, here is one of those old favourites that I do need to tell you about. The recipe is based on this Swedish Arla recipe. I remember making it quite regularly about a decade ago, and was happy to rediscover this dish again. A whole chicken breast with cheese topping is a bit too much for us, so we've split the fillet sideways (?). If you've got a mightier appetite, then feel free to use a whole chicken breast per person and extending the baking time by 10 minutes.

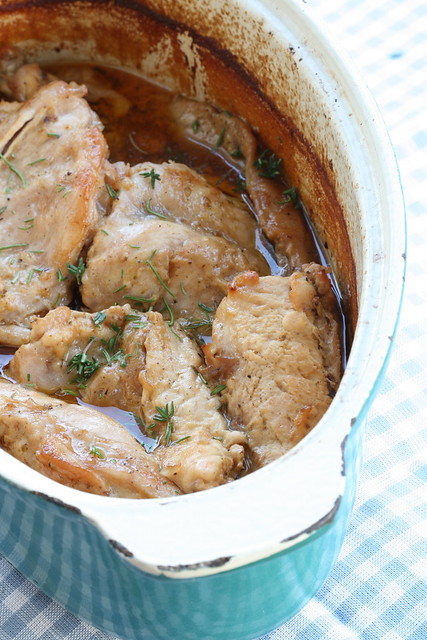
Oven-baked Chicken with Feta Cheese
(Ahjus küpsetatud kanafilee fetaga)
Serves 4

2 large or 4 small chicken breast filets (ca 600 g)
100 g feta cheese, crumbled
200 ml sour cream or creme fraiche or plain yogurt
a pinch of dried oregano
freshly ground black pepper
a pinch of salt

If using large chicken breasts, then cut them into two layers and gently pat and form into filets again (or simply use four small chicken breasts and pat thinner).
Season with pepper and just a little bit of salt. Place into a oiled oven-proof dish.
Mix feta cheese with sour cream, season with oregano. Divide the mixture on top of chicken fillets.
Bake in the middle of 200 C oven for about 30 minutes, until the chicken is cooked through and feta topping is golden.

Serve either with baked potatoes and vegetables, or a light summer salad.

Sunday, February 03, 2008

Easy suppers: Tomato and Olive Chicken

BBC Good Food was my favourite food magazine during my first few years in Scotland. I must admit that these days I subscribe to Delicious and only buy Good Food occasionally, as I find the former visually more attractive and the recipes more intriguing. However, many of my favourite recipes are still from the BBC Good Food magazine. Take this Spanish-influenced tomato and olive chicken that was first published in the March 1999 issue and then again in February 2001 issue. I've made it many, many times over the last nine years, and the combination of tomato sauce and salty olives makes this a true winner. Not many ingredients, plenty of flavour and character, and on your table in 30 minutes. Got that?

Tomato and Olive Chicken
(Tomati-oliivikana)
Serves 4


4 skinless chicken breasts (or mini fillets)
2 garlic cloves, chopped
3 Tbsp concentrated tomato puree/paste
300 ml (just over a cup) of chicken stock/bouillon
a handful of black olives (I used dry-cured olives)
plain/all-purpose flour
salt
freshly ground black pepper
olive oil

Mix flour, salt and pepper in a deep plate. Dust chicken fillets in the flour mixture, shake off any extra flour.
Heat some olive oil in a frying pan/skillet over medium heat. Add chicken fillets* and fry them on both sides until brown - about 10 minutes in total. Remove the chicken fillets from the pan, keep warm.
Add garlic to the pan, fry for a minute.
Add tomato paste and chicken stock. Bring to a simmer, then add the chicken pieces and olives. Cover with a lid and simmer gently for about 15 minutes, turning the chicken half way through. The dish is ready when the chicken is cooked and the sauce slightly thickened.
Taste, season with salt if necessary.
Serve with steamed rice and a green salad.

* For quicker cooking, you may want to use mini fillets, or then place the chicken fillets between two sheets of clingfilm and gently pound them with your hand to flatten them.

Wednesday, December 12, 2007

Sesame and Lemon Chicken Recipe

Somebody somewhere commented that my blog is very nice, but a bit baking-heavy. Well, I cannot help it. I consider myself to be a much better baker than a cook. And with Christmas around the corner, I'll be baking and baking and baking. According to the traditions, one must have seven different types of cakes and cookies on the Christmas table, so I must obey - and keep up a certain reputation I've acquired among my family and friends:)

But just to show I can cook as well, I'm going to post a non-baking recipe today and tomorrow. Tonight I start off with a very easy supper recipe for Sesame and Lemon Chicken. I discovered the recipe from a tiny cookbook by Tami Lehman-Wilzig & Miriam Blum, called "The Melting Pot: A Quick and Easy Blend of Israeli Cuisine" - a gift my friend Hille brought me back from her trip to Israel few years ago. I've made this dish couple of times, and can really recommend it. Again, I love the easiness of this dish, the subtle lemon flavour and the crunch of sesame seeds in my mouth. And I know that kids like this, too - I've checked!

Aitäh raamatu eest, Hille!

Sesame and Lemon Chicken
(Sidruni-seesamikana)
Serves 4


4 small to medium chicken fillets
half a lemon
0.5 tsp salt
0.25 tsp black pepper
1 egg
6 Tbsp plain flour
3 Tbsp sesame seeds
3 Tbsp breadcrumbs
vegetable oil for frying

Flatten the chicken fillets slightly by placing them between two sheets of clingfilm and gently beating them with a rolling pin. Place in a large shallow dish, season with salt, pepper and lemon juice on all sides. Cover and leave to marinate for half an hour in a fridge.
Break the egg into a soup plate, whisking it a little.
Place flour into another plate.
Mix sesame seeds and breadcrumbs on the third plate.
When ready to cook, toss the chicken fillets, one after another, in the flour, then quickly dip into the egg, and finally press into the sesame seed mixture, to ensure they're covered evenly.
Heat oil in a large skillet/frying pan over moderate heat, and cook the chicken fillets on both sides until golden brown and cooked through.
Serve with lemon slices, steamed rice and some steamed broccoli or other vegetables. Or simly with some dressed salad leaves.

Thursday, September 27, 2007

Something exotic: Coconut Chicken Curry, Trinidad style

I've got quite a few Estonian recipes lined up for you during the next few weeks - so much so that I thought it might be a good idea to post something exotic for a change. Although while I certainly do want you to come here whenever you want to read about and cook something Estonian, I don't want to be typecast as 'that Estonian blogger who only posts about Estonian salted broad beans, nettle soup, beef liver gravy, and desserts made of kama.

I can do more than that :)

Here's a recipe for a Coconut Chicken Curry adapted from Globetrekker TV I made last weekend. We both enjoyed this mellow and fragrant curry, and will be making it again when we fancy something more exotic.

Coconut Chicken Curry, Trinidad style
(Trinidadi kana-kookoskarri)
Serves 4


500 grams chicken breast or thigh fillets (I used the latter)
3 garlic cloves, finely chopped
3 lemongrass stalks, inner parts finely chopped
2 Tbsp rum*

2 Tbsp oil
2 medium onions, finely chopped
1 Tbsp curry powder**
250 ml coconut milk
1 red chilli pepper

a small bunch of fresh coriander/cilantro, finely chopped

boiled rice or quinoa to serve

Cut chicken pieces into bite-sized chunks. Mix rum, finely minced garlic and lemongrass stalk in a small bowl, add chicken chunks, toss, cover with clingfilm and put into the fridge to marinate for at least an hour or overnight.
Heat oil in a heavy saucepan, add onions and sauté for 5 minutes on a low heat. Increase heat, add chicken pieces and fry until the colour has changed, stirring to enable even browning (about 8 to 10 minutes).
Add curry powder, stir for a few seconds, then add coconut milk and finely chopped chilli pepper.
Simmer on a low heat for another 5 minutes, until the sauce thickens and chicken cooks through. Remove from the heat, stir in chopped coriander/cilantro and serve with boiled rice or quinoa.

* I used Havana Club Añejo Reserva rum
* I used Caribbean Poudre de Colombo Curry Spice Blend from Seasoned Pioneers, which contains cumin seeds, coriander seeds, fenugreek, black peppercorns, turmeric and cloves. My dear foodblogging friend Johanna gave it to me as a gift this summer.