Friday, November 30, 2012
Oven-baked pork stroganoff with mayonnaise
Stroganoff, for most of you, is associated with the Russian dish boeuf stroganoff, a creamy sauce based on thin beef tenderloin strips and perhaps button mushrooms (interestingly, mushrooms aren't included in böfstrooganov over here). But stroganoff it's also used as a shorthand for various hot dishes using long and thin meat strips. Say, something you'd probably call pork or beef stir-fry strips in English-speaking countries, are called stroganoff pieces over here (you can also buy "maksastrooganov" or thin beef or pork liver strips over here).
Here's a popular Estonian family dinner - oven-baked pork stroganoff that uses less than five ingredients (pork, onions, mushrooms, mayonnaise and seasonings). It tastes lovely with some mashed or simply boiled potatoes, and is a perfect for those cold winter nights.
More stroganoff recipes here on Nami-Nami:
Latvian pork stroganoff "Kurzeme stroganoff"
Mushroom stroganoff
Oven-baked pork stroganoff with mayonnaise
(Sealihast ahjustrooganov majoneesiga)
Serves 4
500 g lean pork (stroganoff/stir-fry strips)
2 large onions
250 g white or button or cremini mushrooms
225 g mayonnaise (I used the local Jaani Provansaal mayo)
salt and freshly ground black pepper
vegetable oil, for frying
To garnish:
fresh chives, finely chopped
Pre-heat the oven to 200 C/400 F. Lightly oil a medium-sized oven casserole dish, put aside.
Peel the onions, halve and cut into thin slices. Clean the mushrooms and cut into thin slices.
Heat oil on a heavy skillet/frying pan, add the pork and fry until lightly browned on all sides. Season to taste with salt and pepper. Put into a casserole dish.
Fry the onions on the same pan, adding some oil, if needed. You don't need to caramelise the onions - around 5 minutes, until the onions are just starting to soften, is all you need.
Scatter the fried onions and the sliced mushrooms on top of the pork. Drizzle or spoon the mayonnaise on top.
Cook in a preheated 200 C oven for about 30 minutes, until the meat and mushrooms are cooked and the mayonnaise topping is lovely light golden brown.
Garnish with chopped chives, and serve with either simple boiled potatoes or mashed potatoes.
Wednesday, November 28, 2012
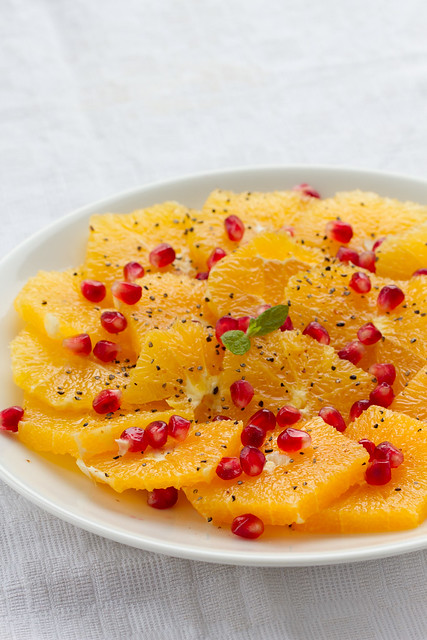
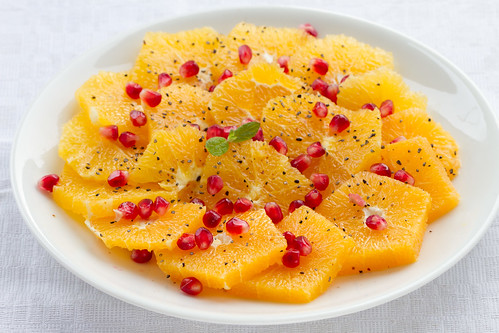
Orange salad with pomegranate seeds, perfect for the festive season
Citrus fruit and Christmas go hand in hand, no? Well, in my house they do. I like serving an orange salad during the festive season - either as a starter, like this beetroot and orange salad with ginger yoghurt dressing or this fennel and orange salad with a simple vinaigrette or even this super-simple orange and red onion salad. Or as a dessert, in a form of a simple "Orange Ambrosia, for instance.
When flipping through the pages of one of my current favourite food magazines, the Swedish-language Lantliv mat & vin, I was immediately drawn to a pretty orange and pomegranate salad. And although Christmas is still a few weeks away, we've had some snow in Estonia already - and it's snowing outside as I'm writing this post - so this salad has been sitting prettily on our table twice during the last week or so. And it'll be definitely making an appearance or two during December.
It'd make a lovely light dessert, or simply one of the dishes on your festive buffet spread. It's also vegan and gluten-free, so suits all kind of special diets.
If you're making this in Estonia and are looking for crushed cardamom seeds, then I recommend buying MEIRA cardamom - it's coarsely ground. If you're looking for fine cardamom "dust" (sorry, powder), then Meira is not for you :) Alternatively, buy whole cardamom pods and grind your own. You'll need seeds from about 20 cardamom pods to get about a teaspoon of ground cardamom.
Orange salad with pomegranate seeds
Apelsinisalat granaatõunaseemnetega
Adapted from Lantliv Mat & Vin, Nr 6/2012 (Apelsinsallad)
Serves 4, can be easily multiplied
4 large sweet oranges
1 ripe pomegranate
1 Tbsp (brown) sugar
1 tsp ground cardamom seeds
Peel the oranges with a sharp knife, then cut into thin slices, crosswise. Arrange nicely on a large plate.
Remove the pomegranate seeds and scatter on top of orange slices.
Mix the ground cardamom with sugar and sprinkle on top of the fruit.
Serve at once or leave to macerate for an hour or two in a cool place, covered.
Friday, November 23, 2012
Interview with me on 7 Ravioli foodblog
There's a short interview with me on a Lithuanian food blog 7 ravioli or Septyni virtieniai :) The interview is here.
If you don't speak Lithuanian, you'll find the English translation here.
Thank you, Dalia, it was a pleasure talking to you!
If you don't speak Lithuanian, you'll find the English translation here.
Thank you, Dalia, it was a pleasure talking to you!
Labels:
Focus On Me
Thursday, November 22, 2012
My recipes in Home & Garden (Kodu & Aed), November 2012
Here's a short overview of the recipes I chose and cooked for the November 2012 issue of the Home and Garden (Kodu ja Aed) magazine, as the magazine's new editor of the food section. If you read Estonian and are based in Estonia, then you can get the magazine at all newsstands until the end of the month.
The photos are by Juta Kübarsepp, who also helped with styling. The props are my own or from my friend Kristiina :)
November is a dark and chilly time in Estonia. There's usually no snow yet, so nothing to reflect back the little light we have during this month (and trust me, there's not much light). However, there are still some things to light up the life during this month - Fathers' Day is celebrated during the second Sunday in November, and there are some folk calendar events as well. (And our little family gets to celebrate my dear K's birthday and the birth of our third child). I was thinking of the Father's day lunch or dinner when planning this menu, yet it'd be perfect for any autumnal family gathering.
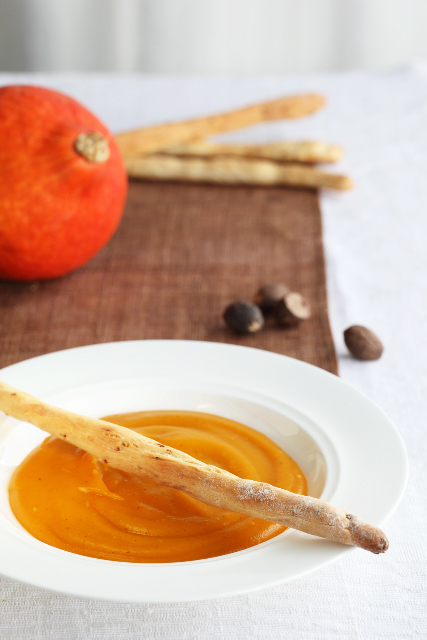
For starters, I chose the silky butternut squash soup with a pinch of nutmeg, accompanied by home-made roasted onion grissini. I've blogged about the soup here on Nami-Nami foodblog in October 2008, and I still highly recommend the recipe. The recipe for roasted onion grissini is originally from an Estonian foodblogger Kätrin, but I've modified it slightly over the last year or two.
For the main course I chose something autumnal and gutsy. Rabbit has become more easily available here in Estonia for an average shopper (read: you can get it vacuum-packed in your local supermarket), and this rabbit stew with a creamy mustard sauce is an excellent way of cooking rabbit. The recipe is French-inspired and adapted from Anthony Demetre, the chef patron at the London restaurants Arbutus, Wild Honey and Les Deux Salons, more specifically, from his book Today's special: A new take on bistro food - Recipes from Arbutus and Wild Honey. Demetre uses rabbit legs, but for a home cook, using a whole rabbit makes much more sense - and is much more economical, of course.
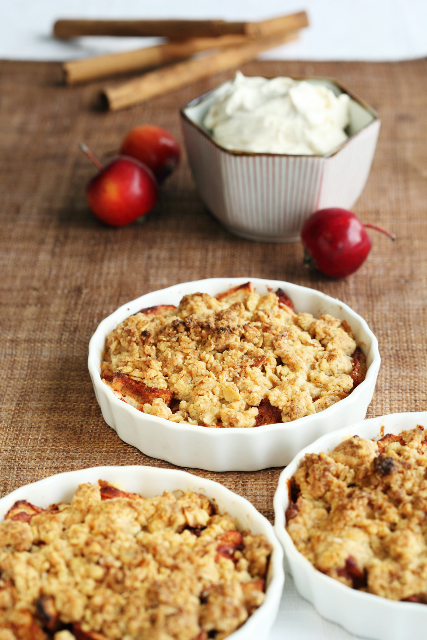
As for the perfect autumn dessert, you cannot go wrong with a classic apple crumble - something that's actually not particularly well-known in Estonia (we're more cake and pie and tart type of people, I guess). I served the crumble with a cinnamon and cream cheese whipped cream - a wonderfully aromatic addition to the crumble.
Check out the October 2012 recipes as well.
Friday, November 16, 2012
Oxtail ragout with celeriac mash
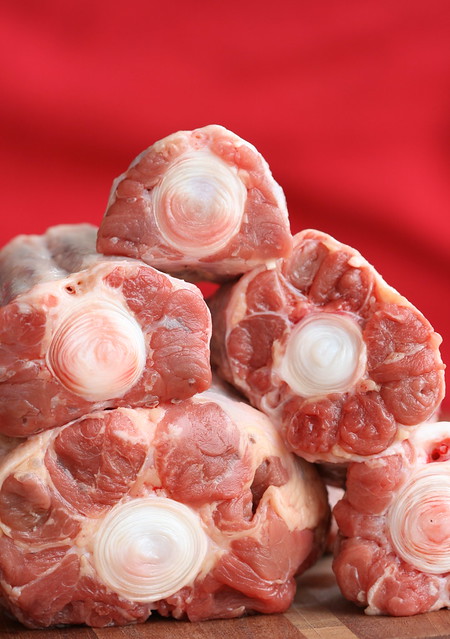
Oxtail - isn't it beautiful? I admit that I blatantly nicked the idea for today's post from the wonderful Jeanne in London, who wrote about a 20-hour sous vide oxtail stew in her award-winning blog, Cook Sister! Here's my oxtail story.
Albarracín at night, March 2008
I still remember my first encounter with oxtail - on a plate, I mean. My dear K. and I were travelling in Spain in March 2008, visiting the lovely Ximena of the Lobstersquad fame in Madrid, and visiting some other off-the-beaten-track cities that Ximena and her also very lovely husband J. had suggested. One late afternoon we arrived in the picturesque Albarracín in Aragon (yep, on the lands of the medieval Kingdom of Aragón). After checking into our hotel for the night, we wandered on the streets of Albaraccín, looking for a tiny restaurant called Rincón del Chorro. Somebody somewhere had recommended it, you see. The night was already dark, but we were obviously too early for dinner, as all we found was a locked door. We returned an hour later, to find a small but busy restaurant. The menu wasn't long - I opted for the pickled partridge (a local speciality, I was told), K. ordered the rabo del toro or oxtail.
Both were brought to the table pretty quickly. While the partridge was lovely, the oxtail was wonderful and although the idea of cooking it myself seemed a wee bit daunting initially, I've become a huge oxtail convert over the years and cook this particular cut of beef regularly.
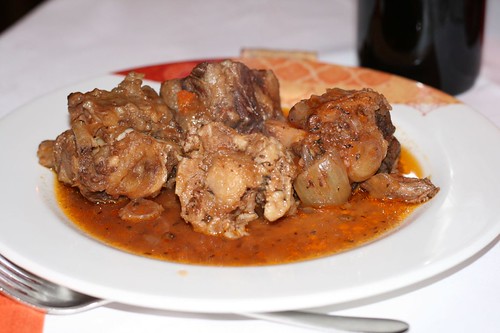
My favourite oxtail dish takes slightly less time to cook than Jeanne's and as there's definitely no sous-vide machine in my kitchen, it can be cooked in a simple stovetop saucepan. But I guarantee it'll be just as delicious ;) The inspiration for the dish is from a blog written by an Estonian restaurateur, Mme Randrüüt - see here. It's an interpretation of the French classic, mijotée de queue de boeuf et purée de céleri rave or stewed oxtail with celeriac pureé. If you haven't cooked oxtail before, then slowly cooked oxtail has the most wonderful sweet and meaty flavour, which is pretty much universally liked. While we happily gnaw away on the slowly cooked oxtail pieces (there's a link to another oxtail stew recipe here on Nami-Nami at the bottom of this post), it can be intimidating to somebody who's new to oxtail - or if you're wanting to serve oxtail in a slightly more elegant manner. This oxtail ragout is the perfect solution then.
In Estonia I usually get my oxtail cut into chunks and packed neatly on a tray. Very convenient, even if it is only sold in one major supermarket and only on certain days, so one has to pre-plan carefully. If you have a friendly butcher at your favourite market, you can obviously order some whenever you need it.
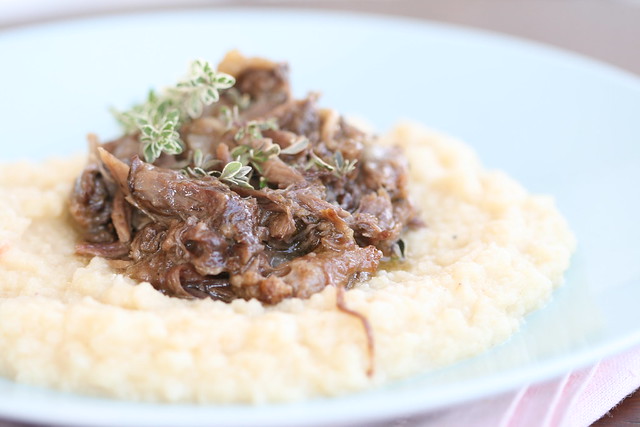
Oxtail ragout with celeriac mash
(Veisesabaraguu)
Serves two to three (can be easily doubled)
1 kg oxtail pieces
2-3 Tbsp oil
500 ml (2 cups) boiling water
few fresh parsley sprigs
few fresh thyme sprigs
1 bay leaf
3-4 whole black peppercorns
3-4 whole allspice berries
salt, to taste
Season the oxtail pieces with salt.
Heat oil in a heavy saucepan, sauté the oxtail pieces until dark golden brown on all sides.
Add the water, herbs and seasonings. Bring into a boil, then reduce heat and cover the saucepan. Simmer gently for about 3-4 hours until meat falls off the bones easily.
Remove from the heat, cool. Remove the meat off the bones, discard the bones and return the meat into the stew.
(This can be done a day in advance).
Skim the excess fat from the top of the stew. Re-heat the stew and simmer gently for another hour or two, until the stew has thickened. Taste for seasoning.
Serve with a celeriac/root celery mash - prepare like your regular potato mash, just use root celery instead.
Looking for more oxtail inspiration? Here are some recipes:
Papardelle with oxtail ragu by Skye Gyngell
Oxtail ragout with papardelle by Sammy and Bella (My Kitchen Rules)
Oxtail braised in dark beer by Nami-Nami
Coda alla vaccinaria by Food Lover's Odyssey
Glazed oxtails by Simply Recipes
Korean braised oxtail by Kitchen Wench
Alsatian oxtail stew by Choosy Beggars
Thursday, November 08, 2012
Chinese Lemon Chicken Recipe
Now that I'm a young mum with three kids, I am looking for and cooking more and more quick and universally appealing dishes. Luckily it doesn't just mean macaroni with fried pork or pasta with pesto - the "older" kids are happy to try different foods (like mussels), and I can still cook my old favourites from across the world. Last week (when I was still a mum to just two :)) I made this quick and easy Chinese chicken dish, which they all loved. It's a lighter and healthier version of the popular Cantonese dish.
The recipe is adapted from Wynnie Chan's 2007 cookbook "Fresh Chinese". Wynnie Chan is a nutritional consultant for the Chinese National Healty Living Centre in the United Kingdom, so she's dedicated to adjusting popular Chinese dishes to modern healthy palates. That isn't always easy, but seems to work for this lemon chicken recipe.
I usually serve it with rice, but egg noodles work just as well, especially if doused with a little sesame oil and sprinkled with some sesame seeds.
Chinese Lemon Chicken
(Hiina sidrunikana)
Serves four
400-500 g chicken breast filets
1 egg
2 garlic cloves, finely crushed or grated
2 small lemons
1 Tbsp soy sauce
1 tsp sesame oil
4 Tbsp cornflour
1 Tbsp groundnut oil or other mild vegetable oil
2 spring onions, sliced at an angle
Whisk the egg, garlic, finely grated zest of 1 lemon, soy sauce, sesame oil and cornflour until combined. Cut the chicken breasts into 2 cm cubes or strips, put into the lemony cornflour mixture. Leave to marinate for at least 15 minutes, preferably an hour.
Heat the wok or a large frying pan until very hot, then add the oil and heat until almost smoking. Add the chicken pieces in batches and fry until golden brown on all sides (reduce the heat, if necessary). Transfer the golden chicken nuggets onto a plate and fry the rest in a similar manner.
When all the chicken pieces are cooked, then return them all to the pan. Add the juice of one lemon, give the dish a quick stir. Taste for seasoning - add more soy sauce or juice of another lemon, if you wish.
Garnish with spring onions and serve at once.
Monday, November 05, 2012
And last, but not least...
If you've been wondering why my posting has been somewhat erratic recently, then here's the reason:
Our third baby was born yesterday morning, on November 4th. She weighed 3710 grams and was 50 cm tall - our biggest baby yet :)
Our oldest - a daughter born in January 2009 and our second child - a son born in January 2011 - are still quite small, 3 years 9 months and 1 year 9 months, respectively. So being heavily pregnant with two small kids needing the attention and trying to write a foodblog - the latter has often had to wait. But I'm still here, and hopefully you'll be patient enough to wait for my future posts - which will be about food, and not kids, I promise :)
Thursday, November 01, 2012
Scottish shortbread, the way I like it
There's a personal reason to celebrate all things Scottish today - namely, it was exactly seven years ago that I met my dear partner K. at a reception at the Scottish parliament in Edinburgh (housed in the lovely building behind me on the photo above, though the picture is taken about 7 months later), which eventually led me to moving back home to Estonia, and living a very happy life with a wonderful partner and two gorgeous kids. Oh, and a lovely garden.
The Scottish dish I'm celebrating today is the wonderful, melt-in-your-mouth, buttery Scottish shortbread. It's soft, yet crunchy - the crunchiness is enhanced by the use of fine semolina in the recipe. You cannot have a cup of tea without those, really.
Here's the home-made Scottish all-butter shortbread - the recipe is from Delia Smith - and as it's a pretty classic one, there's been no reason to change it. I used a special shortbread tin, marked with the thistle, but you can just as well use a regular springform tin or even roll the dough out and cut into preferred shapes with a cookie cutter (remember to adjust the cooking time for smaller cookies!)
Scottish butter shortbread
(Šoti liivaküpsised)
175 butter, at room temperature
75 g caster sugar
175 all-purpose flour, sifted
75 g fine semolina/cream of wheat
a pinch of salt
Preheat the oven to 150 C/300 F.
Using your wooden spoon, cream the butter in a bowl.
Add the sugar, flour, semolina and salt. Mix with the spoon until combined, then use your hands to knead the dough (or simply use a food processor). Avoid over-working the dough, however, as the butter might melt and compromise the texture!
Transfer the cookie dough onto a lightly floured surface. Using the rolling pin, roll into a 20 cm circle and transfer it into a 20 cm springform. Press lightly, then pierce with a fork thoroughly (this keeps the shortcrust pastry from raising during baking).
Bake the shortbread for about 60 minutes in the centre of the preheated oven, until it's pale golden and feels firm to the touch.
Remove it from the oven and cut into 12 wedges.
Sprinkle generously with caster sugar, if you want, and store in an airtight box.
Subscribe to:
Posts (Atom)