Showing posts sorted by date for query cookies. Sort by relevance Show all posts

Tuesday, December 09, 2014

Holiday baking: Carrot cake cookies recipe

Carrot Cake Cookies. Porgandiküpsised.

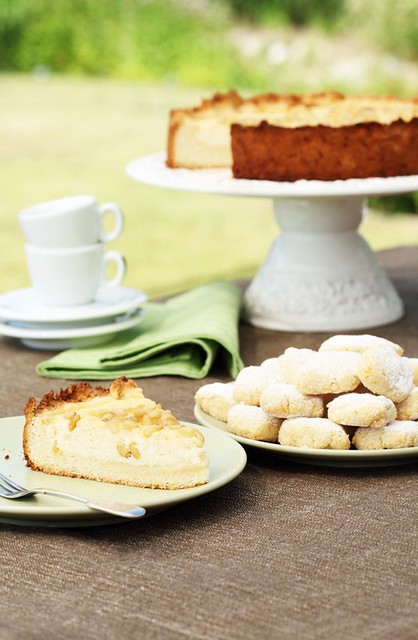
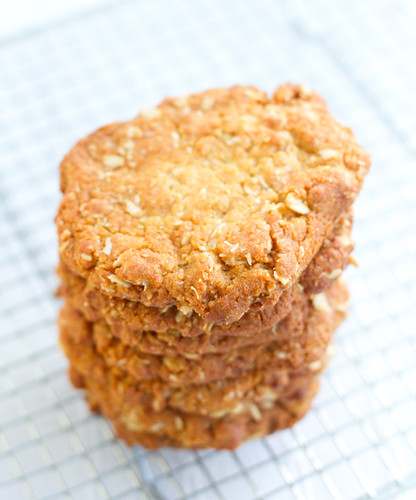
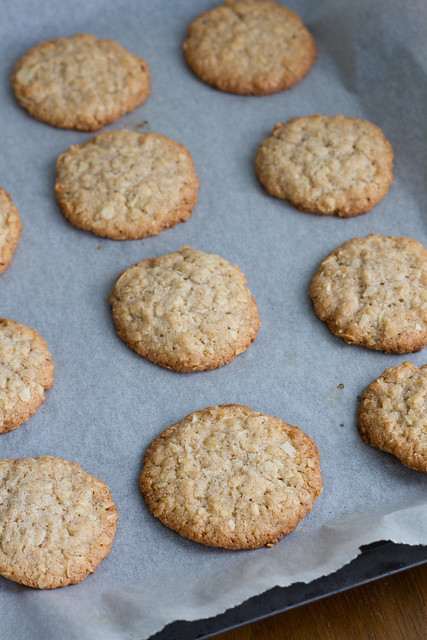
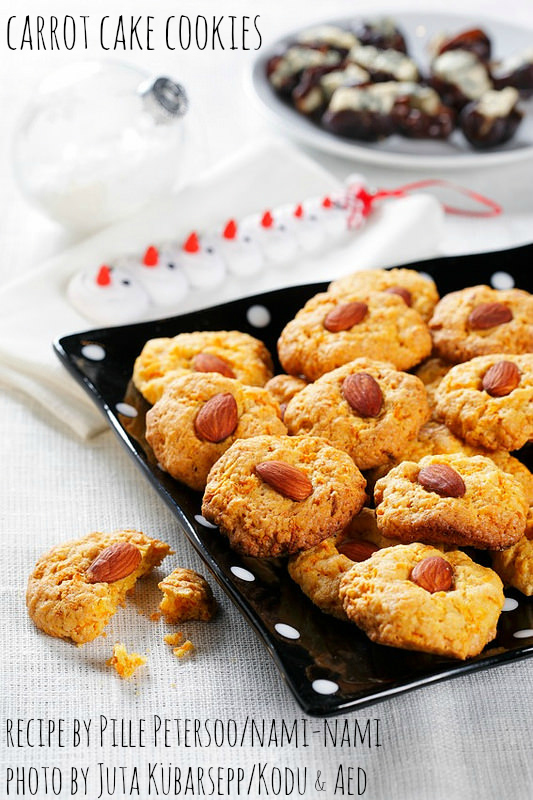
Time to start preparing for the Christmas holidays and I offer you a lovely cookie recipe! Although we'll be mostly eating piparkoogid aka gingerbread cookies here in Estonia, these slightly chewy carrot cake cookies would do just as well.

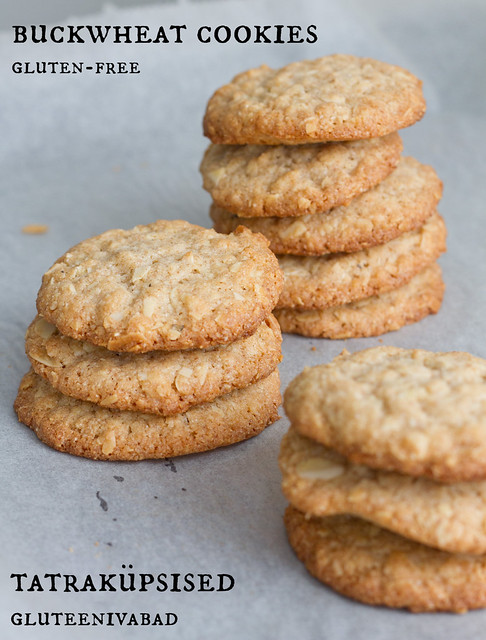
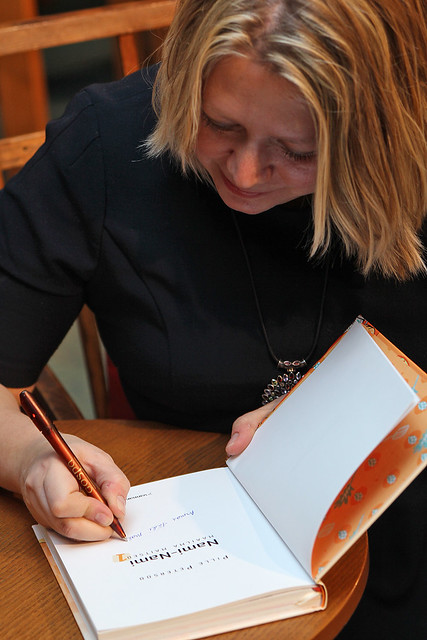
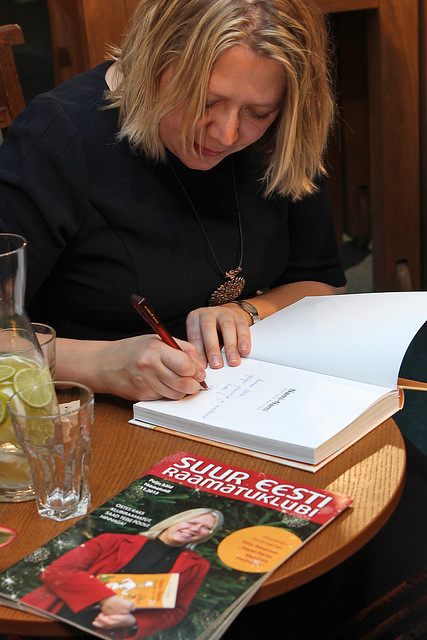
For over two years now I've been contributing recipes for one of the biggest home and gardening magazines here in Estonia, Kodu ja Aed (that translates "Home and Garden"). Since spring we've been focusing on a specific vegetable both on the gardening pages and in the food section. Carrot happened to be the vegetable of the month in December. December, of course, being the Christmas month, so I was trying to think of recipes that would feel right at the Christmas table as well. I think these cookies fit the bill brilliantly. They are easy to make, go brilliantly with a glass of glögg or mulled wine, they're "healthy" as containing a vegetable (carrot is also providing both texture and flavour), and they are egg-free, making them also suitable for some special diets. Most of all, they have a pretty colour and they taste great. As an added bonus, the kids loved them - something to think about when you've got 3 small ones running around the house!

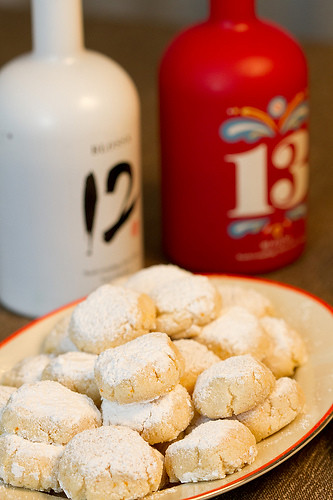
So when you're planning your next glögg party, think of adding these carrot cake cookies to the menu!

You'll find all of Nami-Nami's Christmas recipes here and a selection of cookie recipes here.

TIP! You could make these cookie more festive by adding a scant teaspoon of mixed spices, gingerbread spice or pumpkin pie spice - all of these would work.

TIP! If you forgot to take your butter out of the fridge in advance, then simply grate the cold butter into your mixing bowl. Instant softened butter! 

Carrot cake cookies
(Porgandiküpsised)

200 g butter, at room temperature (7 oz)
150 g caster sugar (2/3 cups)
200 g carrots, finely shredded (2 medium carrots)
300 g all-purpose flour (2 cups)
1 tsp vanilla sugar or extract
1 tsp baking powder
a pinch of salt
whole almonds

Pre-heat the oven to 200C/400F. Line a baking sheet with a parchment paper.

Cream the butter and sugar in a mixing bowl, either using a wooden spoon or the paddle attachment of your standing mixer. Add the carrots, then the dry ingredients (flour, vanilla sugar, baking powder, salt). Mix the dough until combined, then take small chestnut-sized chunks of the dough and form into small balls.

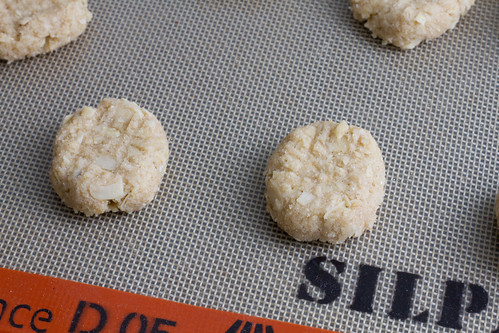
Place the balls onto the baking sheet, flattening them with your palm. Press a whole almond onto each cookie.

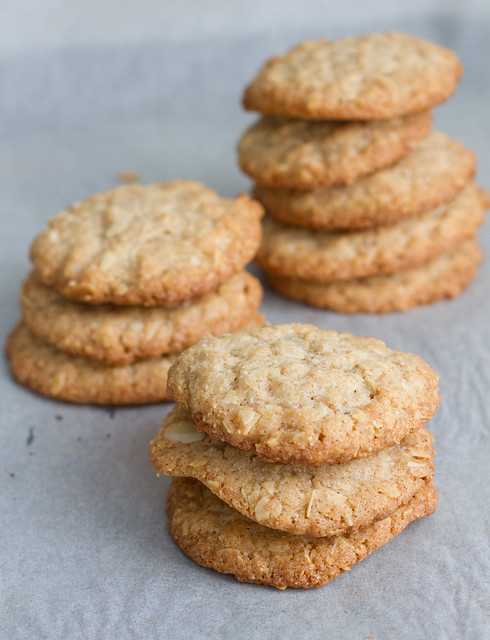
Bake for 15 minutes or until the cookies are golden brown.  Remove from the oven, leave for a few minutes before transferring the carrot cookies onto a metal rack to cool completely.

More carrot cookie recipes:
Carrot oatmeal cookies by Heidi @ 101 Cookbooks
Chocolate chip carrot cookies by Jeanine @ Love & Lemons
Gingered carrot cake cookies by Michelle @ Brown-Eyed Baker
Porgandiküpsised by Marit @ Magusad fotod (recipe in Estonian)
Porgandiküpsised by Kaare @ Koopatibi (recipe in Estonian)
Porkkanakeksit @ Kotiliesi (recipe in Finnish)

Wednesday, September 10, 2014

Quark and pumpkin pudding cake

Kõrvitsa-kohupiimavorm. Pumpkin and curd cheese.

Recipe by Pille @ Nami-NamiAbove photo by Juta Kübarsepp for the October 2013 issue of Kodu ja Aed ("Home and Garden", an Estonian monthly magazine. I've been their food writer since October 2012). 

Pumpkin or winter squash dessert, anyone?

There's a popular old-school dessert here in Estonia, called kohupiimavorm. It consists of curd cheese (also known as quark), sugar, (whisked) eggs, and some add-ons, usually raisins or pieces of fruit. It's not really a cake (too soft), nor a soufflé (no custard base), so after some research I've decided to translate it as pudding cake :) Pudding cake is a cake you need to eat with a spoon, and it's rather difficult to cut it into neat shapes when still warm.

Here's a version using that autumn staple, winter squash or pumpkin. For once, this is a recipe that's very versatile - if you cannot find curd cheese (try looking for 'tvorog' at your nearest Polish/Russian/international shop), you could use drier ricotta or even farmer's cheese. As for pumpkin, any yellow-fleshed winter squash would work. I like using butternut squash here, as this gives the dessert a lovely dark orange hue. Considering the amount of flour in the recipe, you could easily make this wheat-free or gluten-free by using different types of (gluten-free) flours.

You could eat it as it is, or with a dollop of thick yoghurt or sour cream on the side. It's lovely with a kissel or fruit soup (this cranberry kissel would work brilliantly here). I actually prefer this pumpkin version to the traditional version, as it's softer and moister.

Oh, and if you were wondering what those cookies on the top right corner of the photo were, you'll be pleased to know these contain pumpkin/squash as well. You'll find the recipe for those wonderful pumpkin cookies here.

Curd cheese and pumpkin pudding cake 
(Kõrvitsa-kohupiimavorm)
Serves 6

800 g butternut squash or pumpkin (cleaned weight)
100 g caster sugar
500 g curd cheese
4 large eggs, separated
1 lemon, juiced and zested
2 Tbsp all-purpose flour
100 g dried cranberries (craisins) or seedless raisins
a pinch of salt
butter
breadcrumbs

Pre-heat the oven to 200 C/400 F.

Peel the pumpkin, cut into large wedges. Remove the soft core and seeds, and cut the flesh into large cubes. Weigh the pumpkin cubes - you need about 800 g (just under 2 pounds). Place the cubes into a large saucepan, add a cup of water and simmer over a low heat until pumpkin is tender. Drain thoroughly, then place into a bowl and mash with a fork.

Add lemon juice and grated zest, curd cheese, flour, (c)raisins.

Separate the eggs. Whisk the egg yorks with sugar until creamy, add to the rest of the ingredients. Finally, whisk the egg whites with a pinch of salt until stiff peaks forms. Fold 1/3 of the egg whites into the rest of the ingredients, then gently fold in the remaining egg whites.

Butter a large (round) oven dish - about ∅ 26-30 cm is excellent -  and sprinkle with fine breadcrumbs. Spoon the pumpkin and curd cheese mixture into the dish, smooth the top.

Bake in the pre-heated 200 C/400 F oven for about 40 minutes, until it's lovely golden brown, and just a wee bit wobbly in the middle.

Let cool either completely or serve at room temperature.

(From the recipe archives: this post was originally posted in October 2013)

Similar recipes:

Saturday, June 14, 2014

Recipe for torta della nonna, or Tuscan ricotta cake with pinenuts or almonds

Case Vecchie, Sicily

I am still in Sicily, still enjoying the hospitality of Anna Tasca Lanza’s cookery school in Case Vecchie, near Vallelunga. I’ve just got back from the most amazing garden party I’ve ever attended - just under 200 guests seated around a huge long table, set under an elegant makeshift canopy built in the middle of a vegetable patch :) 

Who knows, we may have lingered at the table for another few hours, sipping one of the extremely “quaffable” wines from Tasca d’Almerita, if it weren’t for the thunder and rain that suddenly appeared. Not really out of nowhere - the skies were threatening with rain already yesterday - but apparently heavy showers are pretty much unusual in this part of Sicily in this part of the year. In any case, I use the thunderstorm as an excuse to retreat to my room for a short while and finish another blog post. Being in the company of all those bloggers mentioned yesterday - David, Rachel and Johanna - as well as some others I met today (Elizabeth, Elisia, Alec, Anissa, Linda) - has certainly been very inspiring :)

Filippo and his ricotta.

We arrived at Case Vecchie on Wednesday evening, just in time to have dinner overlooking Fabrizia’s (she’s the owner of the cooking school) gorgeous herb garden. On Thursday morning, just after the breakfast, we ventured out to visit a local shepherd, Filippo at Azienda Agricola Rivitera. We were shown his sheep - 400 in total, milked by hand twice a day, to produce about 800 litres of sheep’s milk during peak times (winter, usually). The milk is turned into wonderfully tasty and fresh ricotta and flavoursome picurinu sicilianu or pecorino siciliano right there, at the small dairy at the premises. We were privileged to watch Filippo making the cheese, and get to taste freshly made tuma and ricotta.


Just before dinner at the courtyard of Case Vecchie (Instagram)

Back at the Case Vecchie, the location for the Anna Tasca Lanza’s cooking school, we perused some of the wonderful products at the Natura in Tasca’s produce range. I chose to bake a cake from my latest cookbook, Torta della Nonna. It’s a typical cake from Tuscany, and while the pâtisseries would fill the cake with thick custard, then at homes the grandmothers (nonna stands for grandmother in Italian :)) would use ricotta cheese. I couldn’t resist the chance to bake this cake with sheep’s milk ricotta, as it’s supposed to be. Back at home in Estonia, I’ve made it with cow’s milk ricotta or goat’s milk ricotta. It’s still lovely, though much milder in flavour. 


The Tuscan ricotta cake I baked at the Case Vecchie (Instagram)

Torta della Nonna or Tuscan ricotta cake
(Toscana ricotta-kook)

Serves eight to ten

Pastry:
100 g butter, at room temperature
85 g caster sugar (100 ml/7 Tbsp)
1 large egg
180 g all-purpose flour (300 ml/1 cup + 3 heapedTbsp)
0,5 tsp baking powder
a pinch of salt

Filling:
500 g fresh ricotta 
85 g caster sugar (100 ml/7 Tbsp)
1 lemon, juiced and zested
2 Tbsp all-purpose flour
3 large eggs
75 g pinenuts or almonds

Butter a 24 or 26 cm (9 or 10 inch) springform pan and/or line with a parchment paper. Preheat the oven to 180 C/375 F. 

First, prepare the pastry. Put the butter and sugar into a mixing bowl and cream with a wooden spoon or a mixer fitted with the blade. Add the egg, then the dry ingredients (mix these first). Spoon the dough into the springform pan and using your hands, spread the dough at the bottom and halfway up the sides - the dough is pretty soft and sticky, so you’re almost pasting it to the bottom and sides. (You may be tempted to add more flour - go ahead, if you wish, but the cake base will be somewhat denser and harder then). 

Place the springform pan into the fridge to wait, while you make the filling

(You may use the same bowl you made the dough in). Mix the ricotta, sugar, the juice and finely grated rind of the lemon, flour and eggs in a bowl until combined. Stir in about two-thirds of the pine nuts or almonds. 

Take the cake pan out of the fridge, pour in the ricotta filling. Sprinkle the remaining pine nuts or almonds on top.

Carefully transfer the pan to the pre-heated oven and bake in the middle of the oven for about 45 minutes, until the cake is lovely golden brown on top. 

Take out of the oven, and let it cool till room temperature before cutting into slices and serving. 


Torta della Nonna and ricciarelli cookies. Photo by Juta Kübarsepp for Nami-Nami. 

Friday, June 13, 2014

Recipe for ricciarelli, delicious gluten-free almond cookies from Siena, Tuscany

TOSKAANA: torta della nonna & ricciarelli
This photo was taken by Juta Kübarsepp for Nami-Nami, the rest are by me or my husband.  

I’m writing this post in Sicily. I’m in a lovely company of David, Rachel and Johanna, enjoying the delicious hospitality of Anna Tasca Lanza Cookery School. La dolce vita, but more about all that in future posts. I do mention that some very nice cookies were baked here yesterday, which reminded me of a lovely Italian cookie recipe I’ve got in my latest cookbook. 

San Gimignano: Agriturismo Montegonfoli

Just over a year ago, in April 2013, I had a lovely holiday in Tuscany with my dear partner and our three small kids - the youngest was just under 6 months back then. We began our family holiday in Florence, then staying in various agriturismos near San Gimignano. On my birthday we took a day trip to Siena. Everybody said that we’d love Siena, but the truth is, we were not so impressed at all - San Gimignano, Volterra, Lucca, Certaldo and the old parts of Colle di Val d'Elsa had been more charming, more real. However, we did love the ricciarelli, the famous almond cookies from Siena. They are light and soft, yet chewy, just a wee bit resistant. If you love marzipan, then you’ll love these!

Certaldo: Osteria del Vicario

Ricciarelli are wonderful with a cup of strong coffee or tea, if you’re not a coffee drinker. In Toscana, they’re a festive food, baked and eaten especially during Christmas, and dipped into a glass of Vin Santo. 

They’re gluten-free. 

Ricciarelli cookies
(Siena mandliküpsised)

300 g ground almonds/almond meal
280 g caster sugar
100 g icing sugar/confectioner’s sugar 
1 tsp baking powder
a pinch of salt
1 orange, finely zested
2 egg whites 
2 tsp almond extract (optional)

For dusting:
icing sugar/confectioner’s sugar

Mix ground almonds, caster sugar, icing sugar, baking powder, salt and the finely grated orange zest in a bowl. 

In another bowl, whisk the egg whites until soft peaks form. Add the almond mixture, folding gently to combine. You’ll have a rather sticky mixture. (Add the almond extract now, if using). 

Using a teaspoon, take about 20 to 30 grams (about an ounce or so) of the mixture and form into oval/oblong patties, flattening them lightly between your palms. Place onto a cookie sheet, covered with parchment/baking paper, leaving some space between the cookies. They won’t spread a lot, but it’s better to be safe. 

Once you’ve formed all the cookies and arranged them onto the cookie sheet, dust them generously with icing sugar. Leave to dry them out at the room temperature for 1-3 hours - the bigger the cookies, the more time they need to dry. 

Bake in a pre-heated 150C oven for 20-25 minutes, until the cookies are just a little bit golden and hardened at the edges - you don’t want them golden brown, or they’ll be too crispy when they cool. You want your ricciarelli to remain soft and chewy inside!

Cool completely. These will keep for a week in an airtight container.  

ricciarelli2012


More ricciarelli recipes:
Divina Cucina
Jul's Kitchen
Lemons and Anchovies
Cook's Hideout
The Curious Baker

Friday, April 25, 2014

ANZAC biscuits (recipe for coconut oat cookies)

ANZAC cookies / ANZAC biscuits / ANZAC küpsised 
From the recipe archives. Originally posted in 2013.

Did you know that it's ANZAC Day today? ANZAC stands for Australian and New Zealand Army Corps. The Department of Veterans' Affairs of the Australian Government explains the Anzac day and tradition in detail. This being a food blog, it suffices to say that apparently these eggless crispy oatcakes were the cookies sent by the Australian and New Zealand women to the soldiers on the frontline during the WWI. And they're lovely - at least their modern equivalent!

The original recipe uses golden syrup, but honey works as well. I actually find the flavour very appealing, similar to the Estonian honey cake, and the chewy-crispy texture went down a treat with my family.

ANZAC-biscuits 
(ANZAC-küpsised)
About 20 cookies
ANZAC cookies / ANZAC biscuits / ANZAC küpsised

125 g butter
2 Tbsp or 45 g golden syrup or runny honey
1 tsp bicarbonate soda
2 Tbsp water
150 g or 250 ml or 1 cup all-purpose flour
100 g rolled oats
60 g shredded coconut
150 g caster sugar

Line a large baking sheet (or two smaller ones) with a parchment paper. Heat the oven to 175 C/350 F.

Place butter and honey/syrup into a medium-sized saucepan, heat and stir until melted and combined.
Mix soda with water and pour into the saucepan. The mixture will sizzle and foam - this is exactly what should happen. Stir until combined and remove the saucepan from the heat.
In a mixing bowl, combine flour, oats, coconut and sugar. Pour in the butter-syrup-soda mixture and stir until combined.
Using your hands, roll the cookie mixture into golfball-sized balls. Place these on the baking tray, leaving plenty of room between the cookies. Press the cookie dough into thinner disks for especially crisp cookies (that's the way I like them).
Bake in a preheated 175 C oven for about 10 minutes or until cooked (the cookies will harden as they cool down; if you didn't pat the cookie dough down, they may need few more minutes in the oven).

Store in an air-tight cookie jar.

SIMILAR POSTS:
Heidi @ 101 Cookbooks (Heidi adds some orange zest)
Lottie + Doof
Tori @ The Shiksa in the Kitchen (Tori toasts the coconut first)
Emily @ Chilli Marmalade
Jennifer @ Use Real Butter (nice step-by-step photos!)
Sneh @ Cook Republic
Martha Stewart
Laura @ Pies & Plots

Sunday, March 16, 2014

Gluten-free buckwheat cookies recipe

Tatraküpsised. Buckwheat cookies.

Are you on Pinterest? I am, with a nice number followers (thank you, all!) and various "boards". One of my boards is called buckwheat recipes, and I've been pinning various recipes there utilising this non-grain/pseudo-grain. Despite the name, you see, buckwheat is not a grass, but a plant related to sorrel and rhubarb.

During the recent months I've noticed that this particular board is getting new followers on a daily basis, and individual buckwheat recipes get repinned by increasingly many pinners. Buckwheat is "in". I guess the popularity of buckwheat recipes is caused by a) this "pseudo-grain" being gluten-free and hence suitable as a wheat substitute for all those avoiding gluten and b) some popular Paleo templates/frameworks allow small to moderate consumption of buckwheat dishes. Plus it has a lovely nutty flavour when baked.

Have you tried buckwheat? It's pretty popular here in Estonia and I've got several buckwheat recipes here on Nami-Nami (listed at the end of this post, see below). While I prefer cookies with buckwheat groats, then I tend to have some buckwheat flour in the house as well. It's the compulsory ingredient in blini, the small yeasted pancakes served with smetana and caviar. Plus I love this buckwheat cookies recipe that I discovered years ago in a British food giant's Sainsbury's client magazine. Apparently the original recipe is by Doves Farm, and you could also use rice flour instead of buckwheat flour. I prefer buckwheat, for it has a lovely flavour of its own. Note that my version has way less sugar (100 g instead of 150 g)  - if you've got a very sweet tooth, you may want to use more sugar perhaps.

I used to make these with chopped hazelnuts, but since our son is sensitive to hazelnuts, I've been using sliced/slivered almonds instead.

Have I missed your excellent buckwheat recipe and you'd like me to include it to the buckwheat recipes board? Leave a link to your blog post in the comments and I'll check it out!


Buckwheat cookies
(Tatraküpsised)
Makes about 2 dozens

Buckwheat and almond cookies. Mandli-tatraküpsised.

125 g butter, at softened
100 g caster sugar
1 egg
150 g (light) buckwheat flour
1 tsp baking powder
100 g chopped hazelnuts or chopped/sliced almonds

Heat the oven to 180C/350F. Line a baking sheet with parchment paper.

Cream together the butter and sugar, followed by the egg. Mix in the flour, baking powder and nuts/almonds, combine. (If the mixture is on the dry side, add a spoonful or two of cold water)*.

Take a heaped teaspoonful of the mixture, roll into balls and place onto the baking sheet. Gently press with a fork to flatten the cookie dough balls a little.

Tatraküpsised. Buckwheat cookies.

Bake for 15-20 minutes in the preheated oven until the cookies are light golden.

Let cool for about 5 minutes, then transfer onto the metal rack to cool completely.

* I've also used a different method - combined all the dry ingredients (buckwheat flour, sugar, baking powder), added the grated softened butter and the egg, and simply mixed everything and rolled into walnut-sized balls.

Buckwheat cookies. Tatraküpsised mandlitega.

More buckwheat inspiration here on Nami-Nami:
Buckwheat with leeks and soy sauce
Buckwheat with beets and dill
Cabbage and buckwheat kasha
Buckwheat kasha with mince
Warm buckwheat and mushroom salad
Buckwheat with beef liver
Buckwheat and mushrooms casserole

More buckwheat cookies by other bloggers:
Buckwheat chocolate chip cookies by Karina @ gluten-free goddess
Multiseed buckwheat cookies  by Clotilde @ Chocolate & Zucchini
Nibby buckwheat butter cookies by Heidi @ 101 cookbooks
Buckwheat sugar cookies @ LA Times
Buckwheat chocolate chip cookies by Garrett @ Vanilla Garlic
Buckwheat chocolate chip cookies by Alanna @ The Bojon Gourmet

Sunday, January 19, 2014

The 2-ingredient banana pancakes

Gluteenivabad banaanipannkoogid. 2-ingredient pancakes (gluten-free; bananas+eggs)

First there were the 3-ingredient cookies, consisting of bananas, oats and raisins. Now we're making 2-ingredient pancakes, consisting of bananas and eggs :)

I discovered the recipe in the summer, when it appeared on my friend Liina's blog, and since then we've made them quite a few times - mostly when we have over-ripe bananas on the counter, or simply want a sweet dessert that's ready in minutes. I've seen versions adding some coconut meal, ground almonds or oats, but as long as you make the pancakes small (mine are about 5 cm or 2 inches in diameter), they'll stay together with just two ingredients as well.

These are not vegan, as they contain eggs, but they do suit most other popular diets out there. Plus the kids love them!

Note that you need ripe bananas - the riper your bananas, the sweeter and nicer the pancakes!

I've served them with a sprinkling of cinnamon and a drizzle of maple syrup.

Banana and egg pancakes
(Banaanipannkoogid)
Serves 3 to 4

2-ingredient pancakes (bananas+eggs). Gluteenivabad banaanipannkoogid

4 smallish bananas
4 eggs

(coconut) oil, for frying

Peel the bananas, place into a medium-sized bowl and squash with your fork. Add the eggs, whisk with your fork until combined.

Heat some (coconut) oil on a frying pan over medium low heat. Drop small amounts of batter (about 2-3 Tbsp) onto the pan and fry until golden brown on both sides, flipping half-ways.

Enjoy!

Banaanipannkoogid (gluteenivabad). 2-ingredient pancakes.

More of those pancakes:
Liina @ Da Vahtra Residence (recipe in Estonian)
Triin @ Mõtted ja maitsed (recipe in Estonian)
Jenni @ Liemessä Ruokablogi (recipe in Finnish)
Marika @ Viljavapa keittiö (recipe in Finnish)
Panda @ Piece of Panda (recipe in Finnish)
Jenni @ Pikkuisen pippuria (recipe in Finnish)
Emmi @ Emmin ja Terhin treeniblogi (recipe in Finnish)
Tine @ FITinspiration (recipe in Danish)
Lauryn @ The Skinny Confidential (recipe in English)
Eugenie @ Eugenie Kitchen (recipe in English)
Adam @ Lifehacker (recipe in English)

Saturday, January 18, 2014

The Easiest Homemade Cheese Crisp Recipe Ever (gluten-free and low-carb)

Imelihtsad juustuküpsised / Simple cheese cookies

I originally blogged about these baked cheese crackers back in early December 2007.  Back then I was teaching at the university during day-time and working as an intern at a restaurant in the evenings. Didn't have much time - or need - to cook at home, so these delicious and exceptionally easy cheese crisps were perfect as a late-night nibble.

Now, more than 6 years and 3 kids later, I still make these every now and then. Cheese is an ingredient I always have lurking in the fridge, as it's pretty versatile - and I love cheese. So whenever I bake something in the oven, I bake a batch of these as well. These are also suitable if you're on a low-carb and/or gluten-free diet. And if you go to sauna on Saturday evenings, like many Estonians do, then these go beautifully with beer.

You can use any semi-hard cheese on hand. I tend to use Eesti juust aka 'Estonian cheese' - a cheese similar to the Danish Havarti cheese which is available pretty much everywhere in the world. Cheddar and Parmesan would work as well, so really, use whatever you have in your fridge.

Easy Baked Cheese Crisps
(Imelihtsad juustuküpsised)

coarsely grated cheese
caraway seeds (optional, but nice!)

Take small heaps of grated cheese and place them on a baking sheet covered with parchment paper. Leave about 5 cm/2 inches between cookies, as they spread during baking.
Sprinkle some caraway seeds on each 'crisp', if you wish. I really love the taste of caraway seeds and find the flavour mingles wonderfully with cheese, but you could use cumin seeds or paprika powder or chilli flakes or anything else you like.
Place in the middle of pre-heated 180 C/350 F oven and bake for 5-7 minutes, until the cheese has melted and turned slightly golden on the edges. Remove the baking sheet from the oven (overbaked cheese is nasty and bitter, so be careful not to bake the crisps/cookies for too long!) and leave to cool.
The cheese crisps harden slightly when cooling.

Serve as an accompaniment to a glass of hõõgvein/mulled wine/glühwein/glögg, or even regular wine or beer.

Thursday, December 26, 2013

Our Christmas meal, 2013

Hope you all had a lovely Christmas, dear friends and readers! We had the pleasure of cooking for and hosting our respective families on Christmas Eve (that's when we, Estonians, have the main Christmas meal and distribute gifts). I was in charge of the menu and cooking - and I thought it's a good idea to share the menu on my blog as well. I decided to have a rather light and minimalist first course. Here's what it looked like:

IMG_7803.jpg

Good black Estonian bread, some white toast and a selection of cured fish. Starting from the left, there are spiced Baltic sprats that I wrote about in the previous post (see here), but this time served simply with sliced red onion:

IMG_7805.jpg

Then there's salt-cured whitefish from my favourite fishmonger, PepeKala OÜ. Whitefish slices are to be eaten with buttered toast:
IMG_7806.jpg

Finally, locally grown and jellied catfish (African sharptooth catfish, to be more precise, angersäga in Estonian, Clarias gariepinus in Latin). This one came out of the jar as well :)

IMG_7807.jpg

For those who prefer meat, I did serve some cold-smoked turkey slices:
IMG_7804.jpg

Serving a selection of cured fish for starters is a rather Nordic thing to do, but you'd find many more dishes on a traditional Estonian Christmas table (some rosolje salad or perhaps the layered vegetable salad). But we kept it rather minimalist this year and it worked for us.

The main course was much more traditional. There was pork - but not my usual Christmas roast,  the ever-delicious oven-baked pork shoulder with honey, mustard and rosemary. I did experiment with pork belly and fennel seeds - and rather successfully - the meat was extremely succulent and melt-in-your-mouth, and gobbled up quickly.

IMG_7815.jpg

Here's a close-up of the pork:IMG_7810.jpg

The cabbage was my classic õllekapsas aka sauerkraut braised in beer (the beer was A le Coq's porter):

IMG_7809.jpg

There were simple boiled potatoes, and a duo of roasted veggies - carrots and parsnips, lightly drizzled with maple syrup:

IMG_7813.jpg

The duo of roasted vegetables was accompanied by a trio of black pudding:  IMG_7821.jpg

For condiments, there were two relishes from a small Estonian producer, Treppoja. Pumpkin and horseradish (the yellow one) and chilli and lingonberry (the red one): IMG_7818.jpg

Neither one was bad, but my mother-in-law's apple and lingonberry jam came out tops (I've got a recipe here, but she uses more lingonberries and less apples): IMG_7819.jpg


The star of the evening, as usual, was the dessert. I was planning to do the popular Danish Christmas dessert risalamande or fluffy rice pudding with almonds and a warm cherry compote. But then our little family went to Denmark for a small holiday in early December, and my dear Danish host-mum Kirsten served us a wonderful æbletrifli - a layered trifle of æblegrød, whipped cream and custard, as well as crunchy Italian almond cookies. It was simple, delicious and really festive, so that ended up finishing our Christmas feast of 2013.

 Danish apple trifle "æbletrifli". Taani kausitort õuntega.

We didn't drink much - some beers, and some small glasses of the Swedish Blossa glögg from 2012 and 2013, juice and water for the kids..

What did you do for Christmas?

See all Nami-Nami's Christmas recipe here.
Estonian World writes about Estonian Christmas traditions here.

Sunday, December 15, 2013

Holiday baking: Sliced Almond Christmas Cookies

French gingerbread / Christmas cookies / Piparkoogid / Viilupiparkoogid
From the recipe archives!

It's the time to bake various Christmas cookies again. While I'll certainly be making and baking and decorating a batch of these favourite Estonian piparkoogid ("pepper cakes"), then this year I have another recipe in mind as well. These sliced Christmas cookies with almonds found their way into my heart in the midst of the summer heatwave, as I was choosing and testing recipes for my Christmas cookbook. I had seen a recipe for "French gingebread cookies" in a Swedish food magazine that I liked, and that reminded me of Jules Destrooper's wonderful almond thins that I used to love. After some tweaking here and there (less sugar and less cloves, more almonds), I ended up with this great recipe.

I usually divide the dough into four equal portions and roll and wrap them individually. Then I bake one and place three in the freezer - I can then bake fresh and aromatic Christmas cookies whenever I feel like :)

Almond Gingerbread Cookies
(Viilupiparkoogid)
Makes a lot - about 4 large sheets

viilupiparkoogidNAMI

250 g butter
200 g caster sugar
140 g light baking syrup (about 100 ml)
420 g plain flour (700 ml)
1 Tbsp ground cinnamon
0.5 Tbsp ground cloves
0.5 Tbsp baking soda
100 g sliced almonds

Melt the butter in a saucepan. Add sugar and syrup, stir until combined. Remove from the heat and let cool completely.
Combine flour, cinnamon, cloves, baking soda and almonds in a bowl, then fold into the cool butter-sugar-syrup mixture. Stir until combined.
Divide the cookie dough into four equal parts, then form each one into a cylinder/sausage, about 4 cm in diameter. Wrap in clingfilm or baking paper and place into the fridge to rest. (Ideally for 24 hours).

To bake the cookies, cut each "sausage" into 3-4 mm (1/8th inch) slices, and place onto a parchment covered cookie sheet.
Bake in the middle of a preheated 200 C oven for 6 to 8 minutes, until golden brown.
Remove from the oven, let rest for a few minutes, then transfer onto a metal rack to cool completely.

French gingerbread / Christmas cookies / Piparkoogid / Viilupiparkoogid

This recipe was also included in my second cookbook, Jõulud kodus ("Christmas at Home"), published in Estonian in November 2011.

Tuesday, November 19, 2013

My cookbook launch on November 11, 2013

Minu uus raamat!
Photo by Päivi Palts.

My third cookbook came out in early November (there will be a blog post about the book!), and last Monday there was a small launch party at the Rahva Raamat bookstore in Tallinn. My dear friend Ximena Maier (you'll surely know her food blog Lobstersquad) did the illustrations for the book again. It's as striking as the first one, don't you agree?

kaanedPicMonkey Collage

They certainly stand out on the bookshelves!

Back to the book launch party. Here's me and my lovely agent, Reelika Rahu, flipping through the pages of the book:
TallinnCity.ee
Photo by Andres Haabu

Me welcoming the people and talking briefly about the book. Take note that my stockings are matching the colour of my newest cookbook :)  TallinnCity.ee
Photo by Andres Haabu

Nami-Nami uue kokaraamatu esitlus 11.11.2013
Photo by Päivi Palts

Nami-Nami uue kokaraamatu esitlus 11.11.2013
Photo by Päivi Palts

This lovely lady, Maret, is a good friend of my mother-in-law. She's also a great fan of Nami-Nami recipes and loved the previous book (or so I'm told). The beetroot phali recipe in the Georgian chapter has caught her attention. Or is it the egg and walnut salad?
Nami-Nami uue kokaraamatu esitlus 11.11.2013
Photo by Päivi Palts

Time to sign the books! I was impressed how many people turned up and was signing the books for well over an hour!
TallinnCity.ee
Photo by Andres Haabu

Autogramme jagamas
Photo by Päivi Palts.

Raamatuid signeerimas.
Photo by Päivi Palts.

Nami-Nami uue kokaraamatu esitlus 11.11.2013
Photo by Päivi Palts

Karl Mattias
Photo by Päivi Palts

Nami-Nami uue kokaraamatu esitlus 11.11.2013
Photo by Päivi Palts

One of the Nami-Nami fans, my friend Eva Pettinen of the Flexus Pilates Studio:
Pille Petersoo ja Eva Pettinen
Photo by Päivi Palts

I don't know who this little sweet girl was, but she had a lovely name and she told me that she always uses Nami-Nami to look for recipe inspiration :)
Anna Lotta (?)

It was a cookbook, so obviously there was food at the launch party :) Suupisted!
Photo by Päivi Palts.

The purple dip is beetroot borani (recipe in the Persian chapter; also available here on the blog). On the front you'll see cheese and herb filled filo "cigars" (recipe in the Lebanese chapter). There's a bowl in the middle, filled with black pudding profiteroles (a recipe in my Christmas cookbook). Not pictured is a big plate with two different types of cookies from the Swedish chapter:
Valik suupisteid
Photo by Päivi Palts.

The filo rolls and the Swedish cookies were baked by my dear friend and a talented baker, American-born Heidi ParkHeidi also did the catering for my first cookbook launch party back in December 2010. I'm so lucky to have met her and call her my friend: Nami-Nami uue kokaraamatu esitlus 11.11.2013. Mina Heidiga.
Photo by Kristjan.

Ok, back to food. Marinated aubergine/eggplant slices, a recipe in the Italian chapter:
 Marineeritud pommuviilud
Photo by Päivi Palts.

A special thanks goes to Põltsamaa Felix, who provided the drinks - juice for the kids and their beautiful dessert wine Põltsamaa Kuldne 2005 for the grown-ups (again, they provided the drinks for the previous launch party as well). Here's my sweet daughter Nora (4 y 9 m) enjoying a glass of Põltsamaa's pear nectar (pirninektar) while chitchatting to her friend Taavi:
Põltsamaa pirninektar
Photo by Päivi Palts.

There was also the wonderful bottled mineral water from Georgia, Borjomi, which, of course, is the perfect drink to go with the recipes in the Georgian chapter:
Gruusia vesi ja Gruusia peatükk
Photo by Borjomi Estonia

And last, but not least, there was some wine, courtesy of Pernod Ricard Estonia. We drank Tamada Mukuzani from Georgia, and San Simone Perlae Naonis Millsesimato Prosecco DOC from Italy:
pernodveinid
Photo by Reet Zimmer

A huge thank you to everybody who made it and a huge thank you to everybody who helped to organise the launch party.