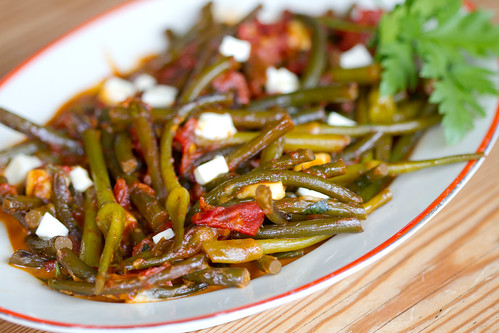
Showing posts with label Recipes: Gluten-free. Show all posts

Thursday, March 19, 2020

IKRA - Russian eggplant caviar/Russian aubergine caviar

Someone was looking for a "soft aubergine/eggplant spread with tomatoes" and I knew exactly what they were talking about. There's a dish in Russia, our Eastern neighbour, which is called IKRA or fake caviar.

I got this recipe from Russian friend Galina back in Edinburgh sometimes around 2000. Still makes a regular appearance in our kitchen.  It's lovely on a slice of toast, or as a condiment or spread on a mezze-table.


Russian aubergine spread IKRA


1 large aubergine/eggplant
1 large onion
2 garlic cloves
2 tomatoes
1 Tbsp olive oil or vegetable oil
2 Tbsp white wine vinegar or lemon juice
salt and freshly ground black pepper
fresh parsley or dill

Prick the aubergine with a fork here and there, then place into a preheated 200C/400F oven and bake for about 60 minutes, until fully cooked and slightly charred on the outside. Flip over once or twice during baking.

Remove from the oven, let it cool. Then cul half lengthwise and scoop out the flesh. Place into a cutting board and chop finely. Place into a medium-sized bowl.

Peel the onion, cut into halve and then chop finely. '

Peel the tomatoes (make a small X-cut at the bottom, place into a boiling water for about 30 minutes, drain and peel). Dice the tomatoes finely.

Mince the garlic.

Mix the aubergine, onion, tomatoes and garlic in the bowl, add the oil and vinegar/lemon juice. Season to taste with salt and pepper.

Cover the bowl with a clingfilm and put the ikra into the fridge for a few hours, so the flavours can mingle and develop.

Sprinkle with chopped fresh herbs just before serving.

Friday, November 24, 2017

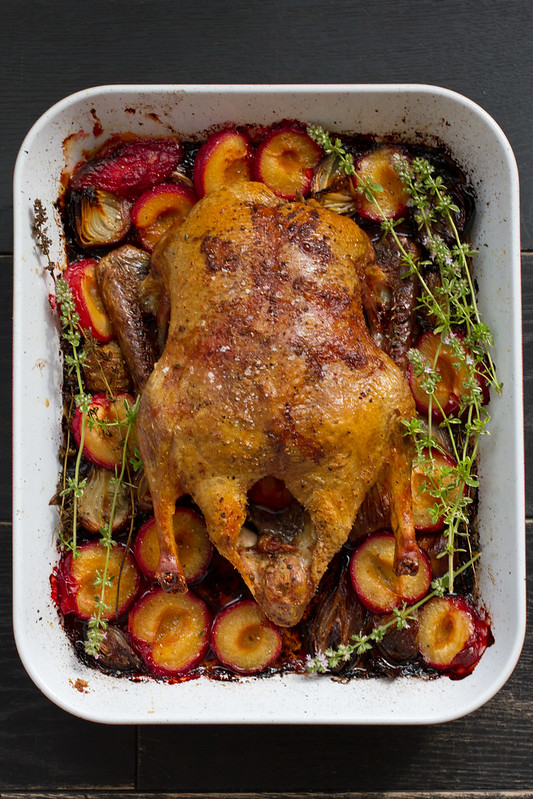
Oven-roasted duck with plums and red onions

Ahjupart ploomidega. Duck with plums.


We love duck in our house. It's just as easy to cook as your regular Sunday chicken roast, but because it's less common, somewhat pricier and much bitter, it has a more festive feel to it. We don't cook duck for weeknight dinners, but for weekend roasts and entertaining at home, it's such a worthy bird.

Here's a version I cooked a few times this autumn, trying to perfect it for a magazine photo shoot :)

Serves around 6


Oven-roasted duck with plums and red onions

(Ahjupart ploomide ja sibulaga)

1 whole duck (ca 3-3,5 kilograms; I prefer chilled to frozen)
salt and freshly ground black pepper
300-400 ml of hot water
5-6 smallish red onions
few decent garlic cloves
4 cloves  (the spice)
1 kilograms large red plums
3-4 fresh thyme sprigs

Preheat the oven to 180 °C/350 °F.

Season the duck with salt and pepper, both inside and out. Place into a good-sized oven dish (I used a lasagne dish on the photo, but a wide dutch oven would do as well). Pour  hot water into the dish, place the dish into the preheated oven and roast for an hour.

While the duck is roasting, peel the onions, halve lengthwise. Peel the garlic cloves.

Remove the duck from the oven and place the onions, garlic cloves, cloves (the spice) and thyme sprigs around the duck. Return to the oven for another hour.

Halve the plums, remove the stones. Take the duck out of the oven, and place the plum halves around the duck.

Increase the heat to 220 °C/425 °F.  Return the duck into the oven and roast for another 30 minutes or until the duck skin in deliciously golden brown and crispy. The meat thermometer should read 73-74 °C/163-165 °F when pierced into the middle of the thickest part of the duck leg.

Remove the duck from the oven and let rest of 10 minutes. Pour the pan jus through the sieve, place into a small saucepan and cook until slightly thickened. 

Then carve the rested duck into portions and serve with roasted plums, onion and garlic and the reduction.

Saturday, November 12, 2016

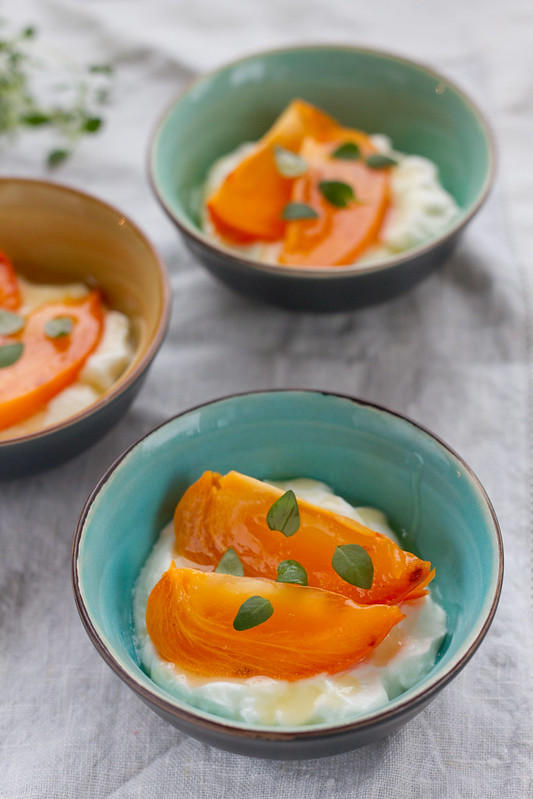
Persimmon with honeyed yoghurt

Hurmaa jogurtiga. Persimmon with honeyed yogurt.

How do you enjoy the persimmons, in season right now?

Here in Estonia we can by mostly the heart-shaped hachiya variety, which is astringent when raw, but meltingly sweet when ripe. We usually just wash them and cut into wedges, but there's also this super-easy and lovely way of serving them, adapted from the Australian Persimmon Inc page here.

Remember, only try this with perfectly rip persimmons unless you want to be utterly disappointed.

Persimmon with honeyed yoghurt
(Hurmaa mesise jogurtiga)
Serves 4

400 grams Greek yogurt
1 large hachiya persimmon
4 tsp of runny honey
fresh thyme leaves

Divide yoghurt between four small dessert bowls or glasses.
Wash and dry the persimmon (no need to peel!), cut into thin wedges. Top the yoghurt with 2-3 persimmon slices. Drizzle some honey on top, garnish with fresh thyme leaves and serve.

Previously on Nami-Nami:


Sunday, July 24, 2016

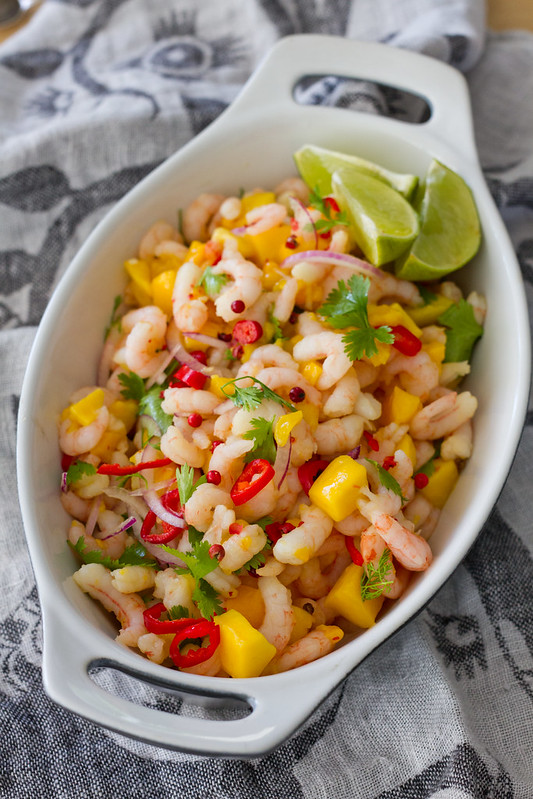
Anne's shrimp and mango salad

Kreveti-mangosalat. Shrimp and mango salad.

We had some friends over today and I needed something bright and yummy (and without gluten) to be served on this sunny day. I was browsing my to-do(-again) lists, and opted for a refreshing mango and shrimp salad that I've made before. It's light, it's easy, and it's quite an eye-catcher, so perfect for a summer get-together. As I suspected, it was very well received - though you might hold back with the chilli when catering for kids as well ;)

The original recipe is from Anne's blog, and she's actually blogged about it a couple of times (see here and here)

Shrimp and Mango Salad
(Kreveti-mangosalat)
Serves four

300 g peeled cooked shrimp
300 g mango cubes
1 red chilli
1 small red onion
2 Tbsp freshly squeezed lime juice
a small handful of fresh coriander leaves/cilantro
a generous pinch of pink peppercorns

If you use frozen shrimp, then defrost them overnight in the fridge or put into a bowl of lukewarm water for a few hours. Drain thoroughly.

Defrost the mango cubes or cut to the fresh mango into small cubes.

Thinly slice the chilli (discard the seeds). Peel the onion, cut either into a small dice or cut into two lengthwise and then into thin slices.

Mix mango, shrimps, chilli, onions and coriander leaves in a bowl. Drizzle with lime juice and sprinkle some crushed pink peppercorns on top.

Serve immediately.

Friday, July 17, 2015

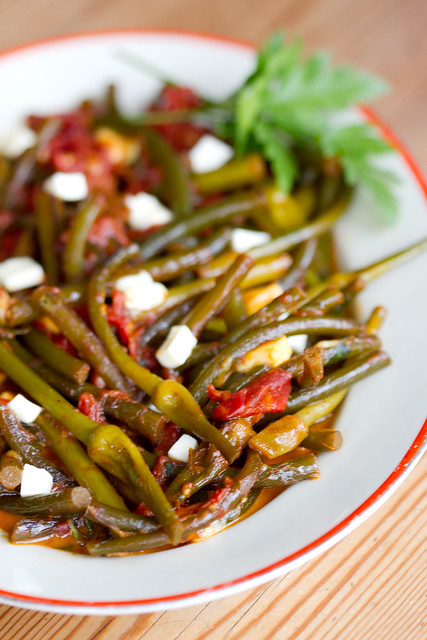
Sautéed garlic scapes with tomatoes

Sautéed Garlic Scapes

Are you familiar with garlic scapes? I've actually mentioned them here on my blog, Nami-Nami, just over ten years ago (YES, NAMI-NAMI BLOG QUIETLY CELEBRATED ITS 10 BLOG ANNIVERSARY IN MID-JUNE) -  when I was still living in Edinburgh. I used to go to the fabulous Edinburgh Farmers Market every weekend, and it's there that I first encountered those spindly scapes, at the stall of Really Garlicky Company (I'm thrilled to see that they're still going strong, those Scottish garlic heroes). I threw those curly garlic tops into stir-fries back then, or chopped them and added to mash.

I grow some hardneck garlic in our beautiful garden these days as well, tucked between our strawberry plants to keep nasty bugs away. Sometimes - but only sometimes - I remember to snip the curly-spindly scapes off in the spring or early summer. This time I did, and made this lovely sauté with tomatoes and cheese. I found a recipe by William Woys Weaver over at Mother Earth News that sounded lovely. Mr Weaver topped his sautéed garlic scapes with cubed and fried halloumi cheese. Although the Cypriot halloumi-cheese is widely available in Estonia, I had none at home. However, as Mr Weaver mentioned that he got an idea for the dish in Slovenia - where local kajmak cheese* is way more popular than halloumi - and kajmak is similar to feta and bryndza cheese. Luckily I had bought some fresh bryndza cheese as well as Georgian suluguni cheese at the market on a previous day, so I used a mixture of these two instead.

A verdict - lovely and tasty and such a genius way for using up those spindly-curly scapes. One of my 5 aunties and one of my 13 cousins came over for dinner that night and the dish got their approval as well. At least none of us will ever waste any garlic scapes again :)

* A huge thanks to my friend Mann for helping me with the Slovenian cheese terms.

(Hautatud küüslauguvõrsed)
Serves 4

Sautéed Garlic Scapes

2 Tbsp extra virgin olive oil
2 Tbsp dark brown sugar
250 g garlic scapes
400 g fresh or canned chopped tomatoes
180 ml (about 3/4 cups) dry white wine
sea salt and freshly ground black pepper
1 Tbsp chopped fresh flat-leaf parsley
about 100 g of cheese (crumbled brynza or feta or cubed and fried halloumi)

Trim the garlic scapes by snipping off the thin tip on top of the garlic buds - this would simply burn on your pan. Discard. Cut the rest of the scapes into 5 cm/2 inch pieces.

Heat oil on a heavy frying pan over medium heat. Add sugar, then stir for a couple of minutes to melt and caramelise the sugar. Add the garlic scapes, cover and fry on a moderately high heat for about 3 minutes, shaking the pan every now and then.

Uncover, then add the tomatoes and wine. Cover the pan again, reduce heat and simmer on a low heat for 8-10 minutes, until the garlic scapes have al dente or softened, depending on your preference.

Season to taste, fold in the parsley and scatter with cheese. Serve hot or at room temperature.

Wednesday, May 20, 2015

Badrijani nigvzit - Georgian aubergine rolls with walnut filling


Badrijani is the Georgian rolled eggplant dish we've been missing our whole life, wrote Lucky Peach on its Facebook page yesterday. I don't really know about rolled eggplant/rolled aubergine dishes in particular, but as far as eggplant dishes in general go, Georgian rolled aubergines are pretty wonderful. They're pictured on the top left corner above.

My recipe is pretty minimalist, as far as the seasoning goes. I've served them as part of a bigger Georgian spread (see f. ex. here), where the famous Georgian spice blend khmeli-suneli was used in various dishes. That's why I like my badrijani nigvzit (badrijani = aubergine/eggplant, nigvzit = walnuts) seasoned just with herbs, onion and vinegar. But feel free to use garlic instead of onion and to add some ground coriander or cumin seeds - or a generous spoonful of khmeli-suneli - to the walnut mixture to make it more flavoursome. Even chilli powder could be added, if you're fond of spicy dishes.

This great appetizer is low-carb, LCHF (low carb, high fat), gluten-free, vegan, Paleo etc. For more Georgian recipes, see my Georgian Flickr album or browse my Georgian recipes here.

Badrijani nigvzit aka Georgian eggplant rolls with walnut paste
(Pähklitäidisega pommurullid e. badrižani)

Serves 6 as an appetizer

2 slender eggplants/aubergines
sea salt
olive oil

Walnut filling:
250 g walnuts
2 onions
fresh dill, cilantro/coriander and parsley, chopped
3-4 Tbsp red wine vinegar
sea salt and freshly ground black pepper

To garnish:
pomegranate seeds

Cut the aubergines into long thin slices, lengthwise. Sprinkle with salt and let stand in a colander for 20-30 minutes. Drain the liquid, pat the slices dry with kitchen paper.

You can cook the aubergine either by frying or by baking. To fry them, heat some oil on a frying pan and fry on moderate heat until golden on both sides. To bake them, place into a 220C/450F oven and bake for about 20 minutes,  turning once.

To make the walnut filling, spread the walnuts on a baking sheet and roast at 180C/350F for about 10 minutes, until they're aromatic and golden. Remove from the oven and let cool.

If you dislike the taste of raw onion, fry the chopped onion in olive oil until translucent.

Place all the filling ingredients into the food processor and blend until coarse and combined. Transfer into a bowl and season to taste - the filling has to be just a wee bit vinegary.

Place a spoonful of the filling onto one end of the aubergine slice, then roll into a cigar (alternatively, spread a thin layer of the walnut paste over the whole length of the aubergine, then roll up).  Place onto a serving tray, and do the same with rest of the aubergine slices and the filling. Garnish with pomegranate seeds and fresh herbs.

More aubergine/eggplant recipes on Nami-Nami:
Grilled aubergine with feta, golden raisins and mint
Armenian aubergine stew
Ottolenghi's roasted aubergine with saffron yoghurt
Nasu dengaku (miso-glazed aubergine)
Aubergine curry with tomatoes, coriander and Nigella seeds
Sautéed aubergine (Melanzane al funghetto)
Israeli roasted aubergine and feta spread
Moussaka, deconstructed

More badrijani recipes on food blogs:
Karen @ Rambling Spoon
Gill @ Gill Stannard
kahviaddikti (recipe in Finnish)
Christina Nichol @ Lucky Peach

Saturday, March 21, 2015

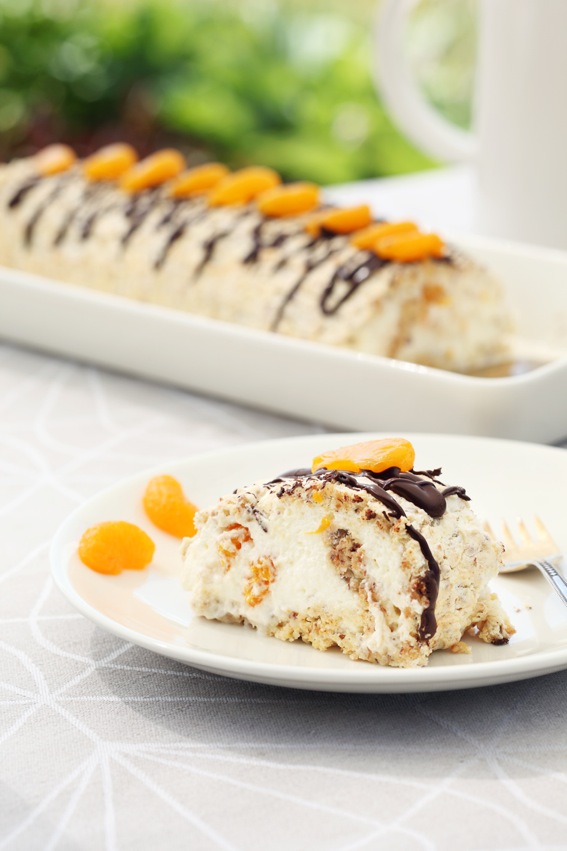
A recipe for gluten-free hazelnut meringue roulade aka Budapestrulle (Budapestbakelse)

ROOTSI: Budapestrulle. Budapest hazelnut meringue roulade.

I am writing this post while sitting on a really comfortable bed in a brand new hotel in Helsinki, called Indigo Hotel. I'm in town for a long weekend to enjoy the Streat Helsinki street food festival. The press trip is organised and hosted by Visit Helsinki, and we have been taken very good care of. This morning Heather of Heather's Helsinki took us for a coffee and Budapest cake at Karl Fazer Café at Kluuvikatu 3. The cake in question was a Budapest slice.

It's a popular cake from Sweden, attributed to a pastry chef Ingvar Strid who was born in 1926 in Vetlanda. It's a hazelnut meringue roulade filled with whipped cream and peeled clementine slices. Delicious! The version popularised by Fazer in Finland is slightly different - the clementines/mandarine oranges are replaced with bananas and raspberries. Different - and sweeter - but still nice.

Here's my version of Budapestrulle - I make the classic Swedish version. The recipe below uses a popular and widely available Swedish product, Marsán snabb vaniljsås, but feel free to replace it with cornflour or potato starch or even all-purpose flour (in latter case it won't be gluten-free, of course).

Since 2013, May 1st has officially been the Budapestbakelsensdag in Sweden.

Budapest slice
(Besee-pähklirull)

Serves 8 to 10

Meringue:
4 large egg whites
100 g caster sugar
150 ml (about 90 g) vanilla custard powder
100 g toasted hazelnuts, finely chopped

Filling:
200 ml whipping cream
1 tsp caster sugar
300 g canned mandarine oranges/clementines, drained

Decoration:
50 g dark chocolate
some canned mangarine oranges/clementines

Heat the oven to 200 C. Grease and line a shallow Swiss roulade tin/baking tray with a parchment paper.

Using electric mizer, whisk the egg whites until stiff but not try. Add the sugar in 2-3 installments, continue whisking until the mix is shiny and white.

Combine the hazelnuts and vanilla custard powder, then gently fold into the meringue mixture. Spread the mixture into the prepared tin. Bake in the middle of pre-heated oven for 12-15 minutes, until the meringue is risen and slightly golden on edges.

Take out of the oven and cool completely. Then turn over onto a new piece of parchment paper and peel off the "baked" parchment paper.

For the filling, whisk the cream and sugar until thick and fluffy, then spread over the meringue. Put some mandarine slices aside for decoration, then scatter the rest over the cream. Roll up the roulade, starting with the long end, and using the paper underneath to help. Carefully lift onto a serving dish, leaving the "seam" underneath.

Melt the chocolate, drizzle over the meringue roulade. Garnish with mandarine orange slices. To serve, cut the cake into thick slices.

The photo above is by Juta Kübarsepp, taken for my cookbook "Nami-Nami. Maailma maitsed 1" (Varrak, 2013).

Wednesday, February 18, 2015

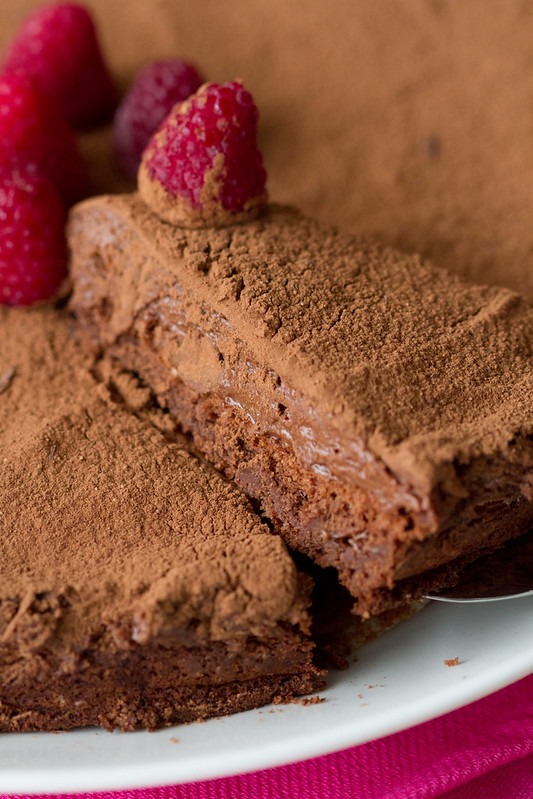
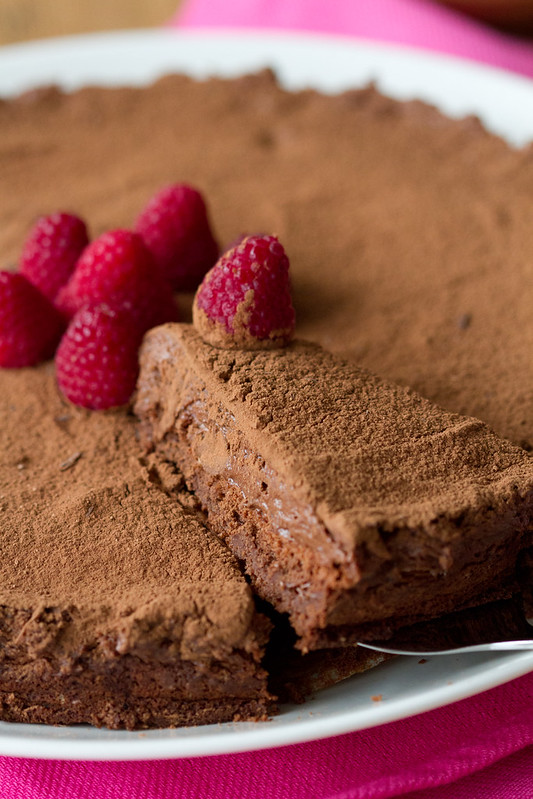
Gâteau Marcel. A recipe for a delicious layered chocolate mousse cake (gluten-free)

Gâteau Marcel. Chocolate mousse cake. Šokolaadikook.

Happy Valentine's Day to all the lovely Nami-Nami readers out there!

Today's recipe is this gluten-free and fun cake from Denmark, where it's considered to be the French chocolate cake. The recipe is from Michel Michaud, a French chef. Well, Michel Michaud was born in France in 1946, but moved to Denmark in 1971, where he introduced the Danes to the culinary delights of French cuisine. Including this cake.

I never came across this cake when living in Denmark at the tender age of 18. I only came across the cake few weeks ago, when somebody mentioned in one Danish-language Facebook group that "oh, this [cake] is very similar to Gateau Marcel." Well, I had to check out what's behind that fancy name and turned out that it's a gluten-free cake that consists of only 4 ingredients (chocolate, butter, eggs, sugar), results in three dirty bowls and one decadent two-layer chocolate mousse cake.

Intrigued? So was I - and we loved this cake a lot!

Best made on a previous day.

Gâteau Marcel 
(Eestikeelne retsept)
Adapted from several Danish-language sources, but modfied
Serves 10

Gâteau Marcel. Chocolate mousse cake. Šokolaadikook.


200 g good-quality dark chocolate (chips/pellets or chopped)
200 g unsalted butter
200 g caster sugar
6 large eggs
a pinch of salt (optional)

To serve:
cacao powder (un-sweetened)
fresh raspberries or chocolate curls

Pre-heat the oven to 175 C/350 F.

Melt the chocolate chips and butter in a bowl set over barely simmering water. Stir until combined, then cool a little.

Separate egg yolks from egg whites. Whisk egg yolks and about 2/3 of the sugar in a large bowl until pale and fluffy. In another, very clean bowl, whisk the egg whites until soft peaks form, then continue whisking and adding the sugar, until the egg white mixture is shiny and stiff.

(You've got 3 bowls now - one with melted chocolate and butter, one with egg yolks and sugar, one with egg whites and sugar).

Gently fold the chocolate mixture into the egg yolk mixture. Then fold in about a third of the meringue (aka egg white mixture) until combined, then very gently add the rest of the egg whites to the batter.

Grease a 24 cm/9 inch springform tin thoroughly with butter, sprinkle lightly with sugar or cocoa powder. Spoon up to a half of the batter into the tin, smooth the top. Bake in the preheated oven for 30 minutes. Remove from the oven and cool a little - it'll collapse a little, which is perfectly normal.

Then spoon the rest of the chocolate batter on top of the cooled chocolate cake - this will become the chocolate mousse layer. Smooth the top, then place into a fridge for at least 4 hours or until the next day.

Before serving, remove the cake carefully from the tin and transfer onto a serving plate. Sprinkle generously with cocoa powder, then decorate with fresh or frozen raspberries or fancy chocolate curls.

Wednesday, January 28, 2015

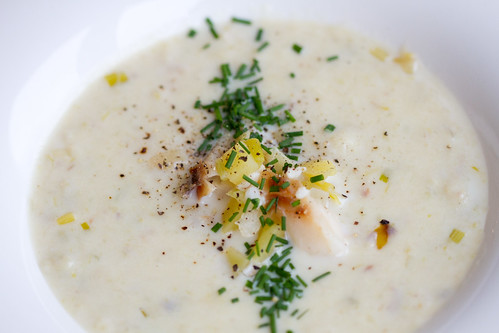
Cullen Skink, a Scottish smoked haddock and potato soup (gluten-free)


IMG_3073.jpg

Few days ago the Scots - and friends of Scotland - celebrated yet another anniversary of the birth of Robert Burns, hosting or attending a Burns Supper. Any self-respecting Burns Supper begins with a proper Scottish soup. I've shared a recipe for Cock-a-leekie before, other options are Scotch broth and Cullen Skink.  Now it's time to share my recipe for the smoked haddock and potato soup - think of it as a Scotch chowder :)

The soup is from the North-East of Scotland, from the fishing town of Cullen. Originally it's a comfort food, cheap and easy fare, and it's still popular in and around Cullen. Yet somehow that humble soup has tranformed into a fancy fare to be enjoyed at various festive Scottish occasions.

Scots know their smoked fish. Arbroath Smokie is a pair of salted haddocks, hot-smoked in a humid smoking chamber. Finnan Haddie, the traditional fish used for making Cullen Skink, is gutted and cleaned haddock that's been dry-salted and then smoked in a cool smoking chamber for 8-9 hours. If Finnan Haddie is hard to find where you live - that's probably most of the world apart from the British Isles - (and avoid the bright yellow dyed stuff, it discolours the soup), then any other nice smoked white fish would do. I used smoked cod, a user of my Estonian Nami-Nami site said that the soup worked well with smoked herring.


Cullen Skink
(Šoti suitsukalasupp)
Serves 6 as a starter, 3 as a main dish

IMG_3083.jpg


500 g smoked haddock (ideally Finnan Haddie)
500 ml (2 cups) of water
butter for frying
1 yellow onion, chopped
1 large leek, cleaned and sliced
2-4 floury potatoes, peeled and cut into chunks
500 ml (2 cups) whole milk
1 bay leaf
salt and freshly ground black pepper
fresh chives, finely minced

Place the fish into a pan, add the bay leaf and cold water. Gently bring into a boil, then simmer for about a minute or two. Remove the fish from the pan, transfer onto a plate and leave to cool. Keep the fish stock!

In another pot melt the butter gently. Add onion and leek, cover and sauté gently for a about 10 minutes. Stir every now and then, do not brown! Season with salt and pepper. Add potato pieces to the onion and leek, give it a stir. Add 500 ml/2 cups of fish stock, bring into a boil and simmer until the potato is cooked.

At the same time remove the fish from the bones carefully, flake into smaller pieces (discard the fish skin and bones). Using a slotted spoon, take couple of spoonfuls of the potato-leek mixture from the soup and put aside. Discard the bay leaf. Add the milk, bring gently into a boil. Add about half of the smoked fish. Mash the remaining soup or pureé using the hand-held/immersion blender. Season with salt and pepper.

To serve, place a large spoonful or two of potato-leek-smoked fish mixture into the middle of each soup bowl, then ladle the liquid soup neatly into the bowls as well. Garnish with chives and serve.

Tuesday, December 30, 2014

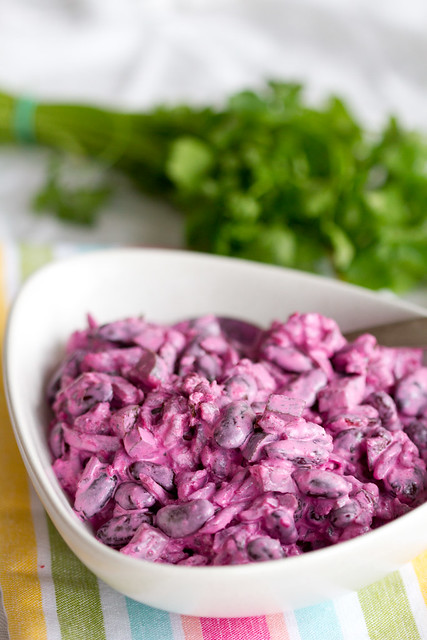
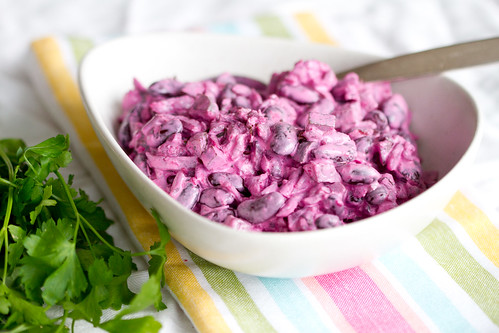
Recipe for a Latvian Beet and Bean Salad (Pupiņu un Biešu Salāti)

Läti peedi-oasalat. Latvian beet and kidney bean salad.  Pupiņi un Biešu Salāti. Rūjienas salāti.

A few years ago Saveur, the American food magazine, featured some Latvian recipes (Latvians, remember, are our Southern neighbours). Among them was a recipe for beet and bean salad, Pupiņu un Biešu Salāti, that caught my attention. I love beetroot, and cook and eat various beetroot salads quite frequently. Some of my favourite beet salad recipes have been featured here on Nami-Nami as well over the last 9+ years, like the Russian vinaigrette salad, beet and potato salad, layered vegetable salad with smoked salmon, to name just a few.

Given my love of beets and the simplicity of the salad, it was only the matter of time I made this salad. We loved it, a lot, although the salad is probably more Russian than Latvian in its origins (any Latvian readers wanna comment on this?). It has also proved to be highly popular with my Estonian readers (like the ones on Nami-Nami's Facebook page), and who knows, perhaps you'll be positively surprised as well :)

Just a handful of ingredients, but surprisingly lot of flavour. Gluten-free as well.

Latvian Beet and Bean Salad 
(Peedi-oasalat)
Adapted from Saveur.com
Serves six to eight

Läti peedi-oasalat. Latvian beet and kidney bean salad.  Pupiņi un Biešu Salāti. Rūjienas salāti.

200 g sour cream (20%)
100 g mayonnaise
400-500 g cooked beetroot*
2 cans of kidney beans (about 400 g/12 oz each), rinsed and drained
4 pickles, chopped
salt and pepper
fresh parsley or chives, finely chopped

* You can use boiled, steamed or roasted beet to make this salad. I use coarsely shredded boiled beetroot. 

In a large bowl, whisk the sour cream and mayonnaise until combined, then season with salt and pepper. Add the beet, beans and pickles, folding them into the sour cream and mayonnaise dressing. Season again, then transfer the salad into the serving dish and sprinkle with herbs.

Thursday, November 06, 2014

Estonian lamb soup with cabbage


Time for soup! Earlier this year I came across a recipe for Islandic lamb and cabbage soup in the blogosphere. Lovely soup and justifiably popular - and almost identical to the Estonian way of making lamb and cabbage soup. Not surprising, giving the fact that both Iceland and Estonia are "up North" and the range of vegetables traditionally available is pretty similar.

It's a simple and rustic soup, as many Estonian soups are. Hope it'll become as well and widely known as the Icelandic one ;)

Note that it's even better on the next day, so feel free to make it a day or two in advance.

Lamb soup with cabbage
(Kapsasupp lambalihaga)
Serves 6 or more as a main dish

500-750 g of lamb on the bone (shank, neck, ribs)
2 l (8 cups) water
salt and black pepper
1 medium head of cabbage
2 medium sized onions, chopped
a handful of pearl barley, soaked (optional)
3-4 carrots, sliced
5-6 potatoes, cut into chunks
fresh dill, finely chopped


Place the meat into a large saucepan, pour in enough cold water to cover. Bring into a rolling boil, let boil for a few minutes. Then drain the whole lot over a colander. Rinse the saucepan thoroughly, return to the hob.

Rinse the meat under a cold running water to remove any impurities. Return to the saucepan. Add 2 litres of water and bring slowly into a boil.

Add the peppercorns and a generous pinch of salt. Bring into a boil, then reduce heat and simmer on a low heat for about 1,5-2 hours, until the meat is really tender and easily falls off the bones. (Skim off any fat or scum that appears at the top of the soup with a slotted spoon). Remove the meat from the soup, put aside.

Now add the onions and shredded cabbage into the pot, and simmer for about 30 minutes (if using pearl barley, then add it alongside onions and cabbage). Add carrots and cook for 15 minutes. Add potatoes and simmer until carrots and potatoes are cooked.

While the vegetables are cooking, remove the meat from the bones and cut the lamb into small pieces. Return the meat into the broth and re-heat thoroughly. Season to taste, sprinkle with dill and serve.

Similar recipes:
Icelandic lamb soup @ TastyTrix
Icelandic lamb soup @ Diary of a Tomato
Irish lamb stew with a twist @ Simply Recipes
Scotch broth @ Milk and Mode
Lambalihasupp aedviljadega @ KÖÖK (recipe in Estonian)

Saturday, October 11, 2014

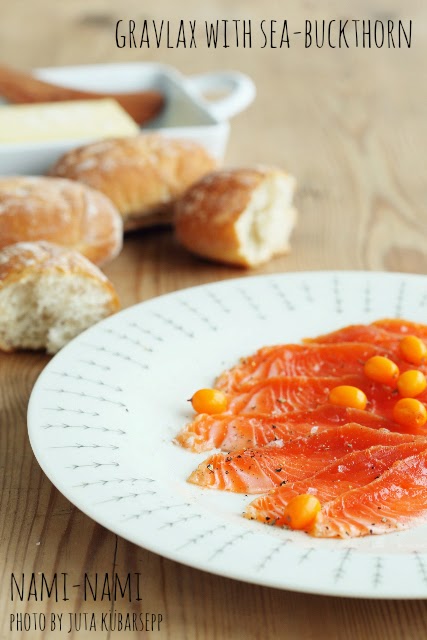
Gravlax with sea-buckthorn berries


Sea-buckthorn is a popular autumn berry here in Estonia. I'm afraid it's not so widely known in the US where most of my blog readers are based. However, given that Doctor Oz has been touting sea-buckthorn as one of the superberries, this may change :) 

Sea-buckthorn berries have a pleasant, but very tart flavour. They can be used instead of lemons - and here sea-buckthorn juice is used as a replacement for lemon juice in curing some nice salmon. 

Use highest quality fresh fish to make this dish. 

Gravlax with sea-buckthorn
Serves four to six

500 g fresh salmon filet
2 Tbsp natural/unsweetened sea-buckthorn juice
2 Tbsp kosher salt or Maldon sea salt flakes
1 Tbsp caster sugar
1 tsp freshly ground black or white peppercorns
handful of sea-buckthorn berries

Remove any bones with pliers. Brush with sea-buckthorn juice. 
Combine salt, sugar and pepper, spread the curing mixture over the fish and rub it gently in. Cut the filet into two even chunks, place them together, flesh sides touching. 

Wrap the salmon tightly with plastic wrap and refrigerate for at least 24 hours or up to 48 hours. 

Unwrap salmon, discarding the curing mixture (rinse quickly, if necessary, and pat thoroughly dry). 

Tp serve, place gravlax skin side down on a cutting board. Cut the gravlax into thin slices with a fileting-knife (a long, narrow-bladed knife), cutting against the grain, and slightly diagonally. 

Other sea-buckthorn recipes:
Mulled sea-buckthorn drink @ Nami-Nami
Sea-buckthorn jelly with kama mascarpone mousse @ Nami-Nami
Sea-buckthorn and Amaretto cheesecake @ Nami-Nami
Sea-buckthorn and apple tart @ Nami-Nami
Sea-buckthorn sorbet @ Nami-Nami
Cardamom panna-cotta with sea-buckthorn and apricot compote @ Nami-Nami
Sea-buckthorn juice @ Russian Season
Sea-buckthorn @ Real Epicurean
Gelbe grütze @ Küchenlatein
Coconut cream custard on sanddorn mirror @ Vegalicious Recipes
Sea buckthorn curd with raspberries @ Swedish Food
Sea-buckthorn cheesecake @ Bumpkin Mag
Sea-buckthorn mousse @ Andie's Veggies
Sea-buckthorn kissel with Greek yoghurt @ Suvi sur le vif

    Monday, September 15, 2014

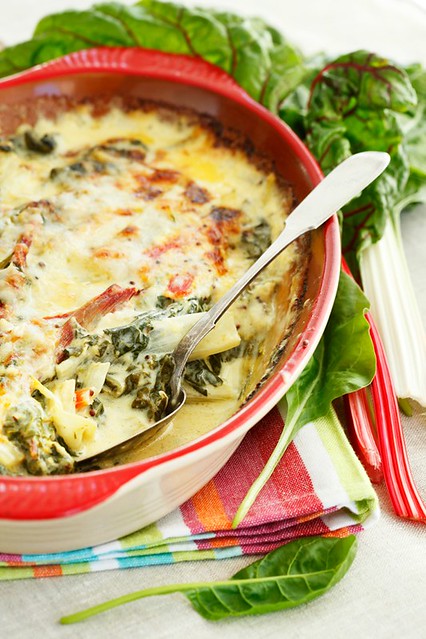
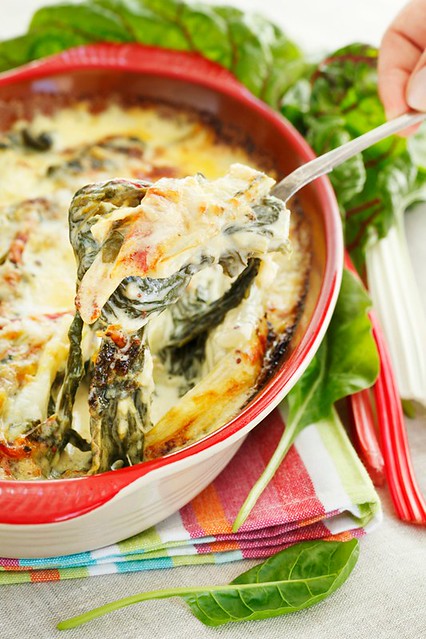
    Swiss Chard Gratin with Cheese

    LehtPeet 05

    Recipe by Pille @ Nami-NamiAll photos by Juta Kübarsepp for the September 2014 issue of Kodu ja Aed ("Home and Garden"), an Estonian monthly magazine. I've been their food writer since October 2012. 

    There's this wonderful cauliflower cheese recipe that I make pretty regularly, as it's super easy, quick, tasty and flavoursome. It's also gluten-free and low-carb, and I always have some cheese and mustard and cream in the fridge. Early this summer I realised that exactly the same cheese-cream-mustard topping works spectacularly well with Swiss chard stems and leaves. I grow around three or four varieties of Swiss chard in my garden, and they thrive well, so I've got a steady supply of those nutritious leafy greens.

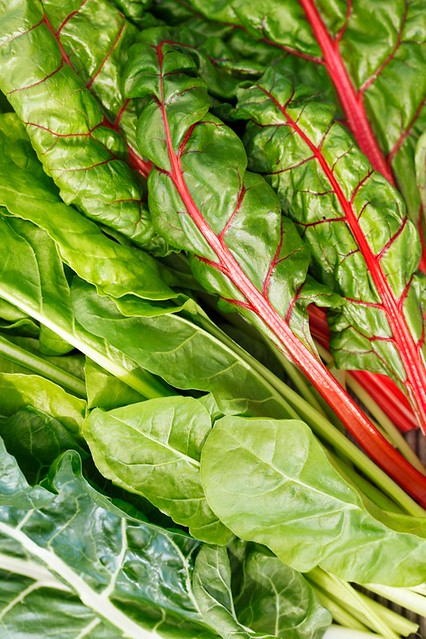
    This dish looks especially pretty when you use bright and colourful Swiss chard (also known as mangold, silverbeet, rainbow chard). Here's the selection from my garden:

    Swiss chard. Lehtpeet ehk mangold.

    Swiss chard with cheese and cream
    (Juustu-lehtpeedivorm)
    Serves 4

     LehtPeet 04

    a good bunch of Swiss chard (about 400-450 grams)
    200 ml double cream
    1 Tbsp wholegrain mustard
    150 g cheese, shredded
    salt and black pepper

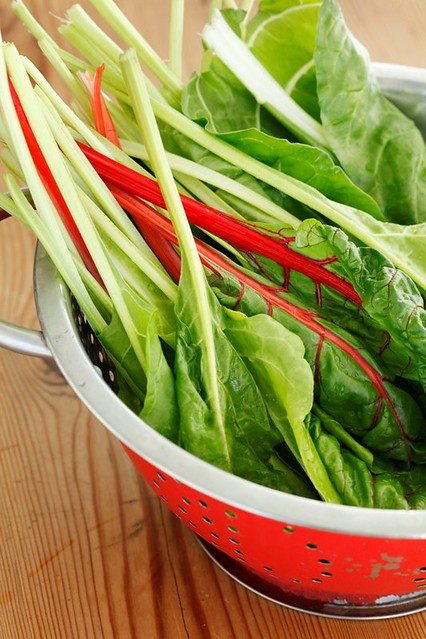
    Separate the ribs/stems from the greens. Cut the ribs into 5 cm/2 inch pieces. Blanch the ribs in lightly salted boiling water for 3-4 minutes, until they soften. Then add the leaves, and cook for another minute. Drain thoroughly.

    Mix the cream and mustard, fold in most of the cheese and season with salt and pepper. Add the Swiss chard stems and leaves.

    Transfer the mixture into a buttered oven dish, sprinkle the remaining cheese on top.

    Bake in the middle of a preheated 200 C/400 F oven for about 30 minutes, until the gratin is lovely golden and crisp on top.

    Serve and enjoy.

    Swiss chard. Lehtpeet ehk mangold.

    More Swiss chard gratin recipes:
    Swiss chard gratin by Alanna @ A Veggie Venture
    Baked Swiss chard stems with olive oil and Parmesan by Kalyn @ Kalyn's Kitchen
    Swiss chard gratin with vegan bechamel by Clotilde @ Chocolate and Zucchini
    Swiss chard gratin @ Whole Foods
    Swiss chard gratin by Phoebe @ Feed Me Phoebe
    Swiss chard au gratin @ Rachel Ray
    Alice Waters' Swiss chard gratin @ Serious Eats

    Wednesday, August 27, 2014

    Creamy chantarelle sauce recipe (aka creamy girolle sauce)


    My regular readers all know about my love for wild mushrooms. We had a long and hot and dry summer here in Estonia - not the time for forageing for wild mushrooms. However, the autumn rains have arrived, so soon I'll be heading to our regular mushroom forests to fill up the baskets (yes, the basket and my pink wellies are already in the boot of the car, waiting :))

    Until then, I have to do with the fresh chantarelle/girolle mushrooms that are widely available at this time of the year. They actually appeared at the market stalls in early June, but were gone for a short while because of the heatwave. I'm glad they're back, for sure!

    I make a popular Estonian dish - kukeseenekaste - quite regularly. It's a simple creamy chantarelle sauce that can be made either with fresh cream (then a spoonful of flour is often added for thickening) or sour cream. I prefer the latter these days, so the recipe is for that. While it's a typical dish in Estonia, it's not exclusively Estonian. The Finns make the same dish, calling it kantarellimuhennos. What is perhaps unique to Estonia is that we serve the chantarelle sauce as a dish on its own right - not as a delicious sauce alongside a steak or grilled elk or pan-fried fish or something along those lines. Kukeseenekaste is a perfectly satisfying meal on its own. (But then we're funny like that here in Estonia. We can also have a pile of _brilliant_ potatoes as the centrepiece of a meal - just read Alanna's overview about her trip to Estonia ;))

    Chantarelle sauce
    (Kukeseenekaste)
    Serves 4 to 5

    400 g fresh chanterelle/girolle mushrooms
    1 Tbsp butter
    1 yellow onion, finely chopped
    200 g sour cream
    salt and pepper
    handful of chopped herbs (dill, parsley, spring onions)

    Carefully clean the mushrooms, then chop coarsely and set aside.
    Melt the butter on a large frying/skillet pan over medium heat. Add the onion and sauté gently for about 5-7 minutes, until just slightly golden.
    Increase heat and add the mushrooms. Season with salt and pepper, then fry for about 5 minutes, stirring every now and then, until the mushrooms have wilted.
    Add the sour cream, stir and just heat through.
    Fold in the herbs and serve with boiled or mashed potatoes.

    More chantarelle recipes:
    Chantarelle pesto
    Carrot and chantarelle quiche
    Chantarelle bruschetta
    Beef stroganoff with chantarelle mushrooms

    Monday, July 21, 2014

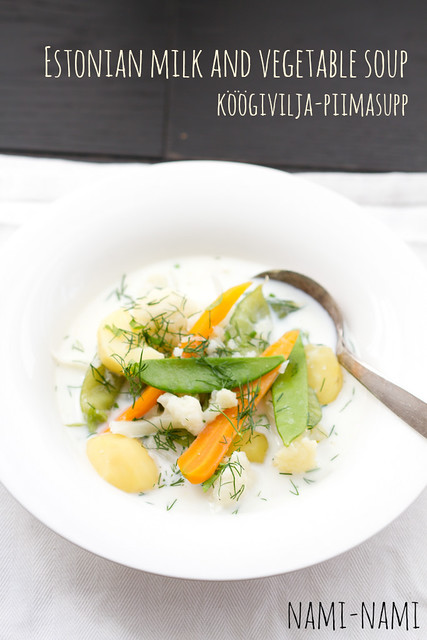
    Summer food: Estonian milk and vegetable soup

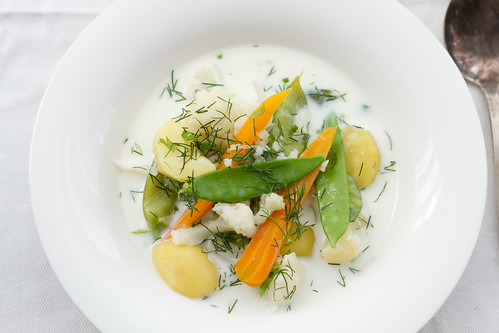
    Köögivilja-piimasupp. Kesäkeitto. Estonian milk and baby vegetable soupl

    It's mid-July, which here in Estonia means the peak of summer. We're having a beautiful summer here, with lots of sun and not much rain. It's the end of the wild strawberry season, it's the height of chantarelle mushroom season (but too early for most other wild mushrooms), and it's the start of the beautiful local vegetable harvest season. Here's a traditional milk soup that glorifies those early tiny vegetables that are still crisp and sweet. I bought the cauliflower and potatoes - simply because I don't grow these, but the carrots and snap peas were from our own little back yard.

    Although the soup is part of the Estonian traditional cuisine, it's not just Estonian. Our Northern neighbours, the Finns, eat a similar soup, called kesäkeitto or summer soup (I've provided links to several recipes at the end of the post). The Swedish name for the soup is snålsoppa or sommarsoppa.

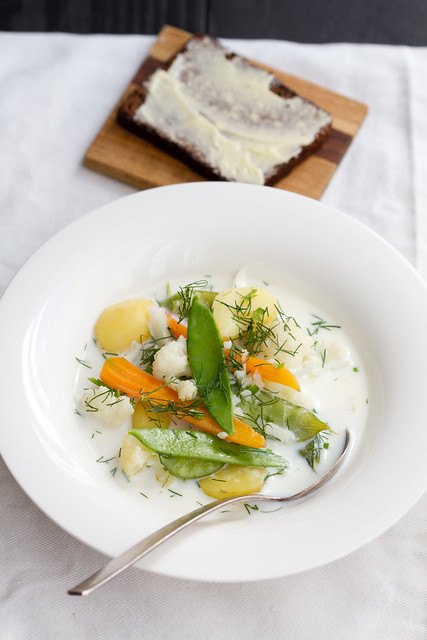
    The soup is best served with some buttered dark rye bread. It's best on day one, though it reheats well. However, be careful not to burn the milk. There's nothing worse than burnt or simply overcooked milk soup, trust me :)

    Estonian milk and vegetable soup
    (Köögivilja-piimasupp)
    Serves four to six

    Piima-köögiviljasupp. Kesäkeitto. Estonian milk and vegetable soup.

    a handful of baby carrots
    1 small head of cauliflower or white cabbage
    a large handful of (sugarsnap) peas
    a large handful of new potatoes
    500 ml (2 cups) water
    1 tsp salt
    2 Tbsp butter
    1 litre (4 cups) full-fat milk
    fresh dill, finely chopped

    Scrub the carrots and potatoes clean, then cut the potatoes into small chunks and the carrots into slices about 3-4 mm thick (if you've got pretty slim carrots, then you can also halve or quarter them lengthwise instead, see the photos). Divide the cauliflower into small florets, or shred the cabbage into small thick slices. Pod the peas, if using regular green peas.

    Place carrots, potatoes and cauliflower/cabbage into a medium saucepan. Add water, season with salt and butter. Bring into a boil. Half-cover with the lid and simmer for about 15-20 minutes, until the vegetables are almost cooked. Add the peas and cook for 5 more minutes.

    Now pour in the milk. Bring slowly into a boil, stirring gently. Remove from the heat, add the dill and season to taste. Serve and enjoy.

    Piima-köögiviljasupp. Kesäkeitto. Estonian milk and vegetable soup.

    Similar recipes:
    Finnish summer soup by Alanna @ Kitchen Parade
    Kesäkeitto by Wendy @ A Wee Bit of Cooking
    Summer soup (kesäkeitto) by Lakshmi @ Pure Vegetarian (no recipe, but, oh, the photos!)
    Finnish summer soup @ The Kitchn
    Summer Soup by Mia @ Cloudberry Quark
    Summer soup (snålsoppa) by Katarina @ Hovkonditorn: Passion for Food and Baking

    Friday, June 13, 2014

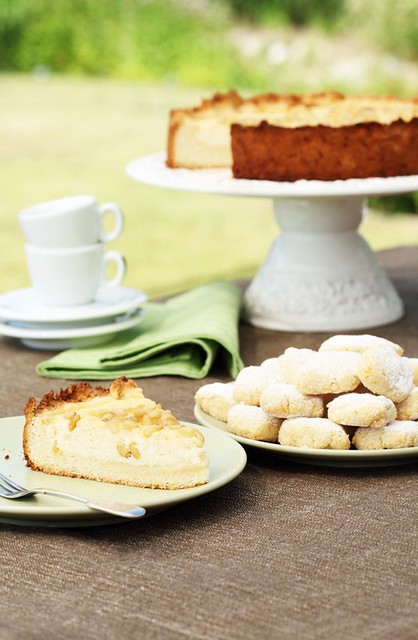
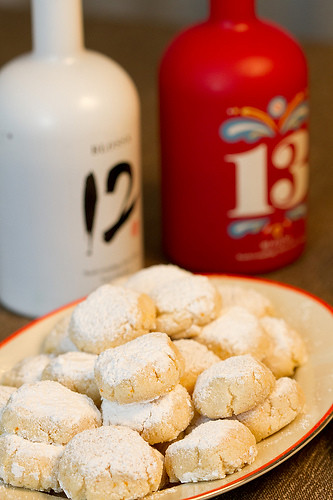
    Recipe for ricciarelli, delicious gluten-free almond cookies from Siena, Tuscany

    TOSKAANA: torta della nonna & ricciarelli
    This photo was taken by Juta Kübarsepp for Nami-Nami, the rest are by me or my husband.  

    I’m writing this post in Sicily. I’m in a lovely company of David, Rachel and Johanna, enjoying the delicious hospitality of Anna Tasca Lanza Cookery School. La dolce vita, but more about all that in future posts. I do mention that some very nice cookies were baked here yesterday, which reminded me of a lovely Italian cookie recipe I’ve got in my latest cookbook. 

    San Gimignano: Agriturismo Montegonfoli

    Just over a year ago, in April 2013, I had a lovely holiday in Tuscany with my dear partner and our three small kids - the youngest was just under 6 months back then. We began our family holiday in Florence, then staying in various agriturismos near San Gimignano. On my birthday we took a day trip to Siena. Everybody said that we’d love Siena, but the truth is, we were not so impressed at all - San Gimignano, Volterra, Lucca, Certaldo and the old parts of Colle di Val d'Elsa had been more charming, more real. However, we did love the ricciarelli, the famous almond cookies from Siena. They are light and soft, yet chewy, just a wee bit resistant. If you love marzipan, then you’ll love these!

    Certaldo: Osteria del Vicario

    Ricciarelli are wonderful with a cup of strong coffee or tea, if you’re not a coffee drinker. In Toscana, they’re a festive food, baked and eaten especially during Christmas, and dipped into a glass of Vin Santo. 

    They’re gluten-free. 

    Ricciarelli cookies
    (Siena mandliküpsised)

    300 g ground almonds/almond meal
    280 g caster sugar
    100 g icing sugar/confectioner’s sugar 
    1 tsp baking powder
    a pinch of salt
    1 orange, finely zested
    2 egg whites 
    2 tsp almond extract (optional)

    For dusting:
    icing sugar/confectioner’s sugar

    Mix ground almonds, caster sugar, icing sugar, baking powder, salt and the finely grated orange zest in a bowl. 

    In another bowl, whisk the egg whites until soft peaks form. Add the almond mixture, folding gently to combine. You’ll have a rather sticky mixture. (Add the almond extract now, if using). 

    Using a teaspoon, take about 20 to 30 grams (about an ounce or so) of the mixture and form into oval/oblong patties, flattening them lightly between your palms. Place onto a cookie sheet, covered with parchment/baking paper, leaving some space between the cookies. They won’t spread a lot, but it’s better to be safe. 

    Once you’ve formed all the cookies and arranged them onto the cookie sheet, dust them generously with icing sugar. Leave to dry them out at the room temperature for 1-3 hours - the bigger the cookies, the more time they need to dry. 

    Bake in a pre-heated 150C oven for 20-25 minutes, until the cookies are just a little bit golden and hardened at the edges - you don’t want them golden brown, or they’ll be too crispy when they cool. You want your ricciarelli to remain soft and chewy inside!

    Cool completely. These will keep for a week in an airtight container.  

    ricciarelli2012


    More ricciarelli recipes:
    Divina Cucina
    Jul's Kitchen
    Lemons and Anchovies
    Cook's Hideout
    The Curious Baker

    Thursday, May 01, 2014

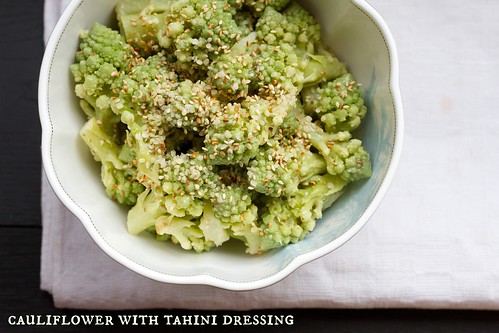
    Cauliflower with tahini dressing and sesame and hemp seeds

    (Romaani) lillkapsas tahiinikastmega. Romanesco cauliflower with tahini dressing and sesame and hemp seeds.

    It's almost two years since I went to Israel with the lovely David Lebovitz and Ms Marmite Lover, as well as Cambria from The Kitchn and Erin from Serious Eats. We were invited and hosted by Kinetis, and I had the most wonderful week exploring the Israeli culinary scene. One of the most memorable meals during that trip was lunch at Haj Kahil, an Arabic restaurant in Jaffa. (Read David's wonderful review of the amazingly satisfying meal here). The restaurant is focusing on "authentic Arab cuisine with a Galilee orientation", cooked by the Palestine chef Omar Iluwan:
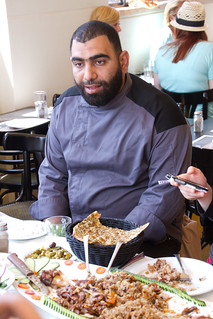
    Omar did all the cooking for us @ Haj Kahil, Jaffa, Israel

    The food was utterly delicious, and I was gorging on the dozen or more mezze dishes, all vegetarian and all utterly delicious. One of the most memorable dishes was a simple cauliflower with tahini (20 NIS, still on the menu). The pairing of cauliflower and tahini was still new to me and it was a match made in heaven. I missed it.

    There's a recipe for fried cauliflower with tahini in Yotam Ottolenghi and Sami Tamimi's newst book, Jerusalem, but Haj Kahil's wasn't fried. It was mild and soft, simple cooked cauliflower, dressed with creamy tahini. Just when I was about to start inventing the bicycle again - or trying to recreate the dish I fell in love with in Jaffa - Clotilde posted a recipe for Cauliflower Salad à la Café Pinson. I made the dish with regular cauliflower on the day Clotilde posted the recipe, and have made it almost on a weekly basis since then. It's my favourite way of preparing cauliflower these days, alongside a simply roasted cauliflower.

    As always, I've modified the way I make this cauliflower salad. I'm not too keen on flax seeds, either whole or crushed, and apart from the crunch factor, I couldn't see what they'd add to the cauliflower. I used lightly toasted sesame seeds instead - after all, the tahini is made with sesame seeds as well, so it seemed like a nice pairing. Also, hulled raw hemp seeds have a lovely moist and soft bite, so I've been adding these as well (the nutritious hemp seeds also called hemp hearts; you can easily buy them from Amazon, see here, here and here).

    (Romanesco) cauliflower with tahini dressing and seeds
    (Romaani) lillkapsas tahiinikastmega
    Serves 4
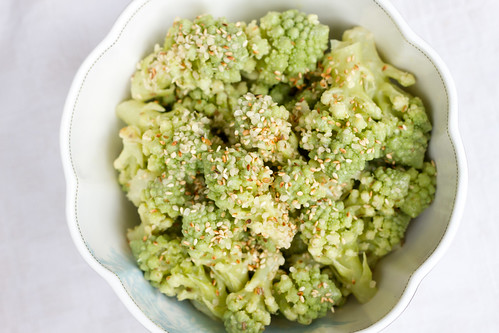
    (Romaani) lillkapsas tahiinikastmega. Romanesco cauliflower with tahini dressing and sesame and hemp seeds.

    1 large cauliflower, regular or Romanesco, cut into florets

    Tahini dressing:
    3 Tbsp light tahini paste
    1 Tbsp freshly squeezed lemon juice
    1 tsp cumin seeds, slightly crushed
    0.5 tsp fine sea salt
    5 Tbsp cold-pressed olive oil

    Topping:
    toasted sesame seeds
    hulled hemp seeds

    Bring a large pan of water to boil. Season generously with salt. Add the cauliflower florets and boil for about 7-8 minutes, until cooked, but still with a bit of bite. Drain thoroughly and let cool to room temperature.

    Make the tahini dressing. Whisk tahina, salt, lemon juice and cumin seeds until combined, then drizzle in the olive oil, whisking vigorously to create a nice emulsified dressing (Clotilde calls this "vegan mayonnaise"). Pour the dressing over the cooked cauliflower and toss until combined.

    Transfer into a serving dish, sprinkle generously with toasted sesame seeds and hulled hemp seeds.

    Enjoy either straight away, or keep in the fridge until ready to serve.

    Here's a cauliflower version, dressed with tahini and topped with just sesame seeds:
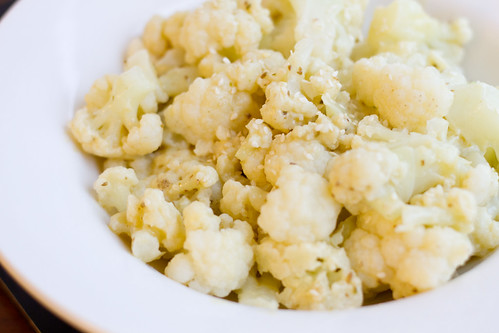
    Lillkapsas tahiinikastmega. Cauliflower with tahini dressing and sesame seeds.

    Tuesday, March 25, 2014

    Green beans, Greek style

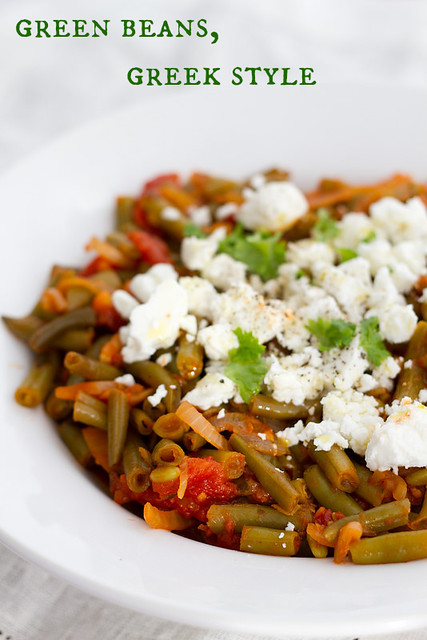
    Green beans, Greek style

    Today is the Greek independence day, commemorating the start of the War of Greek Independence back in 1821. I'm celebrating with sharing one of my favourite Greek dishes with you.

    The recipe has been with me since early 1990s, and I remember clearly that I discovered it from a Finnish women's magazine. Cannot remember the exact date or the name of the magazine, but it was called "kreikkalainen papupata" or Greek bean stew. Since then - and that means for the last 20+ years - I've been making it every now and then. It's versatile - it's lovely when steaming hot, but also nice at room temperature and perfectly edible straight from the fridge. It goes equally well with some bread, or with a grilled steak, it can handle beer, water or wine. My kind of dish, you know :)

    Green beans with tomatoes and feta
    (Rohelised oad Kreeka moodi)
    Serves 3 to 4 as a side dish, or 2 as a main dish

    Kreeka oapada. Greek beans.

    400 - 450 g frozen green beans, trimmed
    2 large (red) onions, chopped
    2-3 Tbsp olive oil
    400 g canned chopped tomatoes
    water
    1-2 tsp dried Greek oregano
    sea salt and freshly ground black pepper
    fresh flat-leaf/Italian parsley, chopped

    To serve:
    about 100 g of Greek feta

    (If using fresh beans, then trim them first, then boil in plenty of salted water for about 5 minutes. Discard the liquid).

    Heat olive oil in a sauté pan. Add the onion and fry gently for about 5 minutes, until the onions start to soften. Don't burn them!

    Add the tomatoes, the green beans and some water (I usually just fill the empty tomato tin with water). Season with salt, pepper and oregano. Bring to the boil, then reduce heat and simmer gently for about 20-25 minutes, until the beans are cooked and the tomato sauce thickened. Stir in the parsley.

    Transfer the beans and tomato into a serving dish. Crumble some feta cheese on top.

    Kreeka oapada. Greek beans.

    Sunday, March 16, 2014

    Gluten-free buckwheat cookies recipe

    Tatraküpsised. Buckwheat cookies.

    Are you on Pinterest? I am, with a nice number followers (thank you, all!) and various "boards". One of my boards is called buckwheat recipes, and I've been pinning various recipes there utilising this non-grain/pseudo-grain. Despite the name, you see, buckwheat is not a grass, but a plant related to sorrel and rhubarb.

    During the recent months I've noticed that this particular board is getting new followers on a daily basis, and individual buckwheat recipes get repinned by increasingly many pinners. Buckwheat is "in". I guess the popularity of buckwheat recipes is caused by a) this "pseudo-grain" being gluten-free and hence suitable as a wheat substitute for all those avoiding gluten and b) some popular Paleo templates/frameworks allow small to moderate consumption of buckwheat dishes. Plus it has a lovely nutty flavour when baked.

    Have you tried buckwheat? It's pretty popular here in Estonia and I've got several buckwheat recipes here on Nami-Nami (listed at the end of this post, see below). While I prefer cookies with buckwheat groats, then I tend to have some buckwheat flour in the house as well. It's the compulsory ingredient in blini, the small yeasted pancakes served with smetana and caviar. Plus I love this buckwheat cookies recipe that I discovered years ago in a British food giant's Sainsbury's client magazine. Apparently the original recipe is by Doves Farm, and you could also use rice flour instead of buckwheat flour. I prefer buckwheat, for it has a lovely flavour of its own. Note that my version has way less sugar (100 g instead of 150 g)  - if you've got a very sweet tooth, you may want to use more sugar perhaps.

    I used to make these with chopped hazelnuts, but since our son is sensitive to hazelnuts, I've been using sliced/slivered almonds instead.

    Have I missed your excellent buckwheat recipe and you'd like me to include it to the buckwheat recipes board? Leave a link to your blog post in the comments and I'll check it out!


    Buckwheat cookies
    (Tatraküpsised)
    Makes about 2 dozens

    Buckwheat and almond cookies. Mandli-tatraküpsised.

    125 g butter, at softened
    100 g caster sugar
    1 egg
    150 g (light) buckwheat flour
    1 tsp baking powder
    100 g chopped hazelnuts or chopped/sliced almonds

    Heat the oven to 180C/350F. Line a baking sheet with parchment paper.

    Cream together the butter and sugar, followed by the egg. Mix in the flour, baking powder and nuts/almonds, combine. (If the mixture is on the dry side, add a spoonful or two of cold water)*.

    Take a heaped teaspoonful of the mixture, roll into balls and place onto the baking sheet. Gently press with a fork to flatten the cookie dough balls a little.

    Tatraküpsised. Buckwheat cookies.

    Bake for 15-20 minutes in the preheated oven until the cookies are light golden.

    Let cool for about 5 minutes, then transfer onto the metal rack to cool completely.

    * I've also used a different method - combined all the dry ingredients (buckwheat flour, sugar, baking powder), added the grated softened butter and the egg, and simply mixed everything and rolled into walnut-sized balls.

    Buckwheat cookies. Tatraküpsised mandlitega.

    More buckwheat inspiration here on Nami-Nami:
    Buckwheat with leeks and soy sauce
    Buckwheat with beets and dill
    Cabbage and buckwheat kasha
    Buckwheat kasha with mince
    Warm buckwheat and mushroom salad
    Buckwheat with beef liver
    Buckwheat and mushrooms casserole

    More buckwheat cookies by other bloggers:
    Buckwheat chocolate chip cookies by Karina @ gluten-free goddess
    Multiseed buckwheat cookies  by Clotilde @ Chocolate & Zucchini
    Nibby buckwheat butter cookies by Heidi @ 101 cookbooks
    Buckwheat sugar cookies @ LA Times
    Buckwheat chocolate chip cookies by Garrett @ Vanilla Garlic
    Buckwheat chocolate chip cookies by Alanna @ The Bojon Gourmet

    Saturday, March 01, 2014

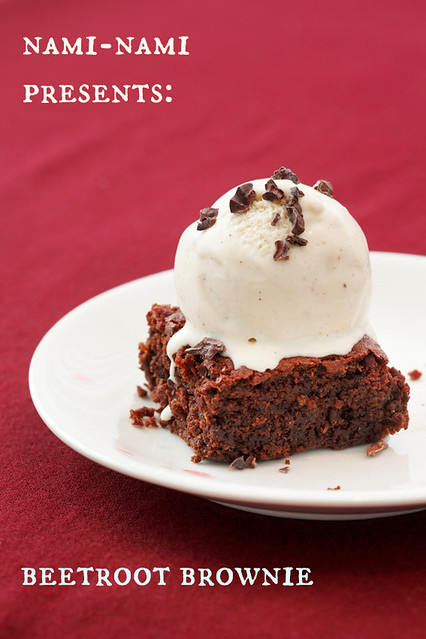
    Beetroot Brownies (wheat-free, possibly gluten-free)

    Beetroot brownies.
    Photo by Juta Kübarsepp for the March 2014 issue of Kodu ja Aed magazine. 

    March. While in some far away corners this means new season's rhubarb and spring greens, then here in far North it's time to dig out the last of the last season's root vegetables and do something nice with them. Beetroot is one of my favourites (see all those beet recipes!?) and luckily it's one vegetable that's still nice and good at this time of the year.

    Chocolate-laden brownies are loved by many, and here's a lovely version I've been baking recently. The cooked (either boiled or roasted) beet makes these extra moist and soft, and you can easily make this gluten-free by using appropriate flour (see notes below).

    Enjoy!

    Beetroot and Dark Chocolate Brownies
    (Peedi-šokolaadiruudud)
    Makes 16 small squares

    200 g unsalted butter
    200 g dark chocolate (70%)
    200 g cooked beetroot
    3 large eggs
    200 g caster sugar
    1 tsp vanilla sugar or extract
    100 g flour*
    50 g coarsely chopped almonds or walnuts (optional)

    * A note on flour: As my son is sensitive to wheat, I use rye - and a wholemeal rye - when baking this. You can use regular wheat flour for this, or even buckwheat or rice flour for a gluten-free version. 

    Pre-heat the oven to 200 C/390 F. Line a 24 cm (10 inch) square cake tin with parchment paper.

    Break the chocolate into pieces, cut the butter into chunks. Place both into a small saucepan and heat gently on a low heat, stirring every now and then, until the chocolate melts. Remove from the hob and stir until combined. Leave and let it cool to room temperature.

    Finely grate the beets, fold into the melted chocolate and butter mixture.

    Whisk the eggs and sugar until thick and pale. Gently fold in the vanilla, then the beet-chocolate-butter mixture. Finally fold in the flour and the nuts, if using. Spoon the mixture into the prepared cake tin.

    Bake in the middle of the oven for 20-25 minutes - or only until the cake looks cooked from the top. Remove from the oven and let cool before cutting into squares.

    brownienov2013.jpg
    Photo by Juta Kübarsepp for Nami-Nami.