Showing posts with label Recipes: Vegetarian. Show all posts

Thursday, March 19, 2020

IKRA - Russian eggplant caviar/Russian aubergine caviar

Someone was looking for a "soft aubergine/eggplant spread with tomatoes" and I knew exactly what they were talking about. There's a dish in Russia, our Eastern neighbour, which is called IKRA or fake caviar.

I got this recipe from Russian friend Galina back in Edinburgh sometimes around 2000. Still makes a regular appearance in our kitchen.  It's lovely on a slice of toast, or as a condiment or spread on a mezze-table.


Russian aubergine spread IKRA


1 large aubergine/eggplant
1 large onion
2 garlic cloves
2 tomatoes
1 Tbsp olive oil or vegetable oil
2 Tbsp white wine vinegar or lemon juice
salt and freshly ground black pepper
fresh parsley or dill

Prick the aubergine with a fork here and there, then place into a preheated 200C/400F oven and bake for about 60 minutes, until fully cooked and slightly charred on the outside. Flip over once or twice during baking.

Remove from the oven, let it cool. Then cul half lengthwise and scoop out the flesh. Place into a cutting board and chop finely. Place into a medium-sized bowl.

Peel the onion, cut into halve and then chop finely. '

Peel the tomatoes (make a small X-cut at the bottom, place into a boiling water for about 30 minutes, drain and peel). Dice the tomatoes finely.

Mince the garlic.

Mix the aubergine, onion, tomatoes and garlic in the bowl, add the oil and vinegar/lemon juice. Season to taste with salt and pepper.

Cover the bowl with a clingfilm and put the ikra into the fridge for a few hours, so the flavours can mingle and develop.

Sprinkle with chopped fresh herbs just before serving.

Tuesday, October 04, 2016

It's cinnamon bun day (kanelbullens dag)!

Korvapuustit / Finnish cinnamon rolls / Soome kaneelisaiad

It's Cinnamon Bun Day in Sweden today. Cinnamon Bun Day was established in 1999, or 17 years ago, when Swedish Home Baking Council (Hembakningsrådet) came up with the idea when looking for a way to celebrate their 40th anniversary. Many Swedes rush to their favourite bakery today and buy some kanelbullar - or bake their own. You'll find a good recipe for Swedish kanelbullar over on Sweden.se site (written by Anne).

I've previously given you recipe for my traditional cinnamon rolls (with step-by-step photos), as well as the hugely popular cinnamon pull-apart bread. Today's recipe is for Finnish korvapuustit ('Slapped ears') - more or less the same thing, just shaped and braided slightly differently.

Korvapuustit/Finnish cinnamon buns
(Soomlaste kaneelisaiad)
Makes about 16 large buns

Korvapuustit / Finnish cinnamon rolls / Soome kaneelisaiad

450 g all-purpose flour (about 750 ml or 3 cups)
85 g caster sugar (100 ml)
1.5 tsp ground cardamom pods
0.5 tsp salt
1 packet of fast-action dried yeast (about 11 g)
250 ml lukewarm milk (1 cup)
1 egg (divided)
75 g butter, softened

Filling:
50 g butter, softened
4 Tbsp caster sugar
cinnamon

Topping:
pearl sugar (optional)

In a large mixing bowl, mix most of the flour, sugar, cardamom, salt and yeast. Stir in the milk and about half of the egg (leave some for brushing the buns before baking). Knead in the softened butter and the rest of the flour, if necessary. Knead until you've got a soft and pliable dough that releases from the sides of the bowl. Cover with clingfilm or a clean towel and leave to prove for about 45-60 minutes, until doubled in size. (The place for proving should be warm and draught-free).
Turn the dough onto a lightly floured table, knead gently couple of times. Roll into a reclangle sized 30x60 cm. Spread soft butter over the dough, then sprinkle generously with cinnamon and sugar. Roll up tightly, starting from the long side, leaving the "seam" under the roll.

Now use a sharp knife to cut into buns, following the scheme here. The buns should be about 2 cm wide on the narrow end and 5 cm on the wide end.

Korvapuustit / Finnish cinnamon rolls / Soome kaneelisaiad

Transfer onto a parchment-lined baking sheet, placing them upright. Using your thumbs or a large pencil, press a dent into the middle of each bun, just like this:

Korvapuustit / Finnish cinnamon rolls / Soome kaneelisaiad

Cover with a kitchen towel and leave to raise for another 30 minutes in a warm place. Meanwhile, preheat the oven to 225 C/450 F.

Brush with egg wash and sprinkle with pearl sugar. Bake in a preheated oven for 10-15 minutes, until the buns and golden brown.

Take the baking sheet out of the oven, and cover the buns with a kitchen towel and let them cool (a little) - this way they remain nice and soft.

Korvapuustit / Finnish cinnamon rolls / Soome kaneelisaiad

Monday, March 21, 2016

Lemony bread and butter pudding with custard and berries


It's been a while since my last proper blog post, I know. It's not that I've neglected my food-loving readers, I've just been focusing on my Estonian readers during the last months. Apologies :) But here I am, attempting to start blogging again with this fun take on bread and butter pudding.

Why bread and butter pudding? We were sorting the bread and butter recipes over on my Estonians site with one of my editors, Kaare, and while doing the research, I came across this shortcut version in the British food magazine Delicious. Meanwhile, if you read Estonian, you can check out Kaare's great article on this humble - yet versatile dessert: Millal Sa viimati saiavormi sõid?

Lemony bread and butter pudding with custard and berries
(Saiavorm sidrunivõide, vanillipudingi ja marjadega)
Serves 6 to 8

400 g good white bread (brioche, challah or such like)
butter, softened
500 ml (2 cups) fresh vanilla custard
200 ml double cream/whipping cream
300 g berries (raspberries, blackberries, blueberries)
6 Tbsp lemon curd or toffee/caramel sauce

Preheat the oven to 160°C . Thickly slice the bread and butter one side of each slice. Cut each slice into large triangles or halves and layer in a 2 litre ovenproof dish.

In a 1-litre jug, mix the vanilla custard and fresh cream, then pour in around the bread slices, pressing the bread down gently. If you can, leave to stand and absorb for about half an hour. 

Scatter berries on top, tucking them between the bread slices. Spoon dollops of lemon curd or caramel sauce on top.

Bake in a preheated oven for 40-50 minutes until the bread slices on top are golden brown on edges and nicely crispy.

Leave to rest for 10 minutes before serving. Serve with a jug of cream or milk (pictured). 

How do you make bread and butter pudding?

Tuesday, February 09, 2016

It's not Pancake Day, it's Shrove Tuesday cream bun day soon ;)

Vastlakuklid 2014
Photo by Juta Kübarsepp for the March 2014 issue of Kodu ja Aed magazine. 

It's time for semlor or lenten cream buns again soon - February 9th, to be precise. Remember, instead of pancakes, in Estonia and other Nordic countries cream-filled buns are eaten (semlor in Swedish, vastlakuklid in Estonian, laskiaispulla in Finnish). I've got three different recipes here on Nami-Nami, all delicious :)

Recipe for classic lenten buns
Recipe for chocolate lenten buns
Recipe for raspberry and marzipan lenten buns

So, are you having pancakes or cream buns next week? ;)

Friday, July 17, 2015

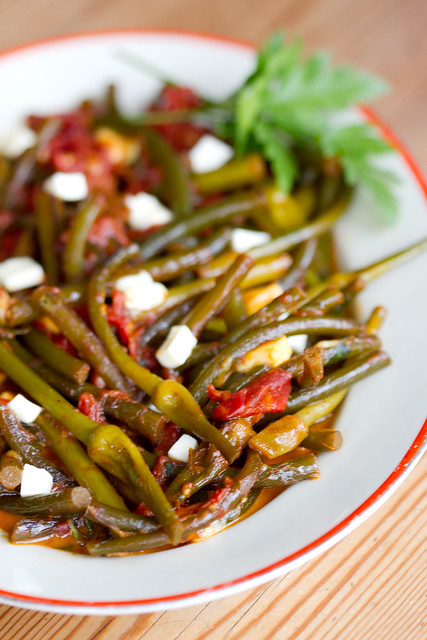
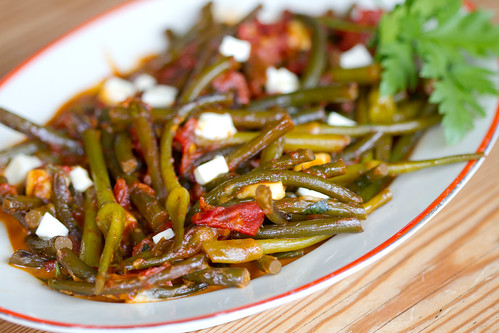
Sautéed garlic scapes with tomatoes

Sautéed Garlic Scapes

Are you familiar with garlic scapes? I've actually mentioned them here on my blog, Nami-Nami, just over ten years ago (YES, NAMI-NAMI BLOG QUIETLY CELEBRATED ITS 10 BLOG ANNIVERSARY IN MID-JUNE) -  when I was still living in Edinburgh. I used to go to the fabulous Edinburgh Farmers Market every weekend, and it's there that I first encountered those spindly scapes, at the stall of Really Garlicky Company (I'm thrilled to see that they're still going strong, those Scottish garlic heroes). I threw those curly garlic tops into stir-fries back then, or chopped them and added to mash.

I grow some hardneck garlic in our beautiful garden these days as well, tucked between our strawberry plants to keep nasty bugs away. Sometimes - but only sometimes - I remember to snip the curly-spindly scapes off in the spring or early summer. This time I did, and made this lovely sauté with tomatoes and cheese. I found a recipe by William Woys Weaver over at Mother Earth News that sounded lovely. Mr Weaver topped his sautéed garlic scapes with cubed and fried halloumi cheese. Although the Cypriot halloumi-cheese is widely available in Estonia, I had none at home. However, as Mr Weaver mentioned that he got an idea for the dish in Slovenia - where local kajmak cheese* is way more popular than halloumi - and kajmak is similar to feta and bryndza cheese. Luckily I had bought some fresh bryndza cheese as well as Georgian suluguni cheese at the market on a previous day, so I used a mixture of these two instead.

A verdict - lovely and tasty and such a genius way for using up those spindly-curly scapes. One of my 5 aunties and one of my 13 cousins came over for dinner that night and the dish got their approval as well. At least none of us will ever waste any garlic scapes again :)

* A huge thanks to my friend Mann for helping me with the Slovenian cheese terms.

(Hautatud küüslauguvõrsed)
Serves 4

Sautéed Garlic Scapes

2 Tbsp extra virgin olive oil
2 Tbsp dark brown sugar
250 g garlic scapes
400 g fresh or canned chopped tomatoes
180 ml (about 3/4 cups) dry white wine
sea salt and freshly ground black pepper
1 Tbsp chopped fresh flat-leaf parsley
about 100 g of cheese (crumbled brynza or feta or cubed and fried halloumi)

Trim the garlic scapes by snipping off the thin tip on top of the garlic buds - this would simply burn on your pan. Discard. Cut the rest of the scapes into 5 cm/2 inch pieces.

Heat oil on a heavy frying pan over medium heat. Add sugar, then stir for a couple of minutes to melt and caramelise the sugar. Add the garlic scapes, cover and fry on a moderately high heat for about 3 minutes, shaking the pan every now and then.

Uncover, then add the tomatoes and wine. Cover the pan again, reduce heat and simmer on a low heat for 8-10 minutes, until the garlic scapes have al dente or softened, depending on your preference.

Season to taste, fold in the parsley and scatter with cheese. Serve hot or at room temperature.

Wednesday, May 20, 2015

Badrijani nigvzit - Georgian aubergine rolls with walnut filling


Badrijani is the Georgian rolled eggplant dish we've been missing our whole life, wrote Lucky Peach on its Facebook page yesterday. I don't really know about rolled eggplant/rolled aubergine dishes in particular, but as far as eggplant dishes in general go, Georgian rolled aubergines are pretty wonderful. They're pictured on the top left corner above.

My recipe is pretty minimalist, as far as the seasoning goes. I've served them as part of a bigger Georgian spread (see f. ex. here), where the famous Georgian spice blend khmeli-suneli was used in various dishes. That's why I like my badrijani nigvzit (badrijani = aubergine/eggplant, nigvzit = walnuts) seasoned just with herbs, onion and vinegar. But feel free to use garlic instead of onion and to add some ground coriander or cumin seeds - or a generous spoonful of khmeli-suneli - to the walnut mixture to make it more flavoursome. Even chilli powder could be added, if you're fond of spicy dishes.

This great appetizer is low-carb, LCHF (low carb, high fat), gluten-free, vegan, Paleo etc. For more Georgian recipes, see my Georgian Flickr album or browse my Georgian recipes here.

Badrijani nigvzit aka Georgian eggplant rolls with walnut paste
(Pähklitäidisega pommurullid e. badrižani)

Serves 6 as an appetizer

2 slender eggplants/aubergines
sea salt
olive oil

Walnut filling:
250 g walnuts
2 onions
fresh dill, cilantro/coriander and parsley, chopped
3-4 Tbsp red wine vinegar
sea salt and freshly ground black pepper

To garnish:
pomegranate seeds

Cut the aubergines into long thin slices, lengthwise. Sprinkle with salt and let stand in a colander for 20-30 minutes. Drain the liquid, pat the slices dry with kitchen paper.

You can cook the aubergine either by frying or by baking. To fry them, heat some oil on a frying pan and fry on moderate heat until golden on both sides. To bake them, place into a 220C/450F oven and bake for about 20 minutes,  turning once.

To make the walnut filling, spread the walnuts on a baking sheet and roast at 180C/350F for about 10 minutes, until they're aromatic and golden. Remove from the oven and let cool.

If you dislike the taste of raw onion, fry the chopped onion in olive oil until translucent.

Place all the filling ingredients into the food processor and blend until coarse and combined. Transfer into a bowl and season to taste - the filling has to be just a wee bit vinegary.

Place a spoonful of the filling onto one end of the aubergine slice, then roll into a cigar (alternatively, spread a thin layer of the walnut paste over the whole length of the aubergine, then roll up).  Place onto a serving tray, and do the same with rest of the aubergine slices and the filling. Garnish with pomegranate seeds and fresh herbs.

More aubergine/eggplant recipes on Nami-Nami:
Grilled aubergine with feta, golden raisins and mint
Armenian aubergine stew
Ottolenghi's roasted aubergine with saffron yoghurt
Nasu dengaku (miso-glazed aubergine)
Aubergine curry with tomatoes, coriander and Nigella seeds
Sautéed aubergine (Melanzane al funghetto)
Israeli roasted aubergine and feta spread
Moussaka, deconstructed

More badrijani recipes on food blogs:
Karen @ Rambling Spoon
Gill @ Gill Stannard
kahviaddikti (recipe in Finnish)
Christina Nichol @ Lucky Peach

Tuesday, December 30, 2014

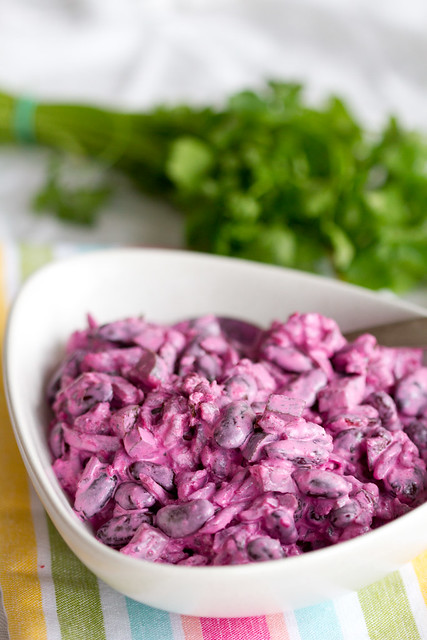
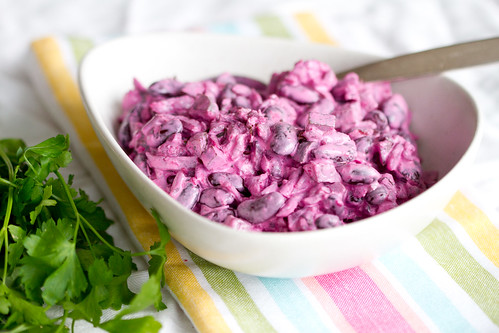
Recipe for a Latvian Beet and Bean Salad (Pupiņu un Biešu Salāti)

Läti peedi-oasalat. Latvian beet and kidney bean salad.  Pupiņi un Biešu Salāti. Rūjienas salāti.

A few years ago Saveur, the American food magazine, featured some Latvian recipes (Latvians, remember, are our Southern neighbours). Among them was a recipe for beet and bean salad, Pupiņu un Biešu Salāti, that caught my attention. I love beetroot, and cook and eat various beetroot salads quite frequently. Some of my favourite beet salad recipes have been featured here on Nami-Nami as well over the last 9+ years, like the Russian vinaigrette salad, beet and potato salad, layered vegetable salad with smoked salmon, to name just a few.

Given my love of beets and the simplicity of the salad, it was only the matter of time I made this salad. We loved it, a lot, although the salad is probably more Russian than Latvian in its origins (any Latvian readers wanna comment on this?). It has also proved to be highly popular with my Estonian readers (like the ones on Nami-Nami's Facebook page), and who knows, perhaps you'll be positively surprised as well :)

Just a handful of ingredients, but surprisingly lot of flavour. Gluten-free as well.

Latvian Beet and Bean Salad 
(Peedi-oasalat)
Adapted from Saveur.com
Serves six to eight

Läti peedi-oasalat. Latvian beet and kidney bean salad.  Pupiņi un Biešu Salāti. Rūjienas salāti.

200 g sour cream (20%)
100 g mayonnaise
400-500 g cooked beetroot*
2 cans of kidney beans (about 400 g/12 oz each), rinsed and drained
4 pickles, chopped
salt and pepper
fresh parsley or chives, finely chopped

* You can use boiled, steamed or roasted beet to make this salad. I use coarsely shredded boiled beetroot. 

In a large bowl, whisk the sour cream and mayonnaise until combined, then season with salt and pepper. Add the beet, beans and pickles, folding them into the sour cream and mayonnaise dressing. Season again, then transfer the salad into the serving dish and sprinkle with herbs.

Tuesday, December 09, 2014

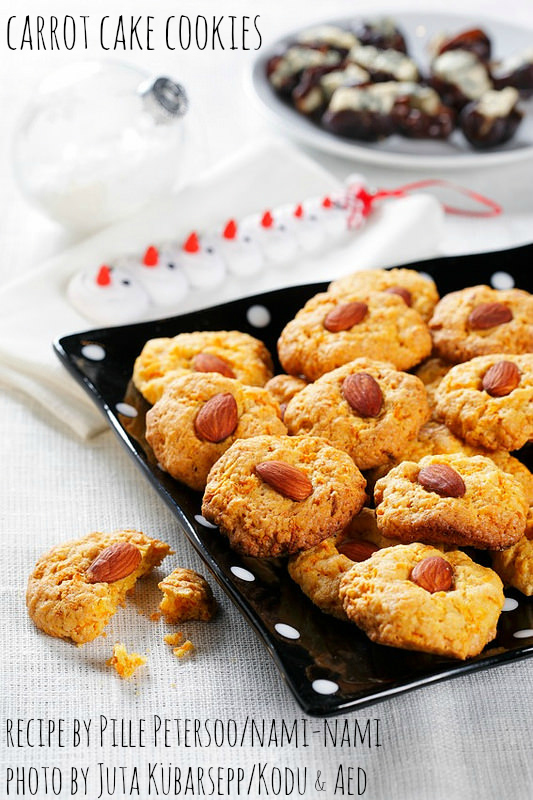
Holiday baking: Carrot cake cookies recipe

Carrot Cake Cookies. Porgandiküpsised.

Time to start preparing for the Christmas holidays and I offer you a lovely cookie recipe! Although we'll be mostly eating piparkoogid aka gingerbread cookies here in Estonia, these slightly chewy carrot cake cookies would do just as well.

For over two years now I've been contributing recipes for one of the biggest home and gardening magazines here in Estonia, Kodu ja Aed (that translates "Home and Garden"). Since spring we've been focusing on a specific vegetable both on the gardening pages and in the food section. Carrot happened to be the vegetable of the month in December. December, of course, being the Christmas month, so I was trying to think of recipes that would feel right at the Christmas table as well. I think these cookies fit the bill brilliantly. They are easy to make, go brilliantly with a glass of glögg or mulled wine, they're "healthy" as containing a vegetable (carrot is also providing both texture and flavour), and they are egg-free, making them also suitable for some special diets. Most of all, they have a pretty colour and they taste great. As an added bonus, the kids loved them - something to think about when you've got 3 small ones running around the house!

So when you're planning your next glögg party, think of adding these carrot cake cookies to the menu!

You'll find all of Nami-Nami's Christmas recipes here and a selection of cookie recipes here.

TIP! You could make these cookie more festive by adding a scant teaspoon of mixed spices, gingerbread spice or pumpkin pie spice - all of these would work.

TIP! If you forgot to take your butter out of the fridge in advance, then simply grate the cold butter into your mixing bowl. Instant softened butter! 

Carrot cake cookies
(Porgandiküpsised)

200 g butter, at room temperature (7 oz)
150 g caster sugar (2/3 cups)
200 g carrots, finely shredded (2 medium carrots)
300 g all-purpose flour (2 cups)
1 tsp vanilla sugar or extract
1 tsp baking powder
a pinch of salt
whole almonds

Pre-heat the oven to 200C/400F. Line a baking sheet with a parchment paper.

Cream the butter and sugar in a mixing bowl, either using a wooden spoon or the paddle attachment of your standing mixer. Add the carrots, then the dry ingredients (flour, vanilla sugar, baking powder, salt). Mix the dough until combined, then take small chestnut-sized chunks of the dough and form into small balls.

Place the balls onto the baking sheet, flattening them with your palm. Press a whole almond onto each cookie.

Bake for 15 minutes or until the cookies are golden brown.  Remove from the oven, leave for a few minutes before transferring the carrot cookies onto a metal rack to cool completely.

More carrot cookie recipes:
Carrot oatmeal cookies by Heidi @ 101 Cookbooks
Chocolate chip carrot cookies by Jeanine @ Love & Lemons
Gingered carrot cake cookies by Michelle @ Brown-Eyed Baker
Porgandiküpsised by Marit @ Magusad fotod (recipe in Estonian)
Porgandiküpsised by Kaare @ Koopatibi (recipe in Estonian)
Porkkanakeksit @ Kotiliesi (recipe in Finnish)

Friday, October 24, 2014

Home-made granola recipe

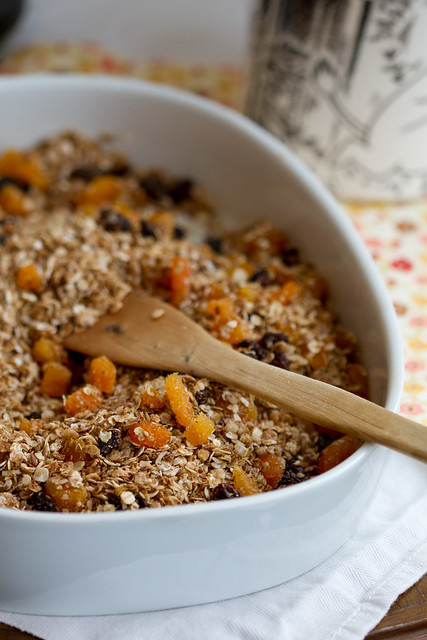
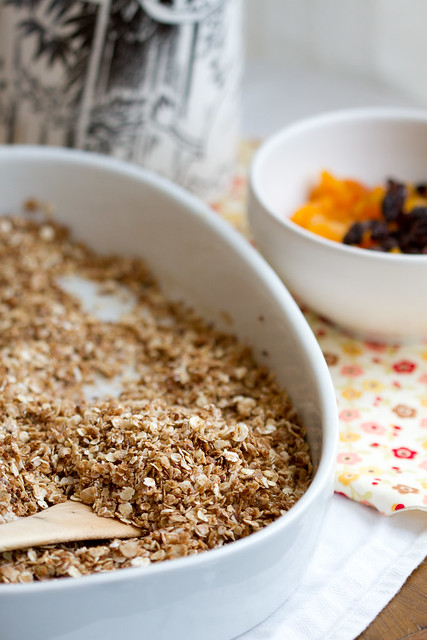
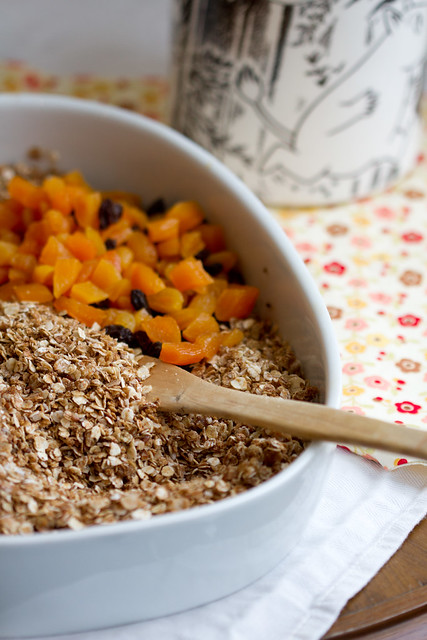
Home-made granola. Kodune krõbe müsli.

This was originally posed in January 2009. I'm reposting this with new photos. 

I'm not sure why it took me so long to make my own granola to sprinkle on yogurt for breakfast, considering how incredibly easy it is! The recipe below is a mixture of various ideas, and it's pretty simple. I'm especially fond of the addition of malt extract* that I got from Moosewood granola recipe included in the Moosewood Restaurant New Classics - it adds a lovely, well, malted flavour to the end product. I've used a mixture of chopped apricots, seedless raisins and dried cranberries to 'buff up' my granola, but the choice of dried fruit is obviously yours.

What do you do? Make your own granola/müsli or buy from a shop? If you buy, then what's your favourite brand/type? Just curious :)

Home-Made Granola
(Kodune krõbe müsli)
Makes enough for 2 persons for a week


100 g old-fashioned rolled oats (about 1 cup)
3 Tbsp dark muscovado sugar
5 Tbsp unsweetened coconut flakes
1 Tbsp flax seeds/linseeds
1 tsp cinnamon

3 Tbsp neutral-flavoured oil
2 Tbsp water
1 Tbsp malt extract

To 'top up':
half a cup or so chopped dried apricots or prunes or dried cranberries or seedless raisins

Mix the oats, sugar, coconut flakes, linseed and cinnamon in a bowl. Stir in molasses extract, oil and water, stir to combine.

Line a small baking tray with a parchment paper and spread the granola mixture on top.

Home-made granola. Kodune krõbe müsli.

Bake in a pre-heated 200 C/400 F oven for 15 minutes, stirring once or twice while baking, until the granola is golden and very aromatic (it will crispen up after you take it out of the oven).

Take out of the oven and cool completely, then stir in the chopped dried fruit.

Home-made granola. Kodune krõbe müsli.

Keep in a closed jar and serve with your breakfast yogurt or milk.

* Moosewood recipe uses "barley malt syrup or unsulphured molasses", explaining that "Barley malt is a liquid made from fermented barley and often used in baking bread. We use it here for sweetness and moisture. If unavailable, any unsulphured molasses except blackstrap will work fine". I used a local product which is meant for brewing your own beer at home, but is also widely used for baking bread at home. 

Saturday, September 20, 2014

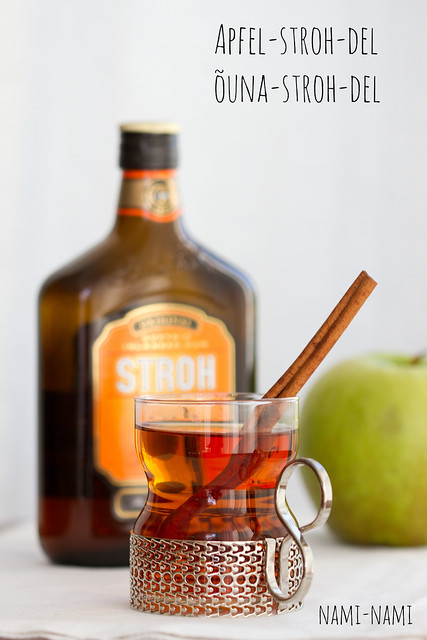
ApfelSTROHdel - a hot apple toddy with Austrian Stroh rum

ApfelSTROHdel. ÕunaSTROHdel.

I've been testing various recipes using the spiced Austrian rum, Stroh, and this autumn/winter drink was quite popular. The ApfelSTROHdel recipe is adapted from the Stroh's website (see here), and it's a witty play of words - think of the famous Viennese apple strudel or Apfelstrudel.  I've still got some Stroh left, I'll be making this again and again. The nights are getting darker and cooler here, and this is a nice recipe to have on a cold and rainy autumn night :)

ApfelSTROHdel
(ÕunaSTROHdel)
Serves 2

400 ml apple juice (you can use apple cider or unfiltered apple juice)
2 cinnamon sticks
2 tsp dark brown sugar (or more, to taste)
60 ml Stroh rum (I used Stroh 40)

Heat the apple juice, cinnamon sticks and sugar gently in a small bowl, stirring, until the sugar has dissolved. Do not boil!
Remove from the heat, let cool for a moment. Stir in the Stroh, pour into glasses and garnish with a thin apple slice (optional).

Enjoy, preferably in front of a flickering fireplace.

ApfelSTROHdel. ÕunaSTROHdel.

Disclosure: This is not a sponsored post as such, but I have received remuneration for sharing this recipe with my Estonian readers on my Estonian-language site.

Monday, September 15, 2014

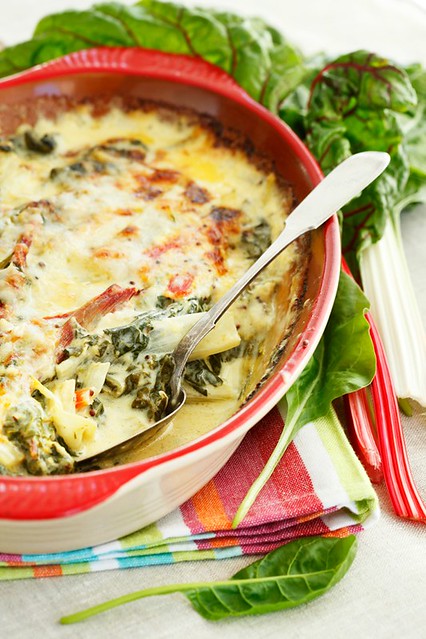
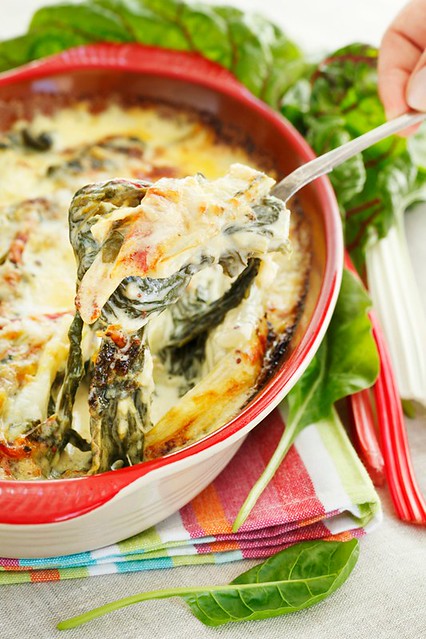
Swiss Chard Gratin with Cheese

LehtPeet 05

Recipe by Pille @ Nami-NamiAll photos by Juta Kübarsepp for the September 2014 issue of Kodu ja Aed ("Home and Garden"), an Estonian monthly magazine. I've been their food writer since October 2012. 

There's this wonderful cauliflower cheese recipe that I make pretty regularly, as it's super easy, quick, tasty and flavoursome. It's also gluten-free and low-carb, and I always have some cheese and mustard and cream in the fridge. Early this summer I realised that exactly the same cheese-cream-mustard topping works spectacularly well with Swiss chard stems and leaves. I grow around three or four varieties of Swiss chard in my garden, and they thrive well, so I've got a steady supply of those nutritious leafy greens.

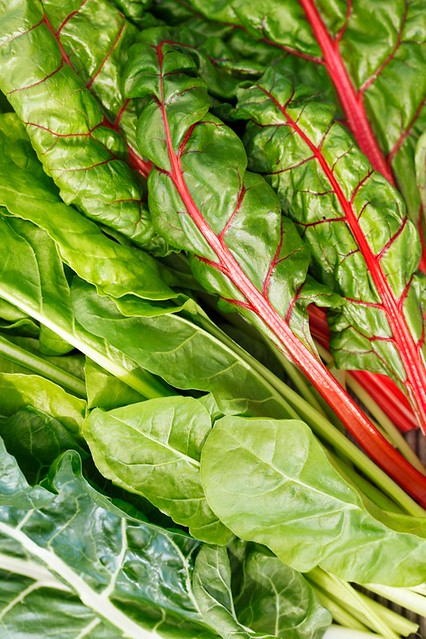
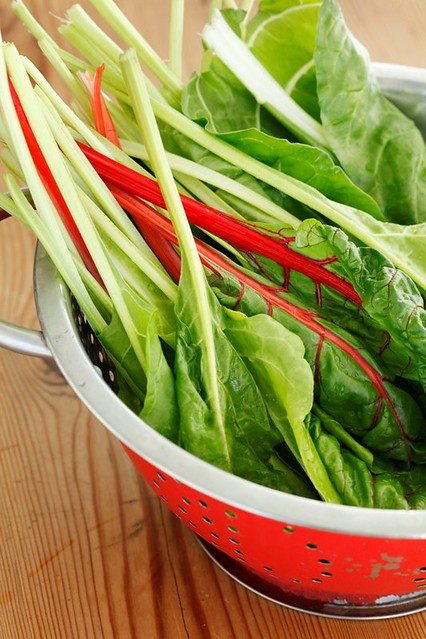
This dish looks especially pretty when you use bright and colourful Swiss chard (also known as mangold, silverbeet, rainbow chard). Here's the selection from my garden:

Swiss chard. Lehtpeet ehk mangold.

Swiss chard with cheese and cream
(Juustu-lehtpeedivorm)
Serves 4

 LehtPeet 04

a good bunch of Swiss chard (about 400-450 grams)
200 ml double cream
1 Tbsp wholegrain mustard
150 g cheese, shredded
salt and black pepper

Separate the ribs/stems from the greens. Cut the ribs into 5 cm/2 inch pieces. Blanch the ribs in lightly salted boiling water for 3-4 minutes, until they soften. Then add the leaves, and cook for another minute. Drain thoroughly.

Mix the cream and mustard, fold in most of the cheese and season with salt and pepper. Add the Swiss chard stems and leaves.

Transfer the mixture into a buttered oven dish, sprinkle the remaining cheese on top.

Bake in the middle of a preheated 200 C/400 F oven for about 30 minutes, until the gratin is lovely golden and crisp on top.

Serve and enjoy.

Swiss chard. Lehtpeet ehk mangold.

More Swiss chard gratin recipes:
Swiss chard gratin by Alanna @ A Veggie Venture
Baked Swiss chard stems with olive oil and Parmesan by Kalyn @ Kalyn's Kitchen
Swiss chard gratin with vegan bechamel by Clotilde @ Chocolate and Zucchini
Swiss chard gratin @ Whole Foods
Swiss chard gratin by Phoebe @ Feed Me Phoebe
Swiss chard au gratin @ Rachel Ray
Alice Waters' Swiss chard gratin @ Serious Eats

Friday, September 12, 2014

Whipped semolina pudding with apples and black aronia berries

Aroonia-õunamannavaht & arooniasmuuti / Black aronia smoothie and black aronia and apple pudding
Recipe by Pille @ Nami-NamiAbove photo by Juta Kübarsepp for the October 2012 issue of Kodu ja Aed ("Home and Garden", an Estonian monthly magazine. I've been their food writer since October 2012). 

Back in July 2013, The Wall Street Journal touted the slightly astringent and tart black aronia as possibly the next superberry. While WSJ listed it alongside other health-giving berries, Fox News wrote more directly: Aronia: The North American super berry with cancer-fighting properties., calling aronia the "King Kong of antioxidant berries" (other than that, it's actually a pretty good and informative article). In a word - it's a great berry that's very good to you!

Black aronia berry has been popular here in Estonia for decades - it makes a beautiful hedge plant, especially in the autumn:

Black aronia / Must aroonia

See what I mean? The aronia plant has most beautiful dark red leaves in the autumn!

Usually the berries are used to make cordial, though they can be used in so many other ways. I often throw a handful of berries into my smoothie, and I've provided links to various recipes below. Here's a simple autumnal pudding, using apples, aronia berries and cream of wheat/semolina.

Black aronia and apple whipped semolina pudding
(Aroonia-õunavaht)
Serves 4 to 6

1 l (4 cups) water
500 ml (2 cups) of cleaned black aronia berries and apple chunks
100 g caster sugar
a pinch of salt
200 ml semolina/cream of wheat (wholewheat or spelt semolina is fine, too)

Put the aronia berries and chopped apples into a saucepan, pour over the water. Bring into a boil, then reduce heat and simmer for about 15 minutes, until the aronia berries have softened.

Take a bowl (or another saucepan) and cover with a sieve. Pour the cooked apples and black aronias - and their boiling liquid - onto the sieve and using the back of a wooden spoon, press as much of the fruit through the sieve. Season the mixture with sugar and a pinch of salt. Bring into a boil.

Pour semolina quickly into the boiling mixture, stirring vigorously to avoid any lumps. Then reduce the heat and simmer gently for 10-15 minutes, stirring every now and then, until semolina - and the pudding - thickens. Remove the pan from the heat and leave to cool for about half an hour. Whisk until fluffy and light - this is best done with an electric mixer.

Serve with milk.

More recipes using black aronia berries aka chokeberries:
Black aronia muffins @ Nami-Nami
Black aronia and kefir smoothie @ Nami-Nami
Aronia jam @ Blooms 'n' Food
6 recipes @ Deep Roots
Aronia jam @ Sto kolorow kuchni (recipe in Polish)
Black aronia soda @ ferdakost
Vispipuuro omenasta ja marja-aroniasta by Riikka @ (recipe in Finnish)
Vispipuuro marja-aroniasta @ Omenaminttu (recipe in Finnish)
Vispipuuro marja-aroniasta ja mustaherukasta by MariMaalla @ Lily (recipe in Finnish)
Aroniaglögi @ Omenaminttu (recipe in Finnish)
Aronia-omenakisselli @ Omenaminttu (recipe in Finnish)
Aronia and rye foam by Malitsu @ Mämmi

(From the recipe archives: this post was originally posted in September 2013)

Wednesday, September 10, 2014

Quark and pumpkin pudding cake

Kõrvitsa-kohupiimavorm. Pumpkin and curd cheese.

Recipe by Pille @ Nami-NamiAbove photo by Juta Kübarsepp for the October 2013 issue of Kodu ja Aed ("Home and Garden", an Estonian monthly magazine. I've been their food writer since October 2012). 

Pumpkin or winter squash dessert, anyone?

There's a popular old-school dessert here in Estonia, called kohupiimavorm. It consists of curd cheese (also known as quark), sugar, (whisked) eggs, and some add-ons, usually raisins or pieces of fruit. It's not really a cake (too soft), nor a soufflé (no custard base), so after some research I've decided to translate it as pudding cake :) Pudding cake is a cake you need to eat with a spoon, and it's rather difficult to cut it into neat shapes when still warm.

Here's a version using that autumn staple, winter squash or pumpkin. For once, this is a recipe that's very versatile - if you cannot find curd cheese (try looking for 'tvorog' at your nearest Polish/Russian/international shop), you could use drier ricotta or even farmer's cheese. As for pumpkin, any yellow-fleshed winter squash would work. I like using butternut squash here, as this gives the dessert a lovely dark orange hue. Considering the amount of flour in the recipe, you could easily make this wheat-free or gluten-free by using different types of (gluten-free) flours.

You could eat it as it is, or with a dollop of thick yoghurt or sour cream on the side. It's lovely with a kissel or fruit soup (this cranberry kissel would work brilliantly here). I actually prefer this pumpkin version to the traditional version, as it's softer and moister.

Oh, and if you were wondering what those cookies on the top right corner of the photo were, you'll be pleased to know these contain pumpkin/squash as well. You'll find the recipe for those wonderful pumpkin cookies here.

Curd cheese and pumpkin pudding cake 
(Kõrvitsa-kohupiimavorm)
Serves 6

800 g butternut squash or pumpkin (cleaned weight)
100 g caster sugar
500 g curd cheese
4 large eggs, separated
1 lemon, juiced and zested
2 Tbsp all-purpose flour
100 g dried cranberries (craisins) or seedless raisins
a pinch of salt
butter
breadcrumbs

Pre-heat the oven to 200 C/400 F.

Peel the pumpkin, cut into large wedges. Remove the soft core and seeds, and cut the flesh into large cubes. Weigh the pumpkin cubes - you need about 800 g (just under 2 pounds). Place the cubes into a large saucepan, add a cup of water and simmer over a low heat until pumpkin is tender. Drain thoroughly, then place into a bowl and mash with a fork.

Add lemon juice and grated zest, curd cheese, flour, (c)raisins.

Separate the eggs. Whisk the egg yorks with sugar until creamy, add to the rest of the ingredients. Finally, whisk the egg whites with a pinch of salt until stiff peaks forms. Fold 1/3 of the egg whites into the rest of the ingredients, then gently fold in the remaining egg whites.

Butter a large (round) oven dish - about ∅ 26-30 cm is excellent -  and sprinkle with fine breadcrumbs. Spoon the pumpkin and curd cheese mixture into the dish, smooth the top.

Bake in the pre-heated 200 C/400 F oven for about 40 minutes, until it's lovely golden brown, and just a wee bit wobbly in the middle.

Let cool either completely or serve at room temperature.

(From the recipe archives: this post was originally posted in October 2013)

Similar recipes:

Wednesday, August 27, 2014

Creamy chantarelle sauce recipe (aka creamy girolle sauce)


My regular readers all know about my love for wild mushrooms. We had a long and hot and dry summer here in Estonia - not the time for forageing for wild mushrooms. However, the autumn rains have arrived, so soon I'll be heading to our regular mushroom forests to fill up the baskets (yes, the basket and my pink wellies are already in the boot of the car, waiting :))

Until then, I have to do with the fresh chantarelle/girolle mushrooms that are widely available at this time of the year. They actually appeared at the market stalls in early June, but were gone for a short while because of the heatwave. I'm glad they're back, for sure!

I make a popular Estonian dish - kukeseenekaste - quite regularly. It's a simple creamy chantarelle sauce that can be made either with fresh cream (then a spoonful of flour is often added for thickening) or sour cream. I prefer the latter these days, so the recipe is for that. While it's a typical dish in Estonia, it's not exclusively Estonian. The Finns make the same dish, calling it kantarellimuhennos. What is perhaps unique to Estonia is that we serve the chantarelle sauce as a dish on its own right - not as a delicious sauce alongside a steak or grilled elk or pan-fried fish or something along those lines. Kukeseenekaste is a perfectly satisfying meal on its own. (But then we're funny like that here in Estonia. We can also have a pile of _brilliant_ potatoes as the centrepiece of a meal - just read Alanna's overview about her trip to Estonia ;))

Chantarelle sauce
(Kukeseenekaste)
Serves 4 to 5

400 g fresh chanterelle/girolle mushrooms
1 Tbsp butter
1 yellow onion, finely chopped
200 g sour cream
salt and pepper
handful of chopped herbs (dill, parsley, spring onions)

Carefully clean the mushrooms, then chop coarsely and set aside.
Melt the butter on a large frying/skillet pan over medium heat. Add the onion and sauté gently for about 5-7 minutes, until just slightly golden.
Increase heat and add the mushrooms. Season with salt and pepper, then fry for about 5 minutes, stirring every now and then, until the mushrooms have wilted.
Add the sour cream, stir and just heat through.
Fold in the herbs and serve with boiled or mashed potatoes.

More chantarelle recipes:
Chantarelle pesto
Carrot and chantarelle quiche
Chantarelle bruschetta
Beef stroganoff with chantarelle mushrooms

Monday, July 21, 2014

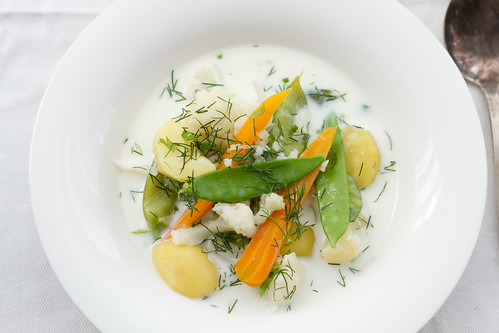
Summer food: Estonian milk and vegetable soup

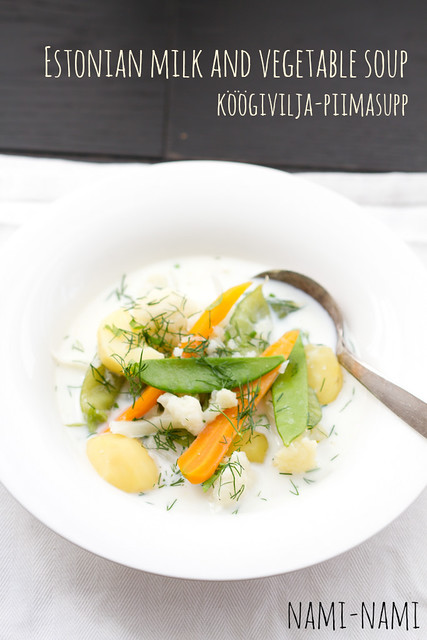
Köögivilja-piimasupp. Kesäkeitto. Estonian milk and baby vegetable soupl

It's mid-July, which here in Estonia means the peak of summer. We're having a beautiful summer here, with lots of sun and not much rain. It's the end of the wild strawberry season, it's the height of chantarelle mushroom season (but too early for most other wild mushrooms), and it's the start of the beautiful local vegetable harvest season. Here's a traditional milk soup that glorifies those early tiny vegetables that are still crisp and sweet. I bought the cauliflower and potatoes - simply because I don't grow these, but the carrots and snap peas were from our own little back yard.

Although the soup is part of the Estonian traditional cuisine, it's not just Estonian. Our Northern neighbours, the Finns, eat a similar soup, called kesäkeitto or summer soup (I've provided links to several recipes at the end of the post). The Swedish name for the soup is snålsoppa or sommarsoppa.

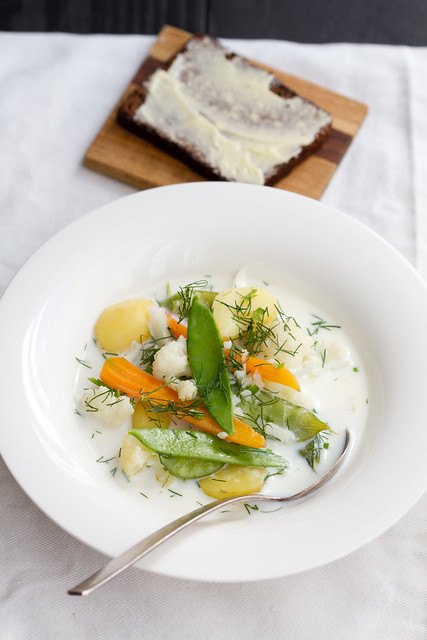
The soup is best served with some buttered dark rye bread. It's best on day one, though it reheats well. However, be careful not to burn the milk. There's nothing worse than burnt or simply overcooked milk soup, trust me :)

Estonian milk and vegetable soup
(Köögivilja-piimasupp)
Serves four to six

Piima-köögiviljasupp. Kesäkeitto. Estonian milk and vegetable soup.

a handful of baby carrots
1 small head of cauliflower or white cabbage
a large handful of (sugarsnap) peas
a large handful of new potatoes
500 ml (2 cups) water
1 tsp salt
2 Tbsp butter
1 litre (4 cups) full-fat milk
fresh dill, finely chopped

Scrub the carrots and potatoes clean, then cut the potatoes into small chunks and the carrots into slices about 3-4 mm thick (if you've got pretty slim carrots, then you can also halve or quarter them lengthwise instead, see the photos). Divide the cauliflower into small florets, or shred the cabbage into small thick slices. Pod the peas, if using regular green peas.

Place carrots, potatoes and cauliflower/cabbage into a medium saucepan. Add water, season with salt and butter. Bring into a boil. Half-cover with the lid and simmer for about 15-20 minutes, until the vegetables are almost cooked. Add the peas and cook for 5 more minutes.

Now pour in the milk. Bring slowly into a boil, stirring gently. Remove from the heat, add the dill and season to taste. Serve and enjoy.

Piima-köögiviljasupp. Kesäkeitto. Estonian milk and vegetable soup.

Similar recipes:

Finnish summer soup by Alanna @ Kitchen Parade
Kesäkeitto by Wendy @ A Wee Bit of Cooking
Summer soup (kesäkeitto) by Lakshmi @ Pure Vegetarian (no recipe, but, oh, the photos!)
Finnish summer soup @ The Kitchn
Summer Soup by Mia @ Cloudberry Quark
Summer soup (snålsoppa) by Katarina @ Hovkonditorn: Passion for Food and Baking

Saturday, June 14, 2014

Recipe for torta della nonna, or Tuscan ricotta cake with pinenuts or almonds

Case Vecchie, Sicily

I am still in Sicily, still enjoying the hospitality of Anna Tasca Lanza’s cookery school in Case Vecchie, near Vallelunga. I’ve just got back from the most amazing garden party I’ve ever attended - just under 200 guests seated around a huge long table, set under an elegant makeshift canopy built in the middle of a vegetable patch :) 

Who knows, we may have lingered at the table for another few hours, sipping one of the extremely “quaffable” wines from Tasca d’Almerita, if it weren’t for the thunder and rain that suddenly appeared. Not really out of nowhere - the skies were threatening with rain already yesterday - but apparently heavy showers are pretty much unusual in this part of Sicily in this part of the year. In any case, I use the thunderstorm as an excuse to retreat to my room for a short while and finish another blog post. Being in the company of all those bloggers mentioned yesterday - David, Rachel and Johanna - as well as some others I met today (Elizabeth, Elisia, Alec, Anissa, Linda) - has certainly been very inspiring :)

Filippo and his ricotta.

We arrived at Case Vecchie on Wednesday evening, just in time to have dinner overlooking Fabrizia’s (she’s the owner of the cooking school) gorgeous herb garden. On Thursday morning, just after the breakfast, we ventured out to visit a local shepherd, Filippo at Azienda Agricola Rivitera. We were shown his sheep - 400 in total, milked by hand twice a day, to produce about 800 litres of sheep’s milk during peak times (winter, usually). The milk is turned into wonderfully tasty and fresh ricotta and flavoursome picurinu sicilianu or pecorino siciliano right there, at the small dairy at the premises. We were privileged to watch Filippo making the cheese, and get to taste freshly made tuma and ricotta.


Just before dinner at the courtyard of Case Vecchie (Instagram)

Back at the Case Vecchie, the location for the Anna Tasca Lanza’s cooking school, we perused some of the wonderful products at the Natura in Tasca’s produce range. I chose to bake a cake from my latest cookbook, Torta della Nonna. It’s a typical cake from Tuscany, and while the pâtisseries would fill the cake with thick custard, then at homes the grandmothers (nonna stands for grandmother in Italian :)) would use ricotta cheese. I couldn’t resist the chance to bake this cake with sheep’s milk ricotta, as it’s supposed to be. Back at home in Estonia, I’ve made it with cow’s milk ricotta or goat’s milk ricotta. It’s still lovely, though much milder in flavour. 


The Tuscan ricotta cake I baked at the Case Vecchie (Instagram)

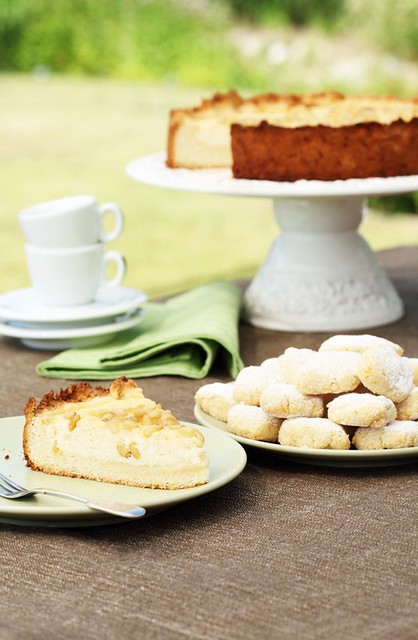
Torta della Nonna or Tuscan ricotta cake
(Toscana ricotta-kook)

Serves eight to ten

Pastry:
100 g butter, at room temperature
85 g caster sugar (100 ml/7 Tbsp)
1 large egg
180 g all-purpose flour (300 ml/1 cup + 3 heapedTbsp)
0,5 tsp baking powder
a pinch of salt

Filling:
500 g fresh ricotta 
85 g caster sugar (100 ml/7 Tbsp)
1 lemon, juiced and zested
2 Tbsp all-purpose flour
3 large eggs
75 g pinenuts or almonds

Butter a 24 or 26 cm (9 or 10 inch) springform pan and/or line with a parchment paper. Preheat the oven to 180 C/375 F. 

First, prepare the pastry. Put the butter and sugar into a mixing bowl and cream with a wooden spoon or a mixer fitted with the blade. Add the egg, then the dry ingredients (mix these first). Spoon the dough into the springform pan and using your hands, spread the dough at the bottom and halfway up the sides - the dough is pretty soft and sticky, so you’re almost pasting it to the bottom and sides. (You may be tempted to add more flour - go ahead, if you wish, but the cake base will be somewhat denser and harder then). 

Place the springform pan into the fridge to wait, while you make the filling

(You may use the same bowl you made the dough in). Mix the ricotta, sugar, the juice and finely grated rind of the lemon, flour and eggs in a bowl until combined. Stir in about two-thirds of the pine nuts or almonds. 

Take the cake pan out of the fridge, pour in the ricotta filling. Sprinkle the remaining pine nuts or almonds on top.

Carefully transfer the pan to the pre-heated oven and bake in the middle of the oven for about 45 minutes, until the cake is lovely golden brown on top. 

Take out of the oven, and let it cool till room temperature before cutting into slices and serving. 


Torta della Nonna and ricciarelli cookies. Photo by Juta Kübarsepp for Nami-Nami. 

Friday, June 13, 2014

Recipe for ricciarelli, delicious gluten-free almond cookies from Siena, Tuscany

TOSKAANA: torta della nonna & ricciarelli
This photo was taken by Juta Kübarsepp for Nami-Nami, the rest are by me or my husband.  

I’m writing this post in Sicily. I’m in a lovely company of David, Rachel and Johanna, enjoying the delicious hospitality of Anna Tasca Lanza Cookery School. La dolce vita, but more about all that in future posts. I do mention that some very nice cookies were baked here yesterday, which reminded me of a lovely Italian cookie recipe I’ve got in my latest cookbook. 

San Gimignano: Agriturismo Montegonfoli

Just over a year ago, in April 2013, I had a lovely holiday in Tuscany with my dear partner and our three small kids - the youngest was just under 6 months back then. We began our family holiday in Florence, then staying in various agriturismos near San Gimignano. On my birthday we took a day trip to Siena. Everybody said that we’d love Siena, but the truth is, we were not so impressed at all - San Gimignano, Volterra, Lucca, Certaldo and the old parts of Colle di Val d'Elsa had been more charming, more real. However, we did love the ricciarelli, the famous almond cookies from Siena. They are light and soft, yet chewy, just a wee bit resistant. If you love marzipan, then you’ll love these!

Certaldo: Osteria del Vicario

Ricciarelli are wonderful with a cup of strong coffee or tea, if you’re not a coffee drinker. In Toscana, they’re a festive food, baked and eaten especially during Christmas, and dipped into a glass of Vin Santo. 

They’re gluten-free. 

Ricciarelli cookies
(Siena mandliküpsised)

300 g ground almonds/almond meal
280 g caster sugar
100 g icing sugar/confectioner’s sugar 
1 tsp baking powder
a pinch of salt
1 orange, finely zested
2 egg whites 
2 tsp almond extract (optional)

For dusting:
icing sugar/confectioner’s sugar

Mix ground almonds, caster sugar, icing sugar, baking powder, salt and the finely grated orange zest in a bowl. 

In another bowl, whisk the egg whites until soft peaks form. Add the almond mixture, folding gently to combine. You’ll have a rather sticky mixture. (Add the almond extract now, if using). 

Using a teaspoon, take about 20 to 30 grams (about an ounce or so) of the mixture and form into oval/oblong patties, flattening them lightly between your palms. Place onto a cookie sheet, covered with parchment/baking paper, leaving some space between the cookies. They won’t spread a lot, but it’s better to be safe. 

Once you’ve formed all the cookies and arranged them onto the cookie sheet, dust them generously with icing sugar. Leave to dry them out at the room temperature for 1-3 hours - the bigger the cookies, the more time they need to dry. 

Bake in a pre-heated 150C oven for 20-25 minutes, until the cookies are just a little bit golden and hardened at the edges - you don’t want them golden brown, or they’ll be too crispy when they cool. You want your ricciarelli to remain soft and chewy inside!

Cool completely. These will keep for a week in an airtight container.  

ricciarelli2012


More ricciarelli recipes:
Divina Cucina
Jul's Kitchen
Lemons and Anchovies
Cook's Hideout
The Curious Baker

Saturday, June 07, 2014

Equal rhubarb cake


I've got a new favourite to-go rhubarb cake recipe. Just because it's one that can be memorized in seconds. Actually you just need kitchen scales and the list of ingredients. No amounts, imagine :)

Here's how it works. I call it equal rhubarb cake, because you need equal weighed amounts of all the main ingredients. I usually take four eggs, chicken or duck, to make this cake. 

Rhubarb sheet cake

eggs
butter, at room temperature*
caster sugar 
all-purpose flour
rhubarb, thinly sliced 

Topping:
demerara sugar and cardamom

Line a baking sheet with a parchment paper/baking paper (if the eggs are large, you can use a large baking sheet, say 35x40 cm, if the eggs are smaller, I tend to use 25x35 cm).  Put aside. 

Put a bowl onto your kitchen scales, switch the scales on and break eggs into the bowl. Weigh the eggs - and remember the number. Put the eggs aside, take another bowl. 

Now, remember the weight of eggs? Add the same amount of butter into the mixing bowl, then the same amount of sugar. Mix the butter and sugar until pale and creamy.

Now add the eggs, one at a time, and mixing thoroughly after each egg. Fold in the same amount of flour. 

(So if your eggs weighted, say, 250 grams, you'll also need 250 g butter, 250 g sugar, 250 g flour and about 250 g rhubarb). 

Now spread the dough mixture onto the baking sheet. Spread the rhubarb evenly across the cake, then sprinkle with demerara sugar and ground cardamom. 


Now bake at 200 C/400 F for about 20 minutes, until cooked and nicely golden. Let cool a little, then cut into squares, dust with icing sugar and serve. 


Keeps well for a day or two, covered.

Sunday, May 25, 2014

Creamy avocado pasta a la Safkaa

Avocado pasta / Avokaadopasta a la Safkaa

About two years ago all the Finnish food blogs and magazines were raving about avocado pasta. Hanna Gullichsen, a Finnish food writer, had published the recipe in her cookbook Safkaa. Parempaa arkiruokaa (Otava, August 2012)  and the recipe quickly became a No 1 hit, so to say, and well deservedly, as it is a lovely dish indeed.

Avocado pasta is nothing new, of course, but Safkaa blog (and book) brought it to the attention to the masses up here North, and we're thankful :)

We don't always get the best avocados here in Estonia, but if we do, I often make this dish for my family. It's easy, there's hardly any washing up (one pot to cook the pasta in, one large bowl to prepare the avocado mixture), and it's quite versatile. Though I like the original version with pecorino and parmesan (photo above), I quite often use a soft goat cheese or even salty feta cheese instead, resulting in a much creamier avocado pasta (photos below). While the Safkaa recipe uses basil and parsley, I often substitute coriander/cilantro, giving it a flavour palate of a nice guacamole. If you love pasta - and love guacamole and/or avocados in general - then do try this version.

You'll find the Safkaa's original recipe in Finnish here. I've included links to similar recipes at the end of the post.

Avocado Pasta Recipe
(Safkaa avokaadopasta)
Serves 4

400 g tagliatelle, linguini or spaghetti
1 fat garlic clove
half a red chilli or a generous pinch of chilli/red pepper flakes
1 lime
2 ripe avocados
extra-virgin olive oil
a small bunch of fresh basil
a small bunch of fresh coriander/cilantro or parsley
30 g Pecorino cheese, finely grated (about 7 Tbsp)
30 g Parmesan cheese, finely grated (about 7 Tbsp)
salt and freshly ground black pepper

First boil the pasta. Bring a large pot of water to boil. Add salt (about a tablespoonful of salt to a large pot of rapidly boiling water). Add the pasta to the boiling water and cook until al dente (check the packet for the recommended cooking time). Do not cover the pot and always cook pasta on a rolling boil!

Avokaadopasta. Avocado pasta.

Meanwhile, make the avocado sauce (above). Peel and finely chop the garlic cloves, add to the serving bowl. De-seed the chilli, finely chop, add to the bowl.

Finely chop the avocado, add to the bowl. Drizzle with lime juice, season generously with salt and pepper. Add the olive oil, chopped herbs and most of the shredded cheese.

When the pasta is ready, reserve about 100 ml (just under 1/2 a cup) of the cooking water. Drain the pasta and add immediately to the avocado sauce. Now stir in some of the reserved starch-enriched cooking water, to help thicken and distribute the sauce more evenly.

Add the rest of the grated cheese and serve immediately. Enjoy al fresco, if possible :)

Avocado pasta. Avokaadopasta.


Similar recipes elsewhere:
Creamy avocado pasta @ Two Peas and Their Pod
Avocado and Goat Cheese Alfredo Pasta @ Closet Cooking
Creamy Avocado and Gouda Cheese Pasta @ Half-Baked Harvest
Avocado Pesto Pasta @ Gimme Some Oven
Avocado Pesto Pasta @ A Cosy Kitchen
Avocado Pasta @ Dessert for Two
Avokaadopasta @ Da Vahtra Residence (in Estonian)
Safkaa avokaadopasta @ Maitse asi (in Estonian)
Avokaadopasta @ Toidutegu (in Estonian)
Avokadopasta @ Pastanjauhantaa (in Finnish)
Avokadopasta @ Food and Then Some (in Finnish/English)

Tuesday, May 20, 2014

Asparagus and cheese tart recipe

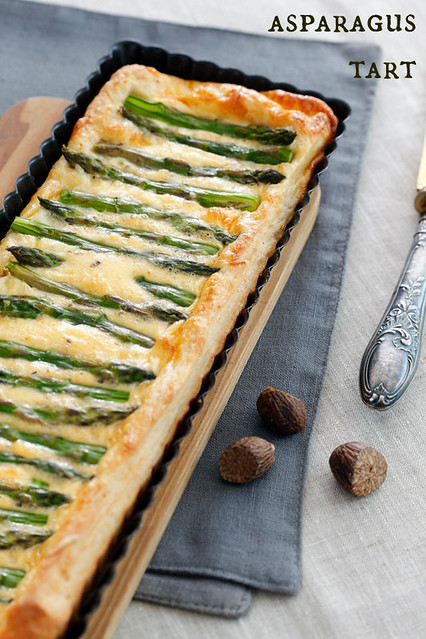
Asparagus tart. Asparagus quiche.
Originally posted in May 2011, but I'm bumping this up again, as the local asparagus season has began. The photo above was taken by Juta Kübarsepp to illustrate my column in the May 2014 issue of Kodu ja Aed magazine here in Estonia.. 

Isn't it pretty? This lovely topless tart can be served either warm (perhaps with a green side salad) or cold (cut into thin slices to accompany drinks). It's a simple tart - a puff pastry base (I made a quick rough puff pastry myself) is covered with a layer of grated cheese, followed by an egg and cream mixture, and finally topped with lightly cooked asparagus spears. You could certainly mix the cheese in to the egg and cream mixture, but I loved the visual effect of using a separate cheese layer.

Asparagus and cheese tart
(Spargli-juustupirukas)
Serves 8 to 10

Asparagus tart / Sparglipirukas

500 g puff pastry (store-bought or home-made rough puff pastry)

24 medium-sized fresh green asparagus spears
150 g Gouda or Gruyère cheese, coarsely grated
3 large eggs
200 ml fresh cream (whipping, heavy or double)
sea salt and freshly ground black pepper
freshly grated nutmeg

Snap off the hard and woody lower end of the asparagus spears (these can be used to make stock, for instance). Cook the asparagus spears in a simmering and lightly salted water for about 2 minutes. Drain, rinse quickly under cold water and drain again. Put aside.
Line a rectangular pie dish (approximately 25x35 cm) with a parchment paper. Roll out a puff pastry so it'd cover the base and come up the sides a little. Prick with a fork here and there.
Scatter the grated cheese over the base.
Whisk the eggs with cream, season with salt, pepper and grated nutmeg. Pour carefully over the cheese.
Place asparagus spears on top.
Bake in a preheated 200 C oven for about 30 minutes, until the tart is nicely golden on top and the puff pastry is cooked.